Install Guide
Mac OS X and Linux
CVXPY supports both Python 2 and Python 3 on OS X and Linux.
Install Anaconda.
Install
cvxpywithconda.conda install -c cvxgrp cvxpy
Test the installation with
nose.
conda install nose
nosetests cvxpy
Windows
There are two ways to install CVXPY on Windows. One method uses Python(x,y), while the other uses Anaconda. Installation with Python(x,y) is less likely to have problems. Both installation methods use Python 2.
Windows with Python(x,y)
1. If you have Python installed already, it’s probably a good idea to remove it first. If you uninstall Anaconda, you may need to take extra steps to remove all traces of the Anaconda install.
- Download the latest version of Python(x,y).
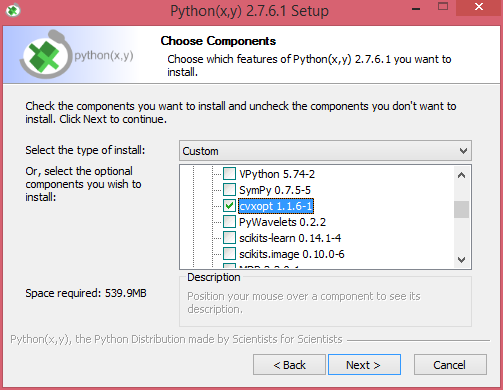
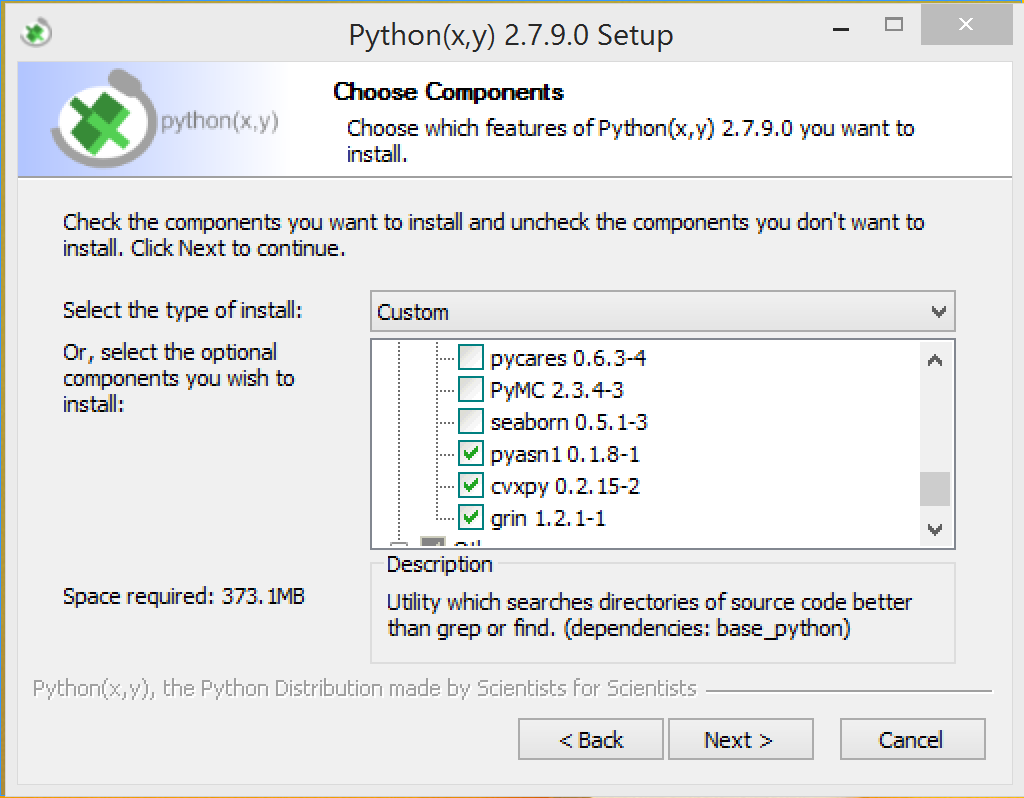
- Install Python(x,y). When prompted to select optional components, make sure to check CVXOPT and CVXPY, as shown below.
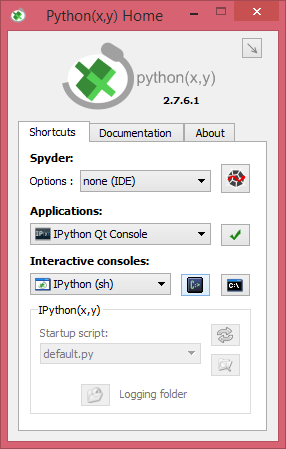
4. To test the CVXPY installation, open Python(x,y) and launch the interactive console (highlighted button in the picture). This will bring up a console.
5. From the console, run nosetests cvxpy.
If all but one of the tests pass, your installation was successful.
Windows with Anaconda
- Download and install the latest version of Anaconda. You must use the Python 2 version.
- Download the Visual Studio C++ compiler for Python.
- Install SCS from the Anaconda prompt by running the following command:
conda install -c https://conda.anaconda.org/omnia scs
- Install CVXPY from the Anaconda prompt by running the following command:
pip install cvxpy
5. From the console, run nosetests cvxpy.
If all the tests pass, your installation was successful.
Other Platforms
The CVXPY installation process on other platforms is less automated and less well tested. Check this page for instructions for your platform.
Install from source
CVXPY has the following dependencies:
- Python 2.7 or Python 3.4
- setuptools >= 1.4
- toolz
- six
- fastcache
- multiprocess
- ECOS >= 2
- SCS >= 1.1.3
- NumPy >= 1.8
- SciPy >= 0.15
- CVXcanon >= 0.0.22
To test the CVXPY installation, you additionally need Nose.
CVXPY automatically installs ECOS, SCS, toolz, six, fastcache, and multiprocess. NumPy and SciPy will need to be installed manually. You may also wish to install Swig to build CVXcanon from source. Once you’ve installed NumPy and SciPy, installing CVXPY from source is simple:
Clone the CVXPY git repository.
Navigate to the top-level of the cloned directory and run
python setup.py install
Install with CVXOPT support
CVXPY supports the CVXOPT solver.
Simply install CVXOPT by running pip install cvxopt.
If you use Anaconda you will need to run conda install nomkl first.
Install with Elemental support
CVXPY supports the Elemental solver.
Simply install Elemental such that you can import El in Python.
See the Elemental website for installation instructions.
Install with GUROBI support
CVXPY supports the GUROBI solver.
Simply install GUROBI such that you can import gurobipy in Python.
See the GUROBI website for installation instructions.
Install with MOSEK support
CVXPY supports the MOSEK solver.
Simply install MOSEK such that you can import mosek in Python.
See the MOSEK website for installation instructions.
Install with GLPK support
CVXPY supports the GLPK solver, but only if CVXOPT is installed with GLPK bindings. To install CVXPY and its dependencies with GLPK support, follow these instructions:
Install GLPK. We recommend either installing the latest GLPK from source or using a package manager such as apt-get on Ubuntu and homebrew on OS X.
Install CVXOPT with GLPK bindings.
CVXOPT_BUILD_GLPK=1
CVXOPT_GLPK_LIB_DIR=/path/to/glpk-X.X/lib
CVXOPT_GLPK_INC_DIR=/path/to/glpk-X.X/include
pip install cvxopt
Follow the standard installation procedure to install CVXPY and its remaining dependencies.
Install with Cbc (Clp, Cgl) support
CVXPY supports the Cbc solver (which includes Clp and Cgl) with the help of cylp. Simply install cylp (you will need the Cbc sources which includes Cgl) such you can import this library in Python. See the cylp documentation for installation instructions.

