User Input
User actions such as clicking a link, pushing a button, and entering text raise DOM events. This page explains how to bind those events to component event handlers using the Angular event binding syntax.
Run the
Binding to user input events
You can use Angular event bindings to respond to any DOM event. Many DOM events are triggered by user input. Binding to these events provides a way to get input from the user.
To bind to a DOM event, surround the DOM event name in parentheses and assign a quoted template statement to it.
The following example shows an event binding that implements a click handler:
<button (click)="onClickMe()">Click me!</button>
The (click) to the left of the equals sign identifies the button's click event as the target of the binding.
The text in quotes to the right of the equals sign
is the template statement, which responds
to the click event by calling the component's onClickMe method.
When writing a binding, be aware of a template statement's execution context. The identifiers in a template statement belong to a specific context object, usually the Angular component controlling the template. The example above shows a single line of HTML, but that HTML belongs to a larger component:
@Component({
selector: 'app-click-me',
template: `
<button (click)="onClickMe()">Click me!</button>
{{clickMessage}}`
})
export class ClickMeComponent {
clickMessage = '';
onClickMe() {
this.clickMessage = 'You are my hero!';
}
}
When the user clicks the button, Angular calls the onClickMe method from ClickMeComponent.
Get user input from the $event object
DOM events carry a payload of information that may be useful to the component.
This section shows how to bind to the keyup event of an input box to get the user's input after each keystroke.
The following code listens to the keyup event and passes the entire event payload ($event) to the component event handler.
template: `
<input (keyup)="onKey($event)">
<p>{{values}}</p>
`
When a user presses and releases a key, the keyup event occurs, and Angular provides a corresponding
DOM event object in the $event variable which this code passes as a parameter to the component's onKey() method.
export class KeyUpComponent_v1 {
values = '';
onKey(event: any) { // without type info
this.values += event.target.value + ' | ';
}
}
The properties of an $event object vary depending on the type of DOM event. For example,
a mouse event includes different information than an input box editing event.
All standard DOM event objects
have a target property, a reference to the element that raised the event.
In this case, target refers to the <input> element and
event.target.value returns the current contents of that element.
After each call, the onKey() method appends the contents of the input box value to the list
in the component's values property, followed by a separator character (|).
The interpolation
displays the accumulating input box changes from the values property.
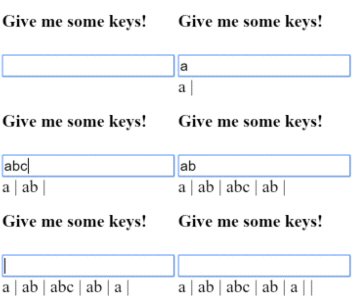
Suppose the user enters the letters "abc", and then backspaces to remove them one by one. Here's what the UI displays:
a | ab | abc | ab | a | |

Alternatively, you could accumulate the individual keys themselves by substituting event.key
for event.target.value in which case the same user input would produce:
a | b | c | backspace | backspace | backspace |
Type the $event
The example above casts the $event as an any type.
That simplifies the code at a cost.
There is no type information
that could reveal properties of the event object and prevent silly mistakes.
The following example rewrites the method with types:
export class KeyUpComponent_v1 {
values = '';
onKey(event: KeyboardEvent) { // with type info
this.values += (<HTMLInputElement>event.target).value + ' | ';
}
}
The $event is now a specific KeyboardEvent.
Not all elements have a value property so it casts target to an input element.
The OnKey method more clearly expresses what it expects from the template and how it interprets the event.
Passing $event is a dubious practice
Typing the event object reveals a significant objection to passing the entire DOM event into the method: the component has too much awareness of the template details. It can't extract information without knowing more than it should about the HTML implementation. That breaks the separation of concerns between the template (what the user sees) and the component (how the application processes user data).
The next section shows how to use template reference variables to address this problem.
Get user input from a template reference variable
There's another way to get the user data: use Angular template reference variables. These variables provide direct access to an element from within the template. To declare a template reference variable, precede an identifier with a hash (or pound) character (#).
The following example uses a template reference variable to implement a keystroke loopback in a simple template.
@Component({
selector: 'app-loop-back',
template: `
<input #box (keyup)="0">
<p>{{box.value}}</p>
`
})
export class LoopbackComponent { }
The template reference variable named box, declared on the <input> element,
refers to the <input> element itself.
The code uses the box variable to get the input element's value and display it
with interpolation between <p> tags.
The template is completely self contained. It doesn't bind to the component, and the component does nothing.
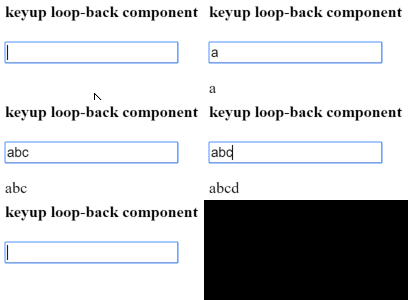
Type something in the input box, and watch the display update with each keystroke.

This won't work at all unless you bind to an event.
Angular updates the bindings (and therefore the screen)
only if the app does something in response to asynchronous events, such as keystrokes.
This example code binds the keyup event
to the number 0, the shortest template statement possible.
While the statement does nothing useful,
it satisfies Angular's requirement so that Angular will update the screen.
It's easier to get to the input box with the template reference
variable than to go through the $event object. Here's a rewrite of the previous
keyup example that uses a template reference variable to get the user's input.
@Component({
selector: 'app-key-up2',
template: `
<input #box (keyup)="onKey(box.value)">
<p>{{values}}</p>
`
})
export class KeyUpComponent_v2 {
values = '';
onKey(value: string) {
this.values += value + ' | ';
}
}
A nice aspect of this approach is that the component gets clean data values from the view.
It no longer requires knowledge of the $event and its structure.
Key event filtering (with key.enter)
The (keyup) event handler hears every keystroke.
Sometimes only the Enter key matters, because it signals that the user has finished typing.
One way to reduce the noise would be to examine every $event.keyCode and take action only when the key is Enter.
There's an easier way: bind to Angular's keyup.enter pseudo-event.
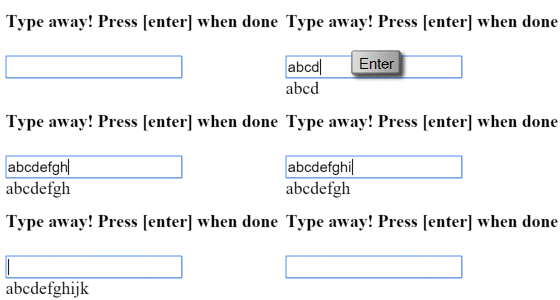
Then Angular calls the event handler only when the user presses Enter.
@Component({
selector: 'app-key-up3',
template: `
<input #box (keyup.enter)="onEnter(box.value)">
<p>{{value}}</p>
`
})
export class KeyUpComponent_v3 {
value = '';
onEnter(value: string) { this.value = value; }
}
Here's how it works.

On blur
In the previous example, the current state of the input box
is lost if the user mouses away and clicks elsewhere on the page
without first pressing Enter.
The component's value property is updated only when the user presses Enter.
To fix this issue, listen to both the Enter key and the blur event.
@Component({
selector: 'app-key-up4',
template: `
<input #box
(keyup.enter)="update(box.value)"
(blur)="update(box.value)">
<p>{{value}}</p>
`
})
export class KeyUpComponent_v4 {
value = '';
update(value: string) { this.value = value; }
}
Put it all together
The previous page showed how to display data. This page demonstrated event binding techniques.
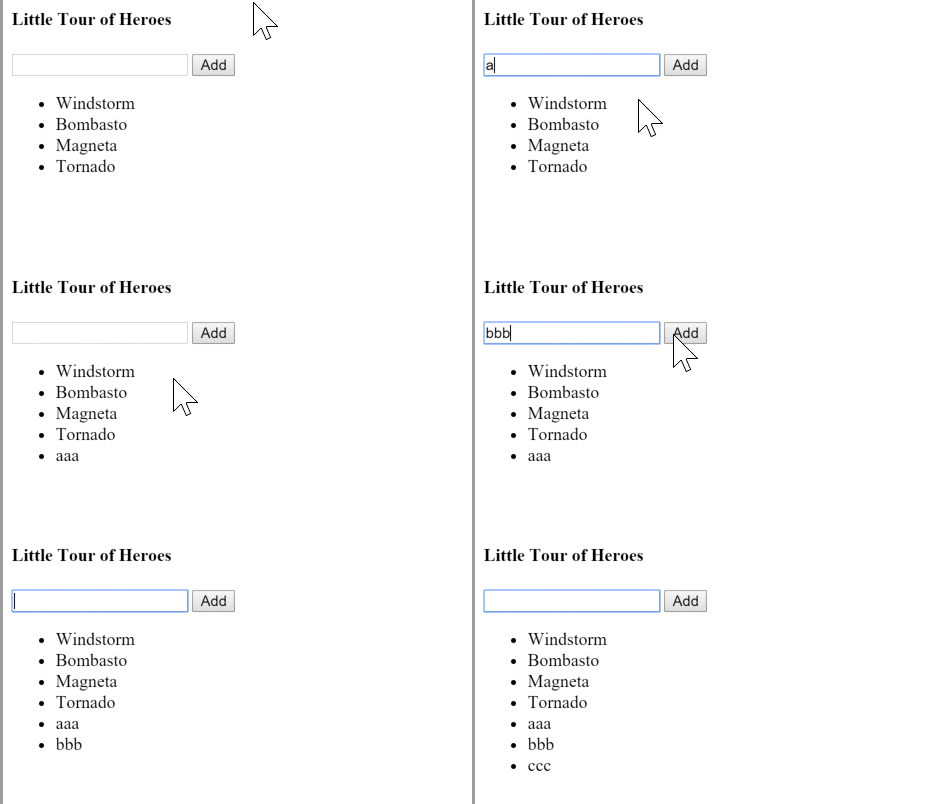
Now, put it all together in a micro-app that can display a list of heroes and add new heroes to the list. The user can add a hero by typing the hero's name in the input box and clicking Add.

Below is the "Little Tour of Heroes" component.
@Component({
selector: 'app-little-tour',
template: `
<input #newHero
(keyup.enter)="addHero(newHero.value)"
(blur)="addHero(newHero.value); newHero.value='' ">
<button (click)="addHero(newHero.value)">Add</button>
<ul><li *ngFor="let hero of heroes">{{hero}}</li></ul>
`
})
export class LittleTourComponent {
heroes = ['Windstorm', 'Bombasto', 'Magneta', 'Tornado'];
addHero(newHero: string) {
if (newHero) {
this.heroes.push(newHero);
}
}
}
Observations
-
Use template variables to refer to elements — The
newHerotemplate variable refers to the<input>element. You can referencenewHerofrom any sibling or child of the<input>element. -
Pass values, not elements — Instead of passing the
newHerointo the component'saddHeromethod, get the input box value and pass that toaddHero. -
Keep template statements simple — The
(blur)event is bound to two JavaScript statements. The first statement callsaddHero. The second statement,newHero.value='', clears the input box after a new hero is added to the list.
Source code
Following is all the code discussed in this page.
Summary
You have mastered the basic primitives for responding to user input and gestures.
These techniques are useful for small-scale demonstrations, but they
quickly become verbose and clumsy when handling large amounts of user input.
Two-way data binding is a more elegant and compact way to move
values between data entry fields and model properties.
The next page, Forms, explains how to write
two-way bindings with NgModel.