Component Router
This guide describes the new Component Router for AngularJS 1.5.
ngRoute module.
If you are looking for information about the Component Router for Angular 2 then
check out the Angular 2 Router Guide.
Overview
Here is a table of the main concepts used in the Component Router.
| Concept | Description |
|---|---|
| Router | Displays the Routing Components for the active Route. Manages navigation from one component to the next. |
| RootRouter | The top level Router that interacts with the current URL location |
| RouteConfig | Configures a Router with RouteDefinitions, each mapping a URL path to a component. |
| Routing Component | An Angular component with a RouteConfig and an associated Router. |
| RouteDefinition | Defines how the router should navigate to a component based on a URL pattern. |
| ngOutlet | The directive (<ng-outlet>) that marks where the router should display a view. |
| ngLink | The directive (ng-link="...") for binding a clickable HTML element to a route, via a Link Paramaters Array. |
| Link Parameters Array | An array that the router inteprets into a routing instruction. We can bind a RouterLink to that array or pass the array as an argument to the Router.navigate method. |
Component-based Applications
It is recommended to develop AngularJS applications as a hierarchy of Components. Each Component is an isolated part of the application, which is responsible for its own user interface and has a well defined programmatic interface to the Component that contains it. Take a look at the component guide for more information.

URLs and Navigation
In most applications, users navigate from one view to the next as they perform application tasks. The browser provides a familiar model of application navigation. We enter a URL in the address bar or click on a link and the browser navigates to a new page. We click the browser's back and forward buttons and the browser navigates backward and forward through the history of pages we've seen.
We understand that each view corresponds to a particular URL. In a Component-based application, each of these views is implemented by one or more Components.
Component Routes
How do we choose which Components to display given a particular URL?
When using the Component Router, each Component in the application can have a Router associated with it. This Router contains a mapping of URL segments to child Components.
$routeConfig: [
  { path: '/a/b/c', component: 'someComponent' }, ...
]
This means that for a given URL the Router will render an associated child Component.
Outlets
How do we know where to render a child Component?
Each Routing Component, needs to have a template that contains one or more Outlets, which is
where its child Components are rendered. We specify the Outlet in the template using the
<ng-outlet> directive.
<ng-outlet></ng-outlet>In the future ng-outlet will be able to render different child Components for a given Route
by specifying a name attribute.
Root Router and Component
How does the Component Router know which Component to render first?
All Component Router applications must contain a top level Routing Component, which is associated with a top level Root Router.
The Root Router is the starting point for all navigation. You can access this Router by injecting the
$rootRouter service.
We define the top level Root Component by providing a value for the $routerRootComponent service.
myModule.value('$routerRootComponent', 'myApp');Here we have specified that the Root Component is the component directive with the name myApp.
Remember to instantiate this Root Component in our index.html file.
<my-app></my-app>Route Matching
When we navigate to any given URL, the $rootRouter matches its Route Config against the URL.
If a Route Definition in the Route Config recognizes a part of the URL then the Component
associated with the Route Definition is instantiated and rendered in the Outlet.
If the new Component contains routes of its own then a new Router (ChildRouter) is created for
this Routing Component.
The ChildRouter for the new Routing Component then attempts to match its Route Config against
the parts of the URL that have not already been matched by the previous Router.
This process continues until we run out of Routing Components or consume the entire URL.

In the previous diagram, we can see that the URL /heros/4 has been matched against the App, Heroes and
HeroDetail Routing Components. The Routers for each of the Routing Components consumed a part
of the URL: "/", "/heroes" and "/4" respectively.
The result is that we end up with a hierarchy of Routing Components rendered in Outlets, via the
ngOutlet directive, in each Routing Component's template, as you can see in the following diagram.

Example Heroes App
You can see the complete application running below.
<h1 class="title">Component Router</h1>
<app></app>

<!-- Load up the router library - normally you might use npm and host it locally -->
<script src="https://npmcdn.com/@angular/router@0.2.0/angular1/angular_1_router.js"></script>Getting Started
In the following sections we will step through building this application. The finished application has views to display list and detail views of Heroes and Crises.
Install the libraries
It is easier to use npm to install the Component Router module. For this guide we will also install AngularJS itself via npm:
npm init
npm install@1.5.x angular --save
npm install @angular/router --save
Load the scripts
Just like any Angular application, we load the JavaScript files into our index.html:
<script src="/node_modules/angular/angular.js"></script>
<script src="/node_modules/@angular/router/angular1/angular_1_router.js"></script>
<script src="/app/app.js"></script>
Create the app module
In the app.js file, create the main application module app which depends on the ngComponentRouter
module, which is provided by the Component Router script.
angular.module('app', ['ngComponentRouter'])We must choose what Location Mode the Router should use. We are going to use HTML5 mode locations,
so that we will not have hash-based paths. We must rely on the browser to provide pushState support,
which is true for most modern browsers. See $locationProvider for more information.
lite-server web server
to do this for us.
.config(function($locationProvider) {
  $locationProvider.html5Mode(true);
})
Configure the top level routed App Component.
.value('$routerRootComponent', 'app')Create a very simple App Component to test that the application is working.
We are using the Angular 1.5 .component() helper method to create
all the Components in our application. It is perfectly suited to this task.
.component('app', {
  template: 'It worked!'
});
Add a <base> element to the head of our index.html.
Remember that we have chosen to use HTML5 mode for the $location service. This means that our HTML
must have a base URL.
<head>
<base href="/">
...
Bootstrap AngularJS
Bootstrap the Angular application and add the top level App Component.
<body ng-app="app">
  <h1 class="title">Component Router</h1>
  <app></app>
</body>
Implementing the AppComponent
In the previous section we have created a single top level App Component. Let's now create some more Routing Components and wire up Route Config for those. We start with a Heroes Feature, which will display one of two views.
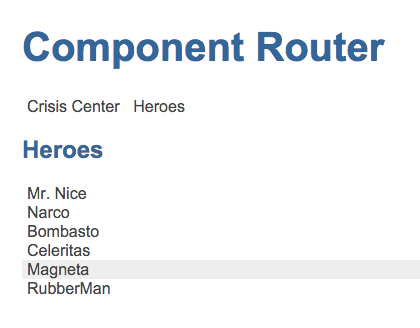
- A list of Heroes that are available:
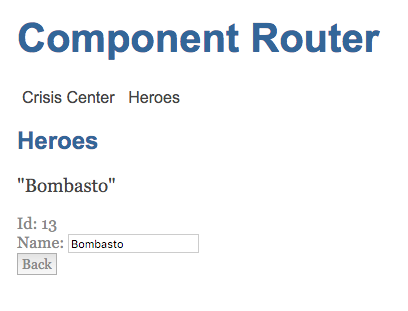
- A detailed view of a single Hero:
We are going to have a Heroes Component for the Heroes feature of our application, and then HeroList
and HeroDetail Components that will actually display the two different views.
App Component
Configure the App Component with a template and Route Config:
.component('app', {
  template:
    '<nav>\n' +
    '  <a>Crisis Center</a>\n' +
    '  <a ng-link="[\'Heroes\']">Heroes</a>\n' +
    '</nav>\n' +
    '<ng-outlet></ng-outlet>\n',
  $routeConfig: [
    {path: '/heroes/...', name: 'Heroes', component: 'heroes'},
  ]
});
The App Component has an <ng-outlet> directive in its template. This is where the child Components
of this view will be rendered.
ngLink
We have used the ng-link directive to create a link to navigate to the Heroes Component. By using this
directive we don't need to know what the actual URL will be. We can let the Router generate that for us.
We have included a link to the Crisis Center but have not included the ng-link directive as we have not yet
implemented the CrisisCenter component.
Non-terminal Routes
We need to tell the Router that the Heroes Route Definition is non-terminal, that it should
continue to match Routes in its child Components. We do this by adding a continuation ellipsis
(...) to the path of the Heroes Route, /heroes/....
Without the continuation ellipsis the HeroList Route will never be matched because the Router will
stop at the Heroes Routing Component and not try to match the rest of the URL.
Heroes Feature
Now we can implement our Heroes Feature which consists of three Components: Heroes, HeroList and
HeroDetail. The Heroes Routing Component simply provides a template containing the ngOutlet
directive and a Route Config that defines a set of child Routes which delegate through to the
HeroList and HeroDetail Components.
HeroesComponent
Create a new file heroes.js, which defines a new Angular module for the Components of this feature
and registers the Heroes Component.
angular.module('heroes', [])
.component('heroes', {
  template: '<h2>Heroes</h2><ng-outlet></ng-outlet>',
  $routeConfig: [
    {path: '/',    name: 'HeroList',   component: 'heroList', useAsDefault: true},
    {path: '/:id', name: 'HeroDetail', component: 'heroDetail'}
  ]
})
Remember to load this file in the index.html:
<script src="/app/heroes.js"></script>and also to add the module as a dependency of the app module:
angular.module('app', ['ngComponentRouter', 'heroes'])Use As Default
The useAsDefault property on the HeroList Route Definition, indicates that if no other Route
Definition matches the URL, then this Route Definition should be used by default.
Route Parameters
The HeroDetail Route has a named parameter (id), indicated by prefixing the URL segment with a colon,
as part of its path property. The Router will match anything in this segment and make that value
available to the HeroDetail Component.
Terminal Routes
Both the Routes in the HeroesComponent are terminal, i.e. their routes do not end with .... This is
because the HeroList and HeroDetail will not contain any child routes.
Route Names
What is the difference between the name and component properties on a Route Definition?
The component property in a Route Definition defines the Component directive that will be rendered
into the DOM via the Outlet. For example the heroDetail Component will be rendered into the page
where the <ng-outlet></ng-outlet> lives as `
The name property is used to reference the Route Definition when generating URLs or navigating to
Routes. For example this link will <a ng-link="['Heroes']">Heroes</a> navigate the Route Definition
that has the name property of "Heroes".
HeroList Component
The HeroList Component is the first component in the application that actually contains significant
functionality. It loads up a list of heroes from a heroService and displays them using ng-repeat.
Add it to the heroes.js file:
.component('heroList', {
  template:
    '<div ng-repeat="hero in $ctrl.heroes">\n' +
      '<a ng-link="[\'HeroDetail\', {id: hero.id}]">{{hero.name}}</a>\n' +
    '</div>',
  controller: HeroListComponent
})
The ng-link directive creates links to a more detailed view of each hero, via the expression
['HeroDetail', {id: hero.id}]. This expression is an array describing what Routes to use to generate
the link. The first item is the name of the HeroDetail Route Definition and the second is a parameter
object that will be available to the HeroDetail Component.
The HeroDetail section below explains how to get hold of the id parameter of the HeroDetail Route.
The template iterates through each hero object of the array in the $ctrl.heroes property.
Remember that the module.component() helper automatically provides the Component's Controller as
the $ctrl property on the scope of the template.
HeroService
Our HeroService simulates requesting a list of heroes from a server. In a real application this would be making an actual server request, perhaps over HTTP.
function HeroService($q) {
  var heroesPromise = $q.when([
    { id: 11, name: 'Mr. Nice' },
    ...
  ]);

  this.getHeroes = function() {
    return heroesPromise;
  };

  this.getHero = function(id) {
    return heroesPromise.then(function(heroes) {
      for(var i=0; i<heroes.length; i++) {
        if ( heroes[i].id == id) return heroes[i];
      }
    });
  };
}
Note that both the getHeroes() and getHero(id) methods return a promise for the data. This is because
in real-life we would have to wait for the server to respond with the data.
Router Lifecycle Hooks
How do I know when my Component is active?
To deal with initialization and tidy up of Components that are rendered by a Router, we can implement one or more Lifecycle Hooks on the Component. These will be called at well defined points in the lifecycle of the Component.
The Lifecycle Hooks that can be implemented as instance methods on the Component are as follows:
$routerCanReuse: called to to determine whether a Component can be reused across Route Definitions that match the same type of Component, or whether to destroy and instantiate a new Component every time.$routerOnActivate/$routeOnReuse: called by the Router at the end of a successful navigation. Only one of$routerOnActivateand$routerOnReusewill be called depending upon the result of a call to$routerCanReuse.$routerCanDeactivate: called by the Router to determine if a Component can be removed as part of a navigation.$routerOnDeactivate: called by the Router before destroying a Component as part of a navigation.
We can also provide an Injectable function ($routerCanActivate) on the Component Definition Object,
or as a static method on the Component, that will determine whether this Component is allowed to be
activated. If any of the $routerCan... methods return false or a promise that resolves to false, the
navigation will be cancelled.
For our HeroList Component we want to load up the list of heroes when the Component is activated.
So we implement the $routerOnActivate() instance method.
function HeroListComponent(heroService) {
  var $ctrl = this;
  this.$routerOnActivate = function() {
    return heroService.getHeroes().then(function(heroes) {
      $ctrl.heroes = heroes;
    });
  }
}
Running the application should update the browser's location to /heroes and display the list of heroes
returned from the heroService.
By returning a promise for the list of heroes from $routerOnActivate() we can delay the activation of the
Route until the heroes have arrived successfully. This is similar to how a resolve works in ngRoute.
Route Parameters
How do I access parameters for the current route?
The HeroDetailComponent displays details of an individual hero. The id of the hero to display is passed
as part of the URL, for example /heroes/12.
The Router parses the id from the URL when it recognizes the Route Definition and provides it to the
Component as part of the parameters of the $routerOnActivate() hook.
function HeroDetailComponent(heroService) {
var $ctrl = this;

this.$routerOnActivate = function(next, previous) {
  // Get the hero identified by the route parameter
  var id = next.params.id;
  return heroService.getHero(id).then(function(hero) {
    $ctrl.hero = hero;
  });
};
The $routerOnActivate(next, previous) hook receives two parameters, which hold the next and previous
Instruction objects for the Route that is being activated.
These parameters have a property called params which will hold the id parameter extracted from the URL
by the Router. In this code it is used to identify a specific Hero to retrieve from the heroService.
This hero is then attached to the Component so that it can be accessed in the template.
Access to the Current Router
How do I get hold of the current router for my component?
Each component has its own Router. Unlike in Angular 2, we cannot use the dependency injector to get hold of a component's Router.
We can only inject the $rootRouter. Instead we use the fact that the ng-outlet directive binds the current router to a $router
attribute on our component.
<ng-outlet><hero-detail $router="$$router"></hero-detail></ng-outlet>We can then specify a bindings property on our component definition to bind the current router to our component:
bindings: { $router: '<' }This sets up a one-way binding of the current Router to the $router property of our Component. The binding is available once
the component has been activated, and the $routerOnActivate hook is called.
As you might know from reading the component guide, the binding is actually available by the time the $onInit
hook is called, which is before the call to $routerOnActivate.
HeroDetailComponent
The HeroDetailComponent displays a form that allows the Hero to be modified.
.component('heroDetail', {
  template:
    '<div ng-if="$ctrl.hero">\n' +
    '  <h3>"{{$ctrl.hero.name}}"</h3>\n' +
    '  <div>\n' +
    '    <label>Id: </label>{{$ctrl.hero.id}}</div>\n' +
    '  <div>\n' +
    '    <label>Name: </label>\n' +
    '    <input ng-model="$ctrl.hero.name" placeholder="name"/>\n' +
    '  </div>\n' +
    '  <button ng-click="$ctrl.gotoHeroes()">Back</button>\n' +
    '</div>\n',
  bindings: { $router: '<' },
  controller: HeroDetailComponent
});
The template contains a button to navigate back to the HeroList. We could have styled an anchor to look like a button and used `ng-link="['HeroList']" but here we demonstrate programmatic navigation via the Router itself, which was made available by the binding in the Component Definition Object.
function HeroDetailComponent(heroService) {
...
this.gotoHeroes = function() {
  var heroId = this.hero && this.hero.id;
  this.$router.navigate(['HeroList']);
};
Here we are asking the Router to navigate to a route defined by ['HeroList'].
This is the same kind of array used by the ng-link directive.
Other options for generating this navigation are:
- manually create the URL and call
this.$router.navigateByUrl(url)- this is discouraged because it couples the code of your component to the router URLs. - generate an Instruction for a route and navigate directly with this instruction.
this form gives you the possibility of caching the instruction, but is more verbose.var instruction = this.$router.generate(['HeroList']); this.$router.navigateByInstruction(instruction);
Absolute vs Relative Navigation
Why not use $rootRouter to do the navigation?
Instead of binding to the current Router, we can inject the $rootRouter into our Component and
use that: $rootRouter.navigate(...).
The trouble with doing this is that navigation is always relative to the Router. So in order to navigate
to the HeroListComponent with the $rootRouter, we would have to provide a complete path of Routes:
['App','Heroes','HeroList'].
Extra Parameters
We can also pass additional optional parameters to routes, which get encoded into the URL and are again
available to the $routerOnActivate(next, previous) hook. If we pass the current id from the
HeroDetailComponent back to the HeroListComponent we can use it to highlight the previously selected hero.
this.gotoHeroes = function() {
  var heroId = this.hero && this.hero.id;
  this.$router.navigate(['HeroList', {id: heroId}]);
};
Then in the HeroList component we can extract this id in the $routerOnActivate() hook.
function HeroListComponent(heroService) {
  var selectedId = null;
  var $ctrl = this;

  this.$routerOnActivate = function(next) {
    heroService.getHeroes().then(function(heroes) {
      $ctrl.heroes = heroes;
      selectedId = next.params.id;
    });
  };

  this.isSelected = function(hero) {
    return (hero.id == selectedId);
  };
}
Finally, we can use this information to higlight the current hero in the template.
<div ng-repeat="hero in $ctrl.heroes"
ng-class="{ selected: $ctrl.isSelected(hero) }">
<a ng-link="['HeroDetail', {id: hero.id}]">{{hero.name}}</a>
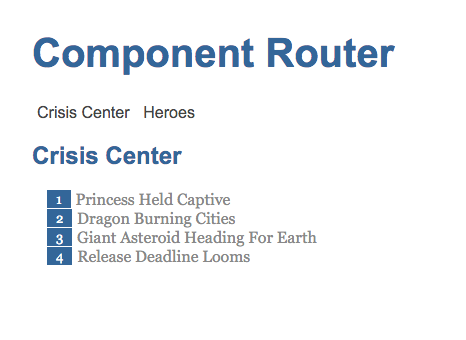
</div>Crisis Center
Let's implement the Crisis Center feature, which displays a list if crises that need to be dealt with by a hero. The detailed crisis view has an additional feature where it blocks you from navigating if you have not saved changes to the crisis being edited.
- A list of Crises that are happening:
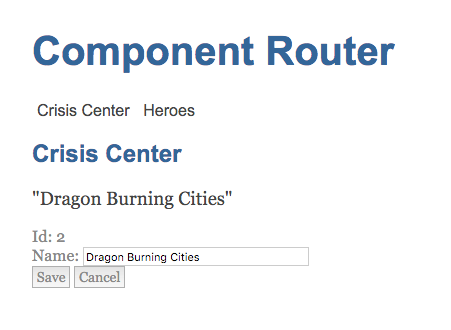
- A detailed view of a single Crisis:
Crisis Feature
This feature is very similar to the Heroes feature. It contains the following Components:
- CrisisService: contains method for getting a list of crises and an individual crisis.
- CrisisListComponent: displays the list of crises, similar to HeroListComponent.
- CrisisDetailComponent: displays a specific crisis
CrisisService and CrisisListComponent are basically the same as HeroService and HeroListComponent respectively.
Navigation Control Hooks
How do I prevent navigation from occurring?
Each Component can provide the $canActivate and $routerCanDeactivate Lifecycle Hooks. The
$routerCanDeactivate hook is an instance method on the Component. The $canActivate hook is used as a
static method defined on the Component Definition Object.
The Router will call these hooks to control navigation from one Route to another. Each of these hooks can
return a boolean or a Promise that will resolve to a boolean.
During a navigation, some Components will become inactive and some will become active. Before the navigation can complete, all the Components must agree that they can be deactivated or activated, respectively.
The Router will call the $routerCanDeactivate and $canActivate hooks, if they are provided. If any
of the hooks resolve to false then the navigation is cancelled.
Dialog Box Service
We can implement a very simple dialog box that will prompt the user whether they are happy to lose changes they
have made. The result of the prompt is a promise that can be used in a $routerCanDeactivate hook.
.service('dialogService', DialogService);

function DialogService($q) {
  this.confirm = function(message) {
    return $q.when(window.confirm(message || 'Is it OK?'));
  };
}
CrisisDetailComponent
We put the template into its own file by using a templateUrl property in the Component Definition
Object:
.component('crisisDetail', {
  templateUrl: 'app/crisisDetail.html',
  bindings: { $router: '<' },
  controller: CrisisDetailComponent
});
In the $routerOnActivate hook, we make a local copy of the crisis.name property to compare with the
original value so that we can determine whether the name has changed.
this.$routerOnActivate = function(next) {
  // Get the crisis identified by the route parameter
  var id = next.params.id;
  crisisService.getCrisis(id).then(function(crisis) {
    if (crisis) {
      ctrl.editName = crisis.name;  // Make a copy of the crisis name for editing
      ctrl.crisis = crisis;
    } else { // id not found
      ctrl.gotoCrises();
    }
  });
};
In the $routerCanDeactivate we check whether the name has been modified and ask whether the user
wishes to discard the changes.
this.$routerCanDeactivate = function() {
  // Allow synchronous navigation (`true`) if no crisis or the crisis is unchanged.
  if (!this.crisis || this.crisis.name === this.editName) {
    return true;
  }
  // Otherwise ask the user with the dialog service and return its
  // promise which resolves to true or false when the user decides
  return dialogService.confirm('Discard changes?');
};
You can test this check by navigating to a crisis detail page, modifying the name and then either pressing the browser's back button to navigate back to the previous page, or by clicking on one of the links to the Crisis Center or Heroes features.
The Save and Cancel buttons update the editName and/or crisis.name properties before navigating
to prevent the $routerCanDeactivate hook from displaying the dialog box.
Summary
This guide has given an overview of the features of the Component Router and how to implement a simple application.