Tutorial 7: Schemas & client libraries
A schema is a machine-readable document that describes the available API endpoints, their URLS, and what operations they support.
Schemas can be a useful tool for auto-generated documentation, and can also be used to drive dynamic client libraries that can interact with the API.
Core API
In order to provide schema support REST framework uses Core API.
Core API is a document specification for describing APIs. It is used to provide an internal representation format of the available endpoints and possible interactions that an API exposes. It can either be used server-side, or client-side.
When used server-side, Core API allows an API to support rendering to a wide range of schema or hypermedia formats.
When used client-side, Core API allows for dynamically driven client libraries that can interact with any API that exposes a supported schema or hypermedia format.
Adding a schema
REST framework supports either explicitly defined schema views, or automatically generated schemas. Since we're using viewsets and routers, we can simply use the automatic schema generation.
You'll need to install the coreapi python package in order to include an
API schema.
$ pip install coreapi
We can now include a schema for our API, by including an autogenerated schema view in our URL configuration.
from rest_framework.schemas import get_schema_view

schema_view = get_schema_view(title='Pastebin API')

urlpatterns = [
    path('schema/', schema_view),
    ...
]
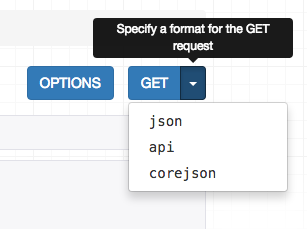
If you visit the /schema/ endpoint in a browser you should now see corejson
representation become available as an option.
We can also request the schema from the command line, by specifying the desired
content type in the Accept header.
$ http http://127.0.0.1:8000/schema/ Accept:application/coreapi+json
HTTP/1.0 200 OK
Allow: GET, HEAD, OPTIONS
Content-Type: application/coreapi+json

{
    "_meta": {
        "title": "Pastebin API"
    },
    "_type": "document",
    ...
The default output style is to use the Core JSON encoding.
Other schema formats, such as Open API (formerly Swagger) are also supported.
Using a command line client
Now that our API is exposing a schema endpoint, we can use a dynamic client library to interact with the API. To demonstrate this, let's use the Core API command line client.
The command line client is available as the coreapi-cli package:
$ pip install coreapi-cli
Now check that it is available on the command line...
$ coreapi
Usage: coreapi [OPTIONS] COMMAND [ARGS]...

  Command line client for interacting with CoreAPI services.

  Visit https://www.coreapi.org/ for more information.

Options:
  --version  Display the package version number.
  --help     Show this message and exit.

Commands:
...
First we'll load the API schema using the command line client.
$ coreapi get http://127.0.0.1:8000/schema/
<Pastebin API "http://127.0.0.1:8000/schema/">
    snippets: {
        highlight(id)
        list()
        read(id)
    }
    users: {
        list()
        read(id)
    }
We haven't authenticated yet, so right now we're only able to see the read only endpoints, in line with how we've set up the permissions on the API.
Let's try listing the existing snippets, using the command line client:
$ coreapi action snippets list
[
    {
        "url": "http://127.0.0.1:8000/snippets/1/",
        "id": 1,
        "highlight": "http://127.0.0.1:8000/snippets/1/highlight/",
        "owner": "lucy",
        "title": "Example",
        "code": "print('hello, world!')",
        "linenos": true,
        "language": "python",
        "style": "friendly"
    },
    ...
Some of the API endpoints require named parameters. For example, to get back the highlight HTML for a particular snippet we need to provide an id.
$ coreapi action snippets highlight --param id=1
<!DOCTYPE html PUBLIC "-//W3C//DTD HTML 4.01//EN" "http://www.w3.org/TR/html4/strict.dtd">

<html>
<head>
  <title>Example</title>
  ...
Authenticating our client
If we want to be able to create, edit and delete snippets, we'll need to authenticate as a valid user. In this case we'll just use basic auth.
Make sure to replace the <username> and <password> below with your
actual username and password.
$ coreapi credentials add 127.0.0.1 <username>:<password> --auth basic
Added credentials
127.0.0.1 "Basic <...>"
Now if we fetch the schema again, we should be able to see the full set of available interactions.
$ coreapi reload
Pastebin API "http://127.0.0.1:8000/schema/">
    snippets: {
        create(code, [title], [linenos], [language], [style])
        delete(id)
        highlight(id)
        list()
        partial_update(id, [title], [code], [linenos], [language], [style])
        read(id)
        update(id, code, [title], [linenos], [language], [style])
    }
    users: {
        list()
        read(id)
    }
We're now able to interact with these endpoints. For example, to create a new snippet:
$ coreapi action snippets create --param title="Example" --param code="print('hello, world')"
{
    "url": "http://127.0.0.1:8000/snippets/7/",
    "id": 7,
    "highlight": "http://127.0.0.1:8000/snippets/7/highlight/",
    "owner": "lucy",
    "title": "Example",
    "code": "print('hello, world')",
    "linenos": false,
    "language": "python",
    "style": "friendly"
}
And to delete a snippet:
$ coreapi action snippets delete --param id=7
As well as the command line client, developers can also interact with your API using client libraries. The Python client library is the first of these to be available, and a Javascript client library is planned to be released soon.
For more details on customizing schema generation and using Core API client libraries you'll need to refer to the full documentation.
Reviewing our work
With an incredibly small amount of code, we've now got a complete pastebin Web API, which is fully web browsable, includes a schema-driven client library, and comes complete with authentication, per-object permissions, and multiple renderer formats.
We've walked through each step of the design process, and seen how if we need to customize anything we can gradually work our way down to simply using regular Django views.
You can review the final tutorial code on GitHub, or try out a live example in the sandbox.
Onwards and upwards
We've reached the end of our tutorial. If you want to get more involved in the REST framework project, here are a few places you can start:
- Contribute on GitHub by reviewing and submitting issues, and making pull requests.
- Join the REST framework discussion group, and help build the community.
- Follow the author on Twitter and say hi.
Now go build awesome things.