Routes and Templates Edit Page
To demonstrate the basic setup and processing of an Ember application, this section will walk through building an Ember application for a property rental site called Super Rentals. It will start with a homepage, an about page and a contact page. Let's take a look at the application from the user perspective before we get started.

We arrive at the home page which shows a list of rentals. From here, we will be able to navigate to an about page and a contact page.
Let's make sure we have a fresh Ember CLI app called super-rentals by running:
1 |
ember new super-rentals |
Before we start building the three pages for our app,
we are going to clear out the contents of the app/templates/application.hbs file
and only leave the {{outlet}} code in place.
We'll talk more about the role of the application.hbs file after our site has a few routes.
Now, let's start by building our "about" page.
Remember, when the URL path /about is loaded,
the router will map the URL to the route handler of the same name, about.js.
The route handler then loads a template.
An About Route
If we run ember help generate, we can see a variety of tools that come with Ember for automatically generating files for various Ember resources.
Let's use the route generator to start our about route.
1 |
ember generate route about |
or for short,
1 |
ember g route about |
We can then see what actions were taken by the generator:
1 2 3 4 5 6 7 |
installing route create app/routes/about.js create app/templates/about.hbs updating router add route about installing route-test create tests/unit/routes/about-test.js |
Three new files are created: one for the route handler, one for the template the route handler will render, and a test file. The fourth file that is touched is the router.
When we open the router, we can see that the generator has mapped a new about route for us.
This route will load the about route handler.
| app/router.js | |
1 2 3 4 5 6 7 8 9 10 11 12 |
import Ember from 'ember'; import config from './config/environment'; const Router = Ember.Router.extend({ location: config.locationType }); Router.map(function() { this.route('about'); }); export default Router; |
By default, the about route handler loads the about.hbs template.
This means we don't actually have to change anything in the new app/routes/about.js file for the about.hbs template to render as we want.
With all of the routing in place from the generator, we can get right to work on coding our template.
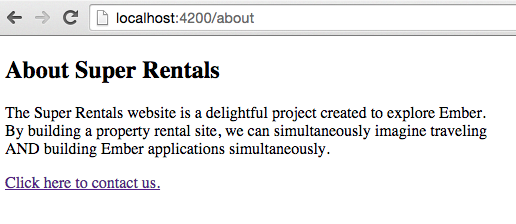
For our about page, we'll add some HTML that has a bit of information about the site:
Run ember serve (or ember s for short) from the shell to start the Ember development server,
and then go to localhost:4200/about to see our new app in action!
A Contact Route
Let's create another route with details for contacting the company. Once again, we'll start by generating a route, a route handler, and a template.
1 |
ember g route contact |
We see that our generator has created a contact route in the app/router.js file,
and a corresponding route handler in app/routes/contact.js.
Since we will be using the contact template, the contact route does not need any additional changes.
In contact.hbs, we can add the details for contacting our Super Rentals HQ:
Now we have completed our second route.
If we go to the URL localhost:4200/contact, we'll arrive on our contact page.
Navigating with Links and the {{link-to}} Helper
We really don't want users to have to know our URLs in order to move around our site, so let's add some navigational links at the bottom of each page. Let's make a contact link on the about page and an about link on the contact page.
Ember has built-in helpers that provide functionality such as linking to other routes.
Here we will use the {{link-to}} helper in our code to link between routes:
The {{link-to}} helper takes an argument with the name of the route to link to, in this case: contact.
When we look at our about page, we now have a working link to our contact page.
Now, we'll add a link to our contact page so we can navigate from back and forth between about and contact.
An Index Route
With our two static pages in place, we are ready to add our home page which welcomes users to the site.
Using the same process we did for our about and contact pages, we will first generate a new route called index.
1 |
ember g route index |
We can see the now familiar output for the route generator:
1 2 3 4 5 |
installing route create app/routes/index.js create app/templates/index.hbs installing route-test create tests/unit/routes/index-test.js |
Unlike the other route handlers we've made so far, the index route is special:
it does NOT require an entry in the router's mapping.
We'll learn more about why the entry isn't required when we look at nested routes in Ember.
Let's update our index.hbs with some HTML for our home page and our links to the other routes in our application: