Getting started with the Arduino Primo
This is a retired product.
The Arduino Primo combines the processing power from the Nordic nRF52 processor, an Espressif ESP8266 for WiFi, as well as several on-board sensors and a battery charger. The nRF52 includes NFC (Near Field Communication) and Bluetooth Smart. The sensors include an on-board button, LED and infrared receiver and transmitter.
The Arduino Primo is programmed using the Arduino Software (IDE), our Integrated Development Environment common to all our boards and running both online and offline. For more information on how to get started with the Arduino Software visit the Getting Started page.
On this page... (hide)
Use your Arduino Primo on the Arduino Web IDE

All Arduino boards, including this one, work out-of-the-box on the Arduino Web Editor, no need to install anything.
The Arduino Web Editor is hosted online, therefore it will always be up-to-date with the latest features and support for all boards. Follow this simple guide to start coding on the browser and upload your sketches onto your board.
Use your Arduino Primo on the Arduino Desktop IDE
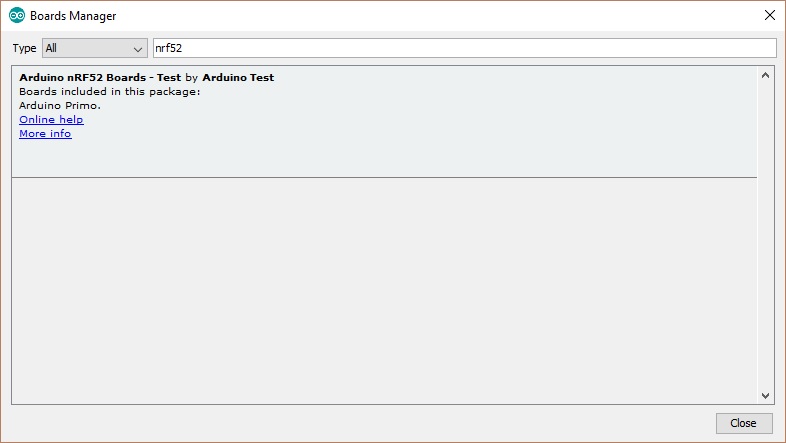
If you want to program your Arduino Primo while offline you need to install the Arduino Desktop IDE and add the Arduino NRF52 Core to it. This simple procedure is done selecting Tools menu, then Boards and last Boards Manager, as documented in the Arduino Boards Manager page.
Installing Drivers for the Primo
OSX and Windows (tested on XP, 7, Vista and 10)
No driver installation is necessary for these operating system after core installation.
Linux
Before you can use the board on Linux machines you needs to execute the following script.
Open your first sketch
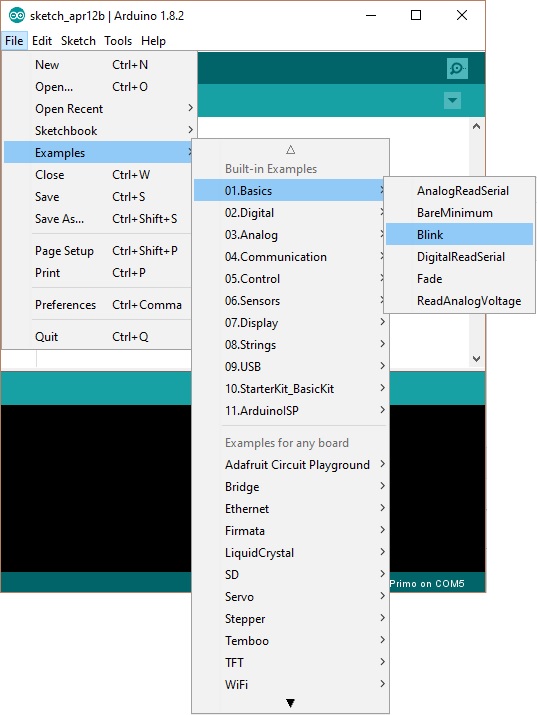
Open the LED blink example sketch: File > Examples >01.Basics > Blink.
Select your board type and port
You'll need to select the entry in the Tools > Board menu that corresponds to your Arduino board.

Select the serial device of the board from the Tools | Serial Port menu. This is likely to be COM3 or higher (COM1 and COM2 are usually reserved for hardware serial ports). To find out, you can disconnect your board and re-open the menu; the entry that disappears should be the Arduino board. Reconnect the board and select that serial port.

Upload the program
Now, simply click the "Upload" button in the environment.

Wait a few seconds - you should see the RX and TX LEDs on the board flashing. If the upload is successful, the message "Done uploading." will appear in the status bar.
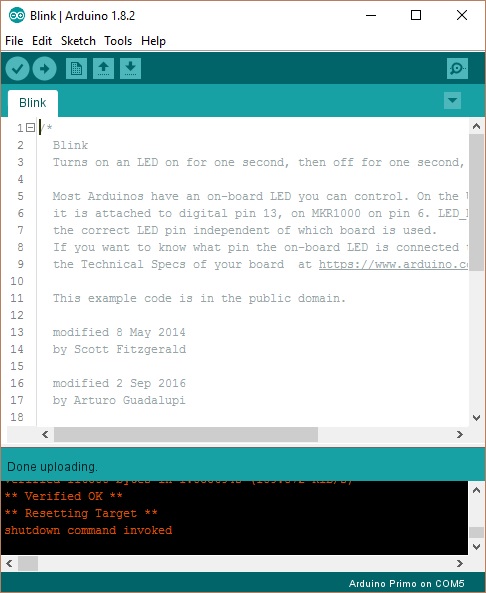
A few seconds after the upload finishes, you should see the on-board LED L9 start to blink. If it does, congratulations! You've gotten your Primo board up-and-running. If you have problems, please see the troubleshooting suggestions.
Tutorials
Now that you have set up and programmed your Primo board, you may find inspiration in our Project Hub tutorial platform, or have a look to the tutorial pages that explain how to use the various features of your board.
Please Read...
First configuration
Your Arduino Primo needs a first configuration to join your WiFi network and it allows you to enter the relevant information creating its own Access Point. Please execute the following procedure every time you bring Arduino Primo in a location where the WiFi network access needs to be reconfigured.
Power the board and wait some time.
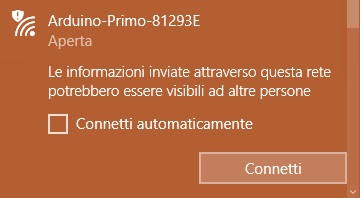
Search the board in the network list, it has an ESSID like this: Arduino-Primo-xxxxxx.

Connect your PC/MAC to the Arduino Primo AP:
Open a browser and connect at this address: http://192.168.240.1/

This is the screen that it will appear:
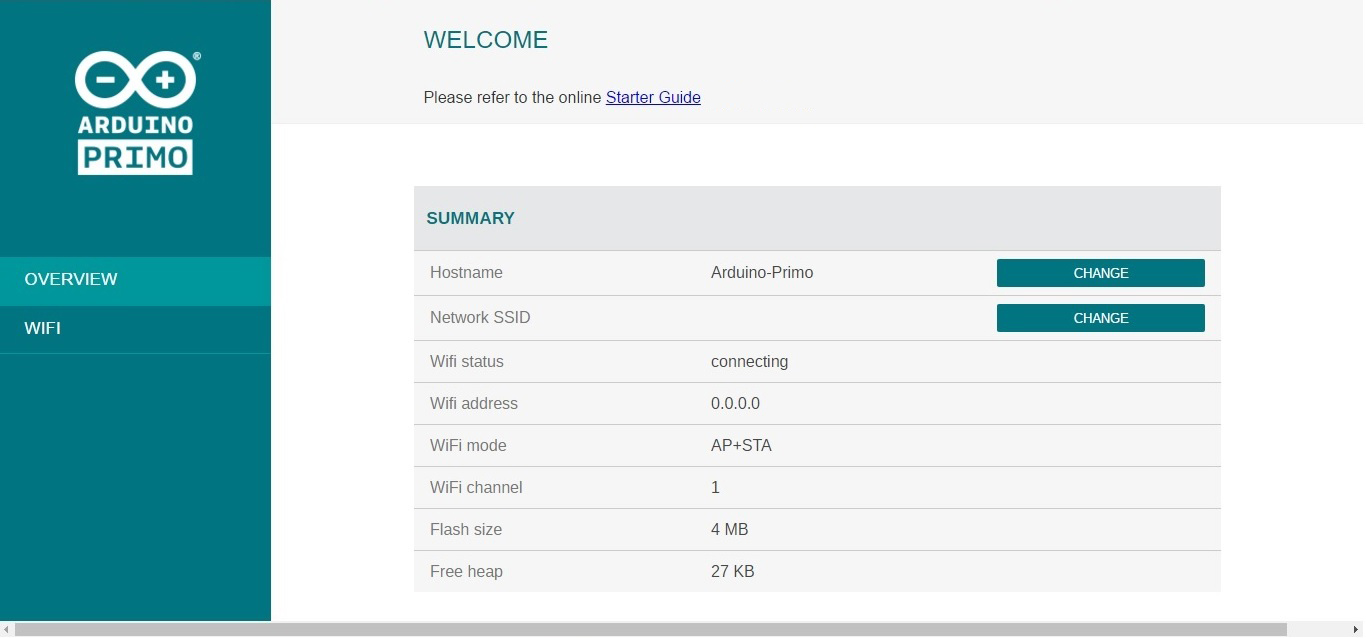
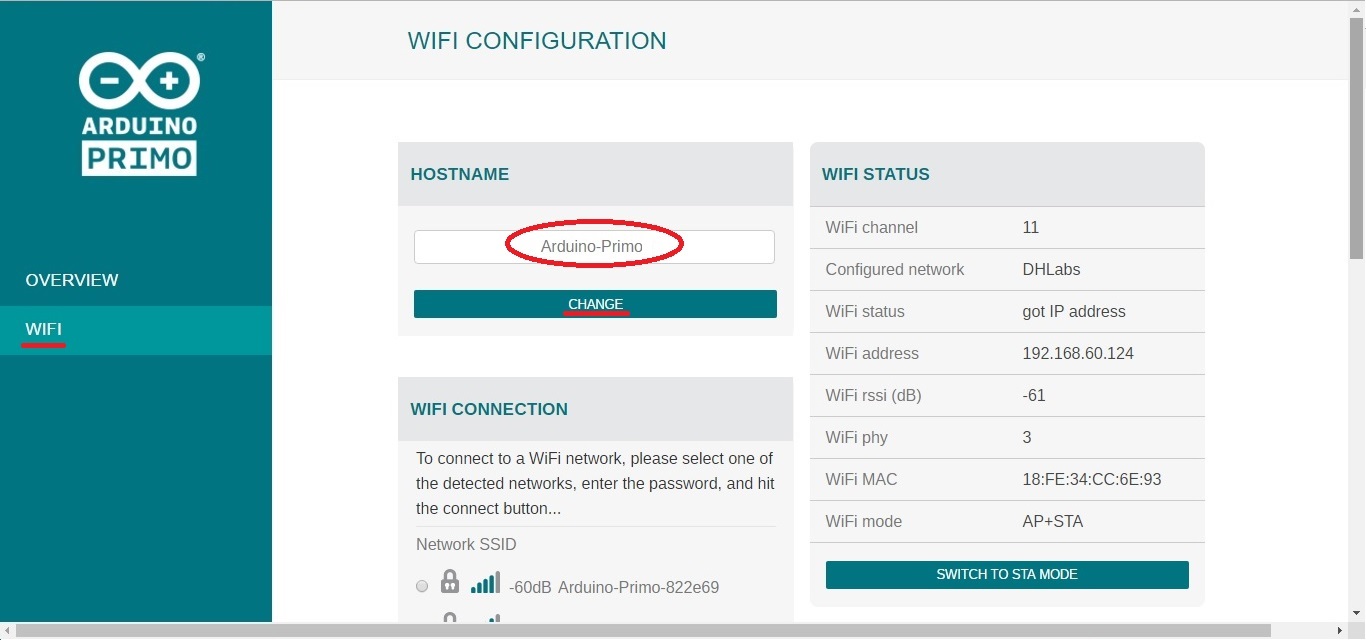
If you want to modify the hostname of the board then click on CHANGE from OVERVIEW menu or select the WiFi on the left menu and insert a new name under HOSTNAME field and after click on CHANGE.

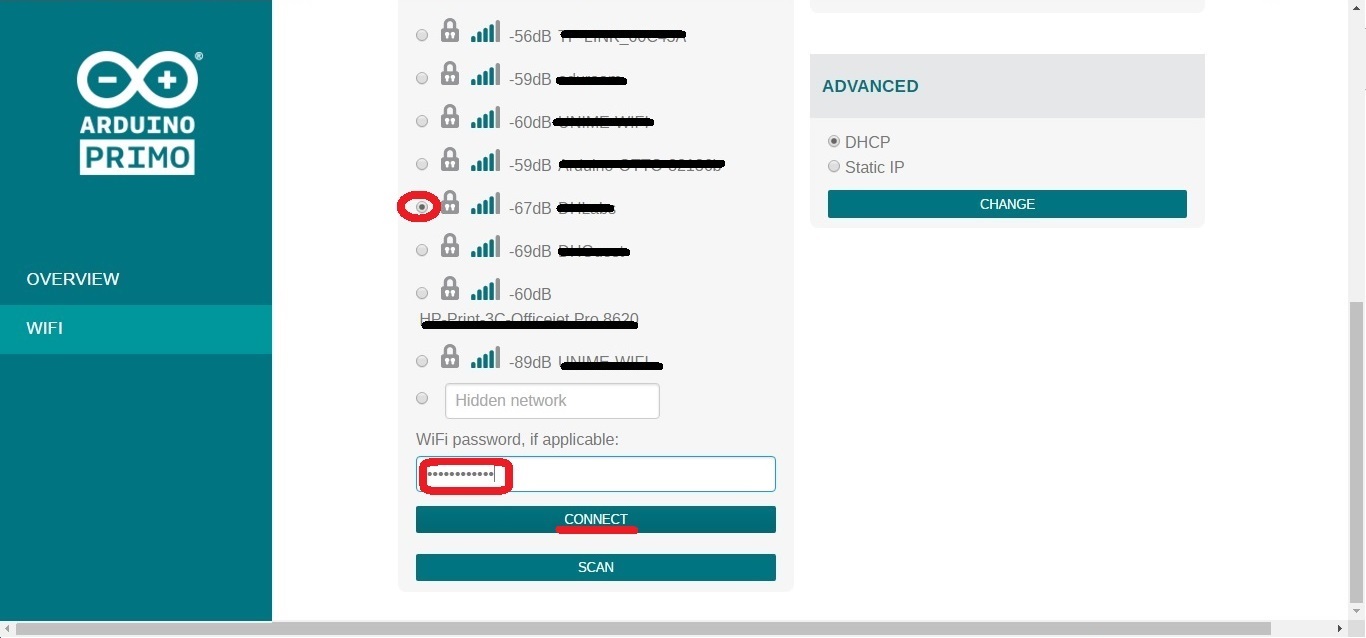
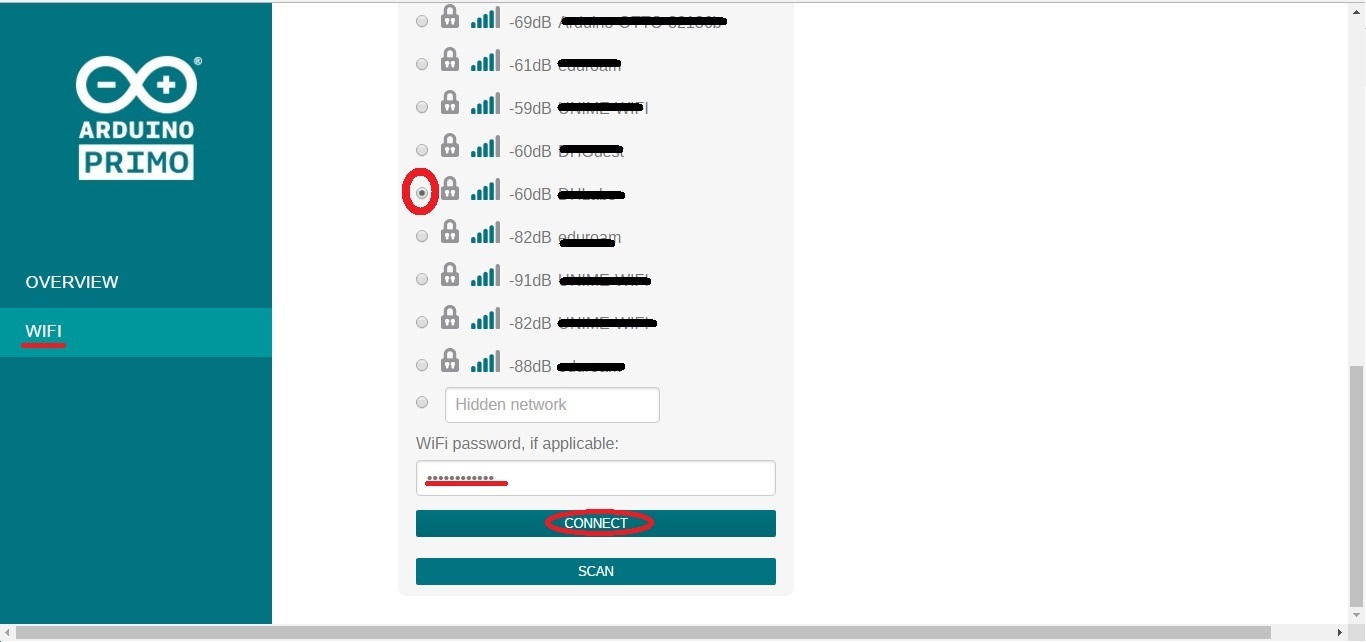
Connect the Arduino Primo to yours Access Point Router, selecting your network from WiFi Connection Menu. Type the correct password and click on CONNECT, as shown in the below image:
Accept the alert message:

When the board will be connected to the network, it will be shown the board ip address.
Now, connect the PC to the same board network and try to access to the board inserting the ip address on the browser.
After click on WiFi in the left menu and change the wifi configuration mode switching to STA MODE, as shown in the below image:
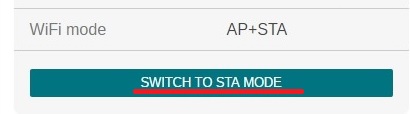
Please note: It is important switching in STA MODE because so the board will be visible on the Arduino IDE and, furthermore, you will be able to protect it from possible attacks, since it will no longer be visible as open network.
Now your Arduino Primo is ready.
Hardware details
Your Arduino Primo maintains full compatibility with UNO shields and offers you some new connectors and features. The following picture details the various hardware parts of the Primo board..
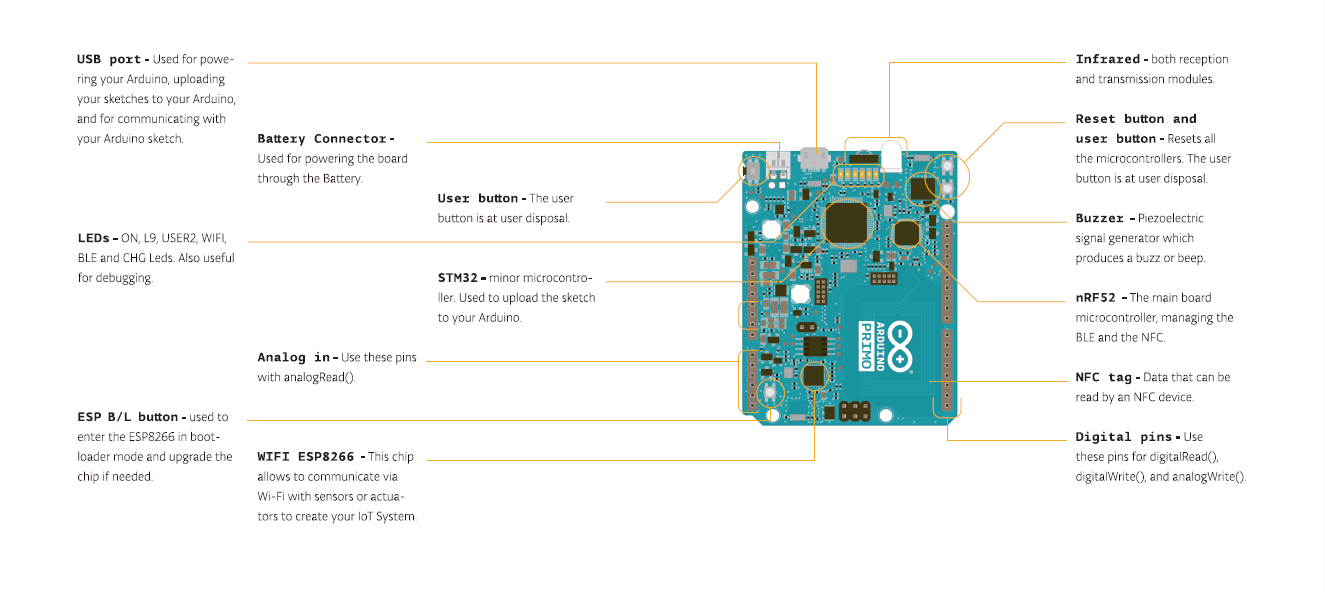
Following the LED_BUILTIN tradition, Arduino Primo has some other define that you can use in your sketches. Following, the complete list.
- LED_BUILTIN - Pin 9 - LED_BUILTIN is the L9 Led onboard
- BUZZER - Pin 35 - Manage the buzzer onboard
- USER1_BUTTON - Pin 34 - used also in some Low Power library functionalities
- USER2_BUTTON - Pin 44 - It isn’t possible to attach an Interrupt
- USER2_LED - Pin 38 - User2 Led onboard
- BLE_LED - Pin 40 - BLE led onboard
Web panel functions details
The Arduino Primo has a Web Panel that it can be reached in different ways:
- If the board isn't been configured yet, you can access inserting in browser this address: http://192.168.240.1/
In this case look at the First Configuration above to configure it.
- If the board is been correctly configured then you can insert the ip address (xxx.xxx.xxx.xxx) or the hostname(hostname.local/) from browser.
The Web Panel has a simple menu that it is formed from two items: OVERVIEW and WIFI.
The Home page of the Web Panel is the OVERVIEW. Here are shown all the information about the board, in particular the hostname, the network SSID, the Wifi address and the Wifi mode:
Selecting the WIFI section, you can change the hostname of the board, typing the new name in the dedicated field and clicking on CHANGE button, as shown in the below image:
It is possible to switch to STA MODE or STA+AP MODE clicking the specific button in the WIFI STATUS box.
Please note: Keep in mind that it is advised to switch only in STA MODE because so the board will be visible on the Arduino IDE and you will be able to protect it from possible attacks, since it will no longer be visible as open network.

Furthermore from the WIFI menu you can connect the board at your network, selecting it from WiFi Connections field, inserting the correct password and clicking on CONNECT button.
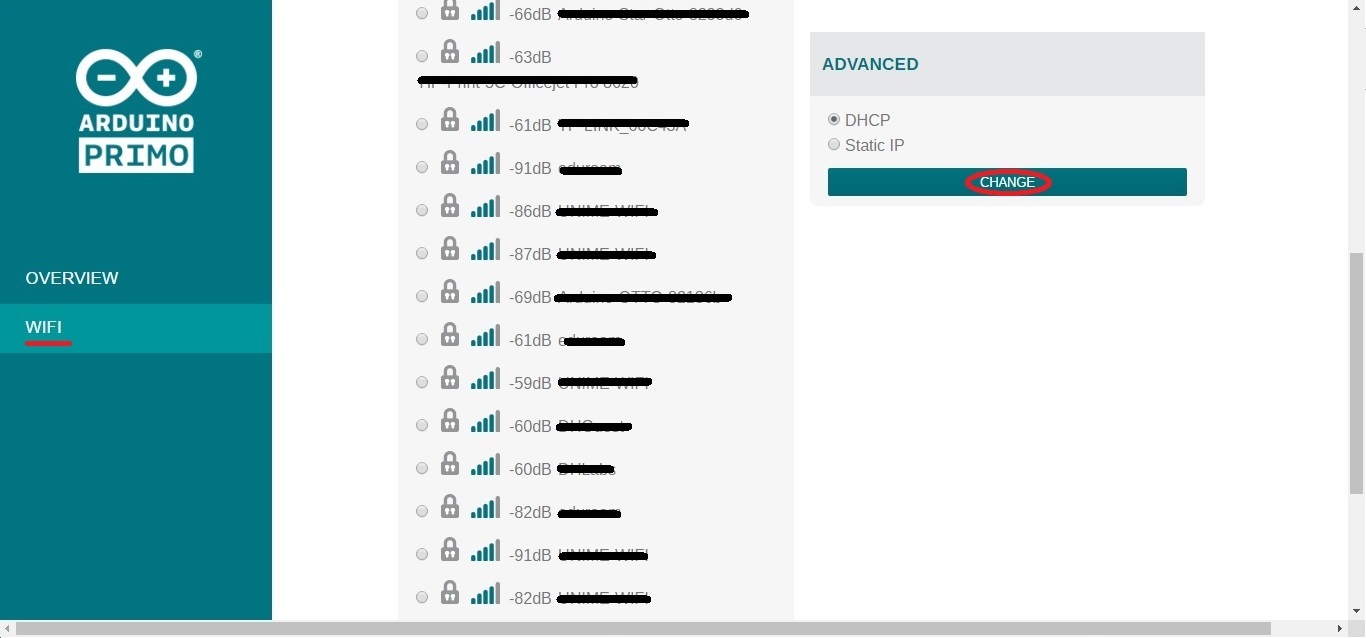
In this section you can also choose if to use the DHCP or the Static IP, as shown in the picture:
Last revision 2018/02/10 by SM
The text of the Arduino getting started guide is licensed under a
Creative Commons Attribution-ShareAlike 3.0 License. Code samples in the guide are released into the public domain.
