Getting Started with Intel® Edison
This guide explains how to get started with your Intel® Edison.
On this page... (hide)
Before you start
In this guide it is assumed that you are using an Intel® Edison kit for Arduino, but the same explanation is valid for the Intel® Edison Breakout Board. It is also assumed that you have connected the Intel® Edison to the Breakout Board. If not please make reference to the Intel® Tutorial about how to do that.
Quick Start
The Intel® Edison board is programmed using the Arduino Software (IDE), our Integrated Development Environment common to all our boards. You should have already it installed on your PC, as explained in the home page of our Getting Started.
The next step requires the addition of the Intel® Edison Core to the Arduino Software (IDE). This simple procedure is done selecting Tools menu, then Boards and last Boards Manager. Select Arduino Certified as type and then click on the Intel i686 boards by Intel. Select the latest core and then Install.
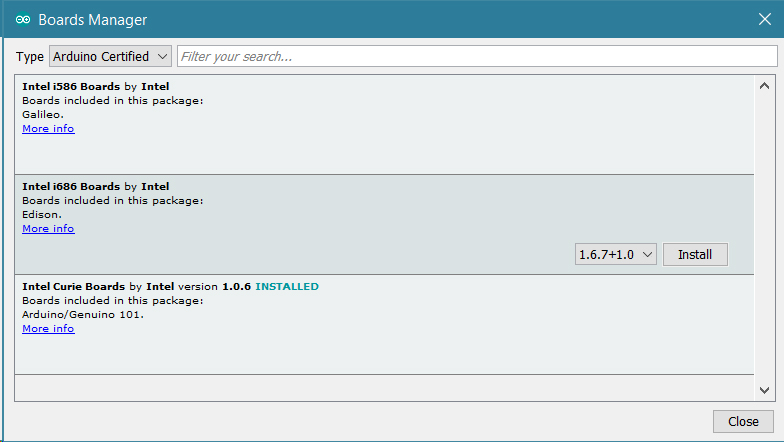
When the process is completed, the Intel Edison board will be available in the boards list.
Connect the board to your PC
To upload Arduino sketches the Intel® Edison board must be powered up and connected to your computer. It is suggested to use two micro USB cables to connect the board to your PC because in this way more current is available if needed.
Find the microswitch in between the USB ports on the expansion board. Switch the microswitch down towards the micro-USB ports, if it isn't already, as shown in the figure below:
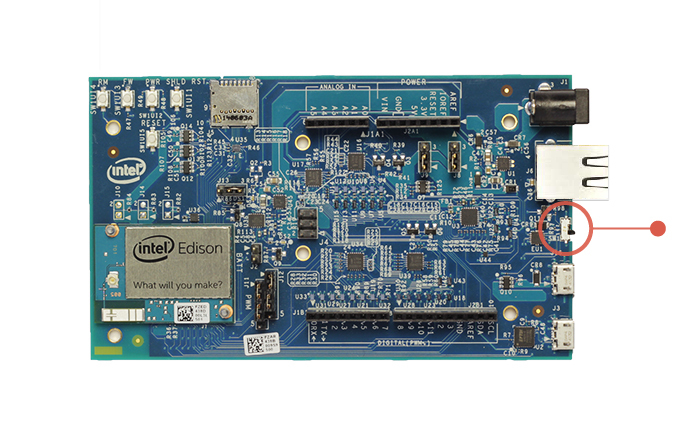
A green light should light up on the expansion board. If it does not, check your connection.

Wait a moment for the board to boot up. You will know that the board is fully initialized when your computer mounts a new drive (much like inserting a SD card into your computer).
Note: If you do not see a new drive, and the LED light (DS1 on the Arduino expansion board) is occasionally turning on and off, it is likely that your computer is not providing enough current. You may need to use a DC power supply as explained at Power Through DC Plug here.
Open the blink example
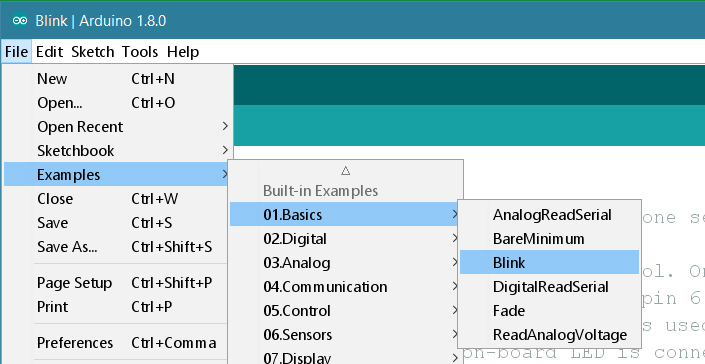
Open the LED blink example sketch: File > Examples > 1.Basics > Blink.
Select your board
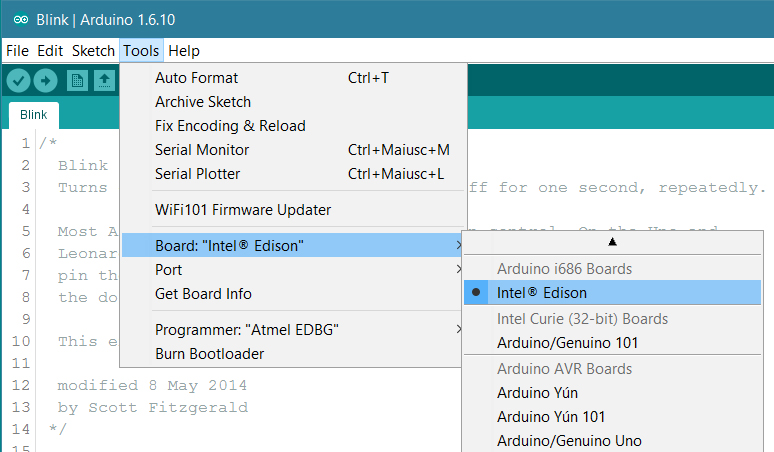
You'll need to select the Intel® Edison in the Tools > Board menu as shown below:
Select your serial port
Select the serial device of the board from the Tools > Serial Port menu. The easiest way to find what port the board is using is by disconnecting your board, restarting the IDE, and re-opening the menu; the entry that disappears should be the Intel® Edison board. Reconnect the board, restart the IDE, and select that serial port.
On Windows
The port is likely to be COM3 or higher and is called "Intel Edison Virtual Com Port" in the Device Manager. It is NOT "USB Serial Port". COM1 and COM2 are usually reserved for hardware serial ports:

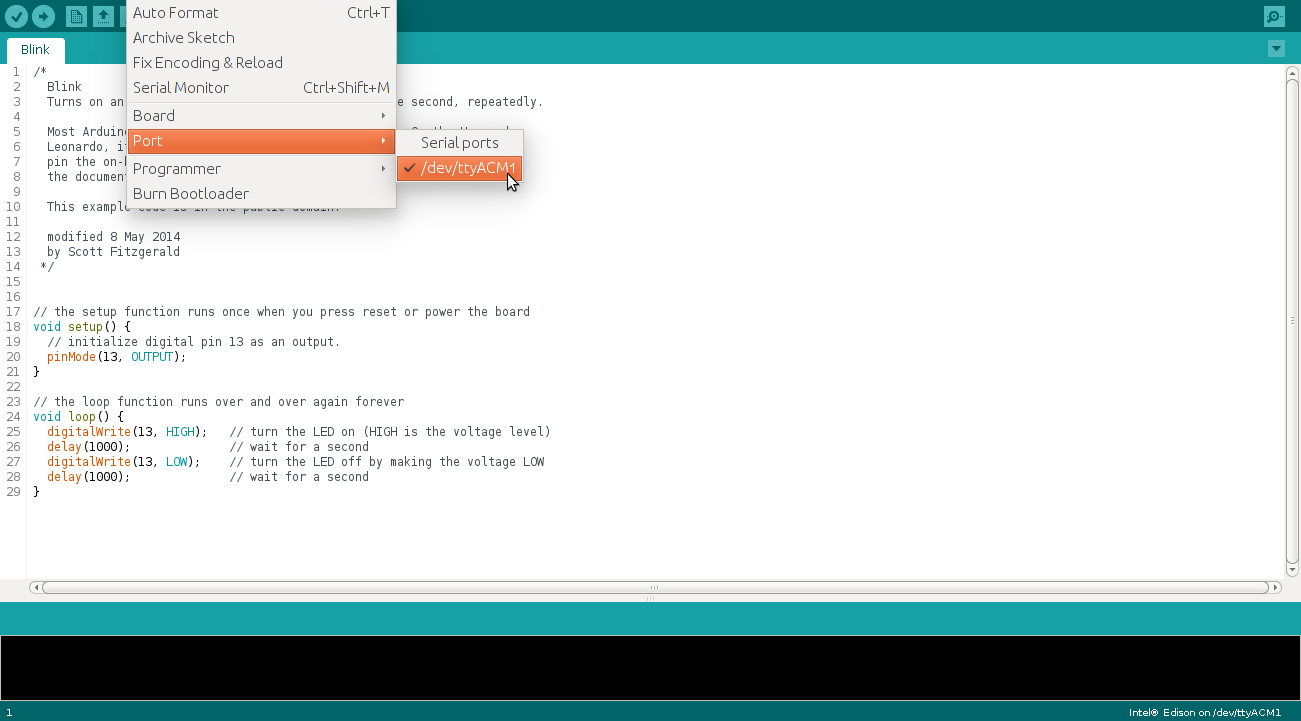
On Linux
The port is likely to be /dev/ttyACM1:
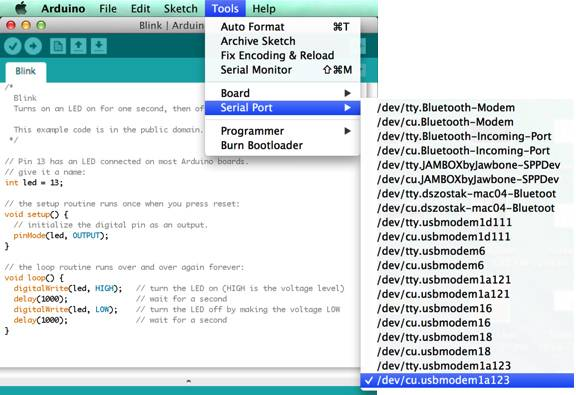
On Mac OS X
The port is likely to be /dev/cu.usbmodemxxxx. If you have multiple such devices, select any one of them as they should all give the same results:
Upload and Run your first Sketch
Click the Upload button in the upper left to load and run the sketch on your board:

You should see a Transfer complete message when it has uploaded:

The DS2 LED on your board should now blink with a 1 second delay.

You have successfully set up your Intel® Edison board and uploaded your first sketch. You are ready to move on with our tutorials and projects: choose your next destination below.
Get inspired
Now that you have set up and programmed your Intel® Edison board, you may find inspiration in our Project Hub tutorial platform, or learn how to use the specific features of the Edison board.
Here a list of tutorials that will help you in making very cool things!
Edison Mini-breakout Board Tutorial
Movie Reccomender
Robotics and Motor Control
Motion detecting video streaming doorbell
Audio Manipulation
Color Recognition - Candy locker
Last revision 2016/08/10 by SM
The text of the Arduino getting started guide is licensed under a
Creative Commons Attribution-ShareAlike 3.0 License. Code samples in the guide are released into the public domain.
