How to connect MKRWAN 1300 to The Things Network (TTN)
To use your MKRWAN 1300 board you need to connect to some LoRa network. At the time of writing this Getting Started Guide, The Things Network is a good solution. Before you go ahead with this guide, please check that you are under a TTN Gateway coverage. This network is community based and the users are responsible for the growth of the access gateway stations.
On this page... (hide)
You'll find an updated map of the available gateways on the communities map of The Things Network. Click on the map to zoom up to urban level, then click on the name of the community – if any in your area - to switch to the corresponding page, scroll down to the map and check if you are under coverage (the blue blob around each gateway).

If you are in range with a gateway, or plan to move close to it for your experiments, you can proceed with the registration on TTN.
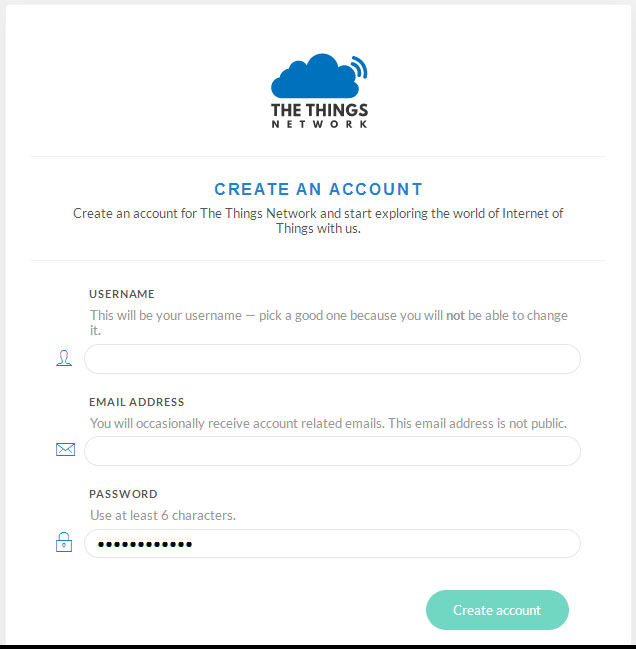
After you have created your account, first you need to create an application and then add a device to it. This process creates a series of keys and numbers that will be used in our software and on the TTN pages. In the process you will use our FirstConfiguration sketch available with the MKRWAN library.
Add MKRWAN library
This library should be manually installed using Library Manager as it is not part of the Board Core package. You can find it typing MKRWAN in the search field.

Find your EUI number
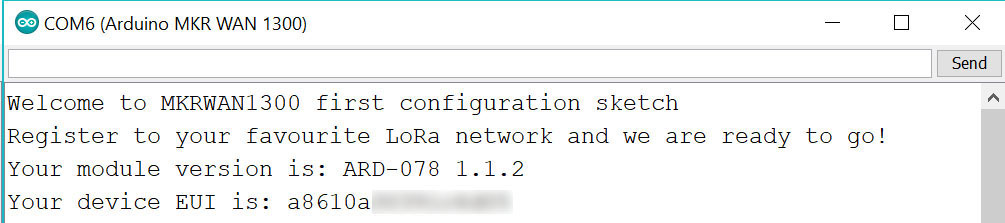
In the application creation process online, you need to input the EUI value of your board, this allows TTN to recognize your board and associate it properly with your applications. To read that number you need the First Configuration sketch that is available in the examples of the MKRWAN libarary. Upload it to the board and open the Serial Monitor: in the first lines you will find out the board’s EUI made of 8 hex numbers.
Now you can proceed with the creation of the application online. An application is the entry point for your data towards other services or a web interface. We suggest that you read the documentation available on TTN site to discover what you may do. For our purposes, we just create the application necessary to connect a device – our MKRWAN 1300 – and confirm that it works.
Application and device creation
Log into the TTN with the credential created during the registration process. Access your Console and click on the Applications big icon and select add application in the following page.

You get to the main template for applications, where you have to create an Application ID that is a string of lower case text that will identify the application on the TTN. Next is the ‘’Description’’ field where you put a text that describes your application. The third field is generated by the service and the last field is chosen from a drop down list of the available handlers. Choose the handler for your area.

Click on the Applications menu item on top right, near your name, to access the Applications list, then double click on your newly created application to get to its parameters.

Select the tab Devices and from the new screen select register device to open the form where you associate your MKRWAN 1300 board to your application.

Give a name to your board in the Device ID field with lowercase letters and numbers and copy in the Device EUI the eight hex values you already got running the FirstConfiguration sketch as instructed above. Save your data clicking on the Register button at the bottom of the form and you’re back to the devices page with your board in the list.
Click on the name of your application on the top bar on the left of the screen to get to the Application Overview page, then scroll down to find that the application now has one registered device.

Click on the icon to get to the Devices list and then on your registered board. In this page you have an overview of the device’s settings and, most important, you have the Application EUI and App Key. These two groups of eight and sixteen hex numbers are needed for every connection to the TTN and our FirstConfiguration sketch requires them to work.
Before we go ahead, go to settings of the device and select OTAA as the activation method if you have ABP in the device overview page.
FirstConfiguration again
When we first run the sketch we didn’t have the numbers to create a secure connection with TTN; after the registration process we now have all we need to send our first message. Reset the board and open the Serial Monitor. The board is queried again for version and EUI data, then the sketch asks if we want to connect via OTAA or ABP. You set OTAA in the TTN device settings and therefore you have to type ‘’1’’ in the console and press Send.

The sketch asks in sequence for APP EUI and APP KEY. If you have the browser open and logged into the TTN on the same machine, you can easily copy and paste from the device’s overview page to the console; use the little icon on the right of each field for an easy ‘’copy to clipboard’’. If you can’t do the copy and paste, you may reveal the App Key clicking on the eye on the left of the field to make it visible and write EUI and Key on paper.

Your board is now sending out the message, encrypted and with its ID to the TTN gateway and if you are under proper coverage, you should see in a few seconds a confirmation message.

You can see the HeLoRA world! message in the ‘’Data’’ tab of your device on TTN as proof of the your successful first configuration.
Last revision 2018/01/31 by SM
