Library
From Xojo Documentation
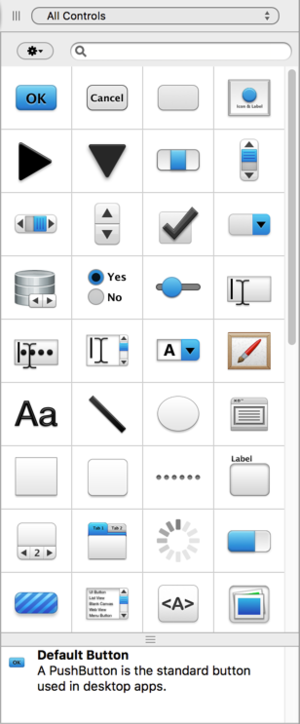
The Library (also called the Control Library) is a list of all built-in controls that can be added to your layout for your project type. It also contains all the project items that you can add to your project. To show the Library, click the Library button on the toolbar, select View ↠ Library from the menu or press the shortcut key (⌘-L on macOS, Ctrl-L on Windows and Linux). The Library displays on the right side of the workspace by default, but you can also set a preference to have it display as a floating palette.
The Library allows you to display controls in several ways. By default the controls are shown in Large size, but you can also change the size, add group headers and change the sorting. You can make these changes using the small “gear” icon at the top of the Library. Display settings include:
- Large Icons
- Large Icons and Labels
- Small Icons and Labels
- Large Icons and Descriptions
- Show Group Banners
- Sort Alphabetically
Hovering the mouse over any control displays its description in the Description Area at the bottom of the Library. If you do not need to see the description, you can resize the area to hide it.
Using the drop-down at the top of the Library you can choose to show "All Controls" (all the controls included with Xojo as well as any subclasses of controls you have added to your project), "All Built-In Controls" (only the controls included with Xojo) or you can choose to show only controls from a specific group. You can also use the Search field (also at the top) to quickly search for and show controls by name or type. For example, type “button” to see all the button controls. Lastly, if a control is selected in the Library, you can just start typing to jump to specific controls.
There are several ways to use the controls in the Library. You can drag controls from the Library onto the Layout Editor if it supports the control you have selected. You can drag controls from the Library directly to the Navigator to immediately create a subclass of the control. You can also double-click the control to add it to either the Navigator (as a subclass) or the Layout Editor, depending on which one has the focus. Lastly, you can right-click on a control in the Library to display the "New Subclass" menu which creates a subclass of the control and adds it to your project.
At the very bottom of the Library (in a group called Project Controls, if you have group headings displayed) is a list of control subclasses from your project. This is an easy way to drag your own custom controls onto a layout. You can exclude controls from appearing in this section by using the HideFromLibrary attribute or by choosing "All Built-In Controls" from the drop-down at the top of the Library.
Palettes
By default, the Library and Inspector display on the right side of the window and only one appears at a time. You can quickly toggle between the Library and Inspector using View ↠ Toggle Palettes in the menu.
If you would prefer to position the Library and Inspector anywhere or have them both on screen at the same time, you should use the preference to display them as separate Palettes, which you can then position however you want (even a second display). In the General area of Preferences (Options on Windows and Linux) change "Show Library and Inspector" from "In the project window" to "As floating palettes".
See Also
Navigator, Layout Editor, Inspector topics

