Getting Started with Angular: Your First App
Welcome to Angular!
This tutorial introduces you to the essentials of Angular. It leverages what you already know about HTML and JavaScript—plus some useful Angular features—to build a simple online store application, with a catalog, shopping cart, and check-out form. You don't need to install anything: you'll build the app using the StackBlitz online development environment.
You'll find many resources to complement the Angular docs. Mozilla's MDN docs include both HTML and JavaScript introductions. TypeScript's docs include a 5-minute tutorial. Various online course platforms, such as Udemy and Codeacademy, also cover web development basics.
Create a new project
Click here to create a new project in StackBlitz.
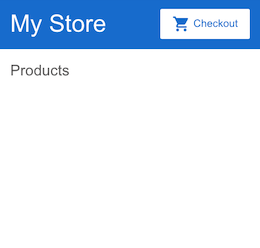
StackBlitz creates a starter Angular app. We've seeded this particular app with a top bar—containing the store name and checkout icon—and the title for a product list.
- Log into StackBlitz, so you can save and resume your work. If you have a GitHub account, you can log into StackBlitz with that account.
- To copy a code example from this tutorial, click the icon at the top right of the code example box, and then paste the code snippet from the clipboard into StackBlitz.
- If the StackBlitz preview pane isn't showing what you expect, save and then click the refresh button.
- StackBlitz is continually improving, so there may be slight differences in generated code, but the app's behavior will be the same.
Template syntax
Angular's template syntax extends HTML and JavaScript. In this section, you'll learn about template syntax by enhancing the "Products" area.
(So that you can focus on the template syntax, the following steps use predefined product data and methods from the product-list.component.ts file.)
-
In the
product-listfolder, open the template fileproduct-list.component.html. -
Modify the product list template to display a list of product names.
-
We want each product in the list to be displayed the same way, one after the other on the page. To iterate over the predefined list of products, use the
*ngFordirective. Put the*ngFordirective on a<div>, as shown below:src/app/product-list/product-list.component.html <h2>Products</h2> <div *ngFor="let product of products"> </div>*ngForcauses the<div>to be repeated for each product in the list.`*ngFor` is a "structural directive". Structural directives shape or reshape the DOM's structure, typically by adding, removing, and manipulating the elements to which they are attached. Any directive with an * is a structural directive. -
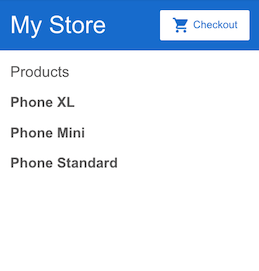
To display the names of the products, use the interpolation syntax {{ }}. Interpolation renders a property's value as text. Inside the
<div>, add an<h3>heading to display the interpolation of the product's name property:<h2>Products</h2> <div *ngFor="let product of products"> <h3> {{ product.name }} </h3> </div>The preview pane immediately updates to display the name of each product in the list.
-
-
In the final app, each product name will be a link to product details. Add the anchor now, and set the anchor's title to be the product's name by using the property binding [ ] syntax, as shown below:
<h2>Products</h2> <div *ngFor="let product of products"> <h3> <a [title]="product.name + ' details'"> {{ product.name }} </a> </h3> </div>In the preview pane, hover over the displayed product name to see the bound name property value. They are the same. Interpolation {{ }} lets you render the property value as text; property binding [ ] lets you use the property value in a template expression.

-
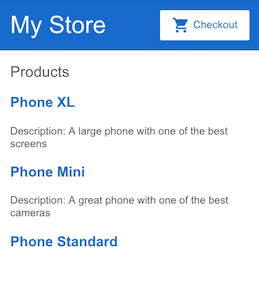
Add the product descriptions. On the paragraph tag, use an
*ngIfdirective so that the paragraph element is only created if the current product has a description.The app now displays the name and description of each product in the list, as shown below. Notice that the final product does not have a description paragraph at all. Because the product's description property is empty, the paragraph element—including the word "Description"—is not created.
-
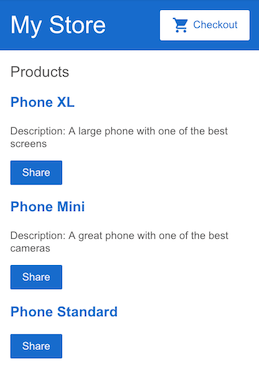
Add a button so users can share a product with friends. Bind the button's
clickevent to theshare()event that we defined for you (inproduct-list.component.ts). Event binding is done by using ( ) around the event, as shown below:Each product now has a "Share" button:
Test the "Share" button:
The app now has a product list and sharing feature. In the process, you've learned to use five common features of Angular's template syntax:
Learn more: See the Template Syntax guide for information about the full capabilities of Angular's template syntax.
Components
Components are the building blocks of Angular apps. You've already been working with the product list component.
A component is comprised of three things:
- A component class, which handles data and functionality. In the previous section, the product data and the
share()method were defined for you in the component class. - An HTML template, which determines what is presented to the user. In the previous section, you modified the product list's HTML template to display the name, description, and a "Share" button for each product.
- Component-specific styles that define the look and feel. The product list does not define any styles.
An Angular application is composed of a tree of components, in which each Angular component has a specific purpose and responsibility.
Currently, our app has three components:
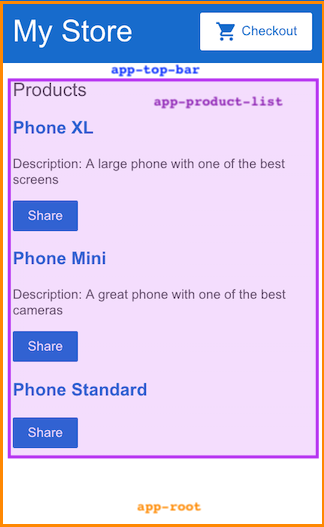
app-root(orange box) is the application shell. This is the first component to load, and the parent of all other components. You can think of it as the base page.app-top-bar(blue background) is the store name and checkout button.app-product-list(purple box) is the product list that you modified in the previous section.
In the next section, you'll expand the app's capabilities by adding a new component for a product alert. You'll add it as a child of the product list component.
Learn more: See Introduction to Components for more information about components and how they interact with templates.
Input
Currently, the product list displays the name and description of each product.
You might have noticed that the product list component also defines a products property that contains imported data for each product. (See the products array in products.ts.)
We're going to create a new alert feature. The alert feature will take a product as an input. It will then check the product's price, and, if the price is greater than $700, it will display a "Notify Me" button that lets users sign up for notifications when the product goes on sale.
-
Create a new product alerts component.
-
Right click on the
appfolder and use theAngular Generatorto generate a new component namedproduct-alerts.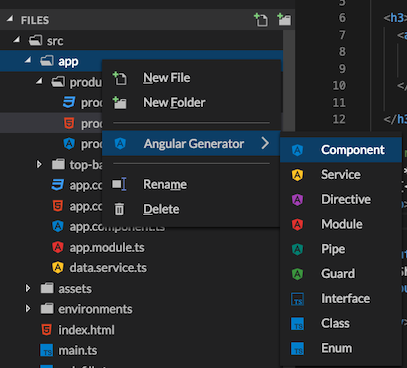
The generator creates starter files for all three parts of the component:
product-alerts.component.tsproduct-alerts.component.htmlproduct-alerts.component.css
-
-
Open
product-alerts.component.ts.src/app/product-alerts/product-alerts.component.ts import { Component } from '@angular/core'; @Component({ selector: 'app-product-alerts', templateUrl: './product-alerts.component.html', styleUrls: ['./product-alerts.component.css'] }) export class ProductAlertsComponent { }-
Notice the
@Componentdecorator. This indicates that the following class is a component. It provides metadata about the component, including its templates, styles, and a selector.-
The
selectoris used to identify the component. The selector is the name you give the Angular component when it is rendered as an HTML element on the page. By convention, Angular component selectors begin with the prefixapp-, followed by the component name. -
The template and style filenames. These reference the other two files generated for you.
-
-
The component definition also includes an exported class (
ProductAlertsComponent), which handles functionality for the component.
-
-
Set up the new product alerts component to receive a product as input:
-
Import
Inputfrom@angular/core.import { Component } from '@angular/core'; import { Input } from '@angular/core'; -
In the
ProductAlertsComponentclass definition, define a property namedproductwith an@Inputdecorator. The@Inputdecorator indicates that the property value will be passed in from the component's parent (in this case, the product list component).export class ProductAlertsComponent { @Input() product; }
-
-
Define the view for the new product alert component.
Open the
product-alerts.component.htmltemplate and replace the placeholder paragraph with a "Notify Me" button that appears if the product price is over $700.src/app/product-alerts/product-alerts.component.html <p *ngIf="product.price > 700"> <button>Notify Me</button> </p> -
Display the new product alert component as part of (a child of) the product list.
-
Open
product-list.component.html. -
To include the new component, use its selector (
app-product-alert) as you would an HTML element. -
Pass the current product as input to the component using property binding.
src/app/product-list/product-list.component.html <button (click)="share()"> Share </button> <app-product-alerts [product]="product"> </app-product-alerts>
-
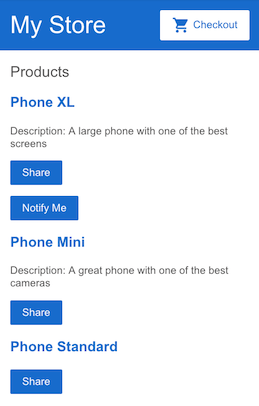
The new product alert component takes a product as input from the product list. With that input, it shows or hides the "Notify Me" button, based on the price of the product. The Phone XL price is over $700, so the "Notify Me" button appears on that product.
Learn more: See Component Interaction for more information about passing data from a parent to child component, intercepting and acting upon a value from the parent, and detecting and acting on changes to input property values.
Output
The "Notify Me" button doesn't do anything yet. In this section, you'll set up the product alert component so that it emits an event up to the product list component when the user clicks "Notify Me". You'll define the notification behavior in the product list component.
-
Open
product-alerts.component.ts. -
Import
OutputandEventEmitterfrom@angular/core:src/app/product-alerts/product-alerts.component.ts import { Component } from '@angular/core'; import { Input } from '@angular/core'; import { Output, EventEmitter } from '@angular/core'; -
In the component class, define a property named
notifywith an@Outputdecorator and an instance of event emitter. This makes it possible for the product alert component to emit an event when the value of the notify property changes.export class ProductAlertsComponent { @Input() product; @Output() notify = new EventEmitter(); } -
In the product alert template (
product-alerts.component.html), update the "Notify Me" button with an event binding to call thenotify.emit()method.src/app/product-alerts/product-alerts.component.html <p *ngIf="product.price > 700"> <button (click)="notify.emit()">Notify Me</button> </p> -
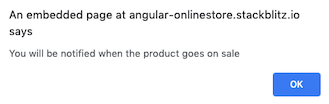
Next, define the behavior that should happen when the button is clicked. Recall that it's the parent (product list component)—not the product alerts component—that's going to take the action. In the
product-list.component.tsfile, define anonNotify()method, similar to theshare()method:src/app/product-list/product-list.component.ts export class ProductListComponent { products = products; share() { window.alert('The product has been shared!'); } onNotify() { window.alert('You will be notified when the product goes on sale'); } } -
Finally, update the product list component to receive output from the product alerts component.
In
product-list.component.html, bind theapp-product-alertscomponent (which is what displays the "Notify Me" button) to theonNotify()method of the product list component.src/app/product-list/product-list.component.html <button (click)="share()"> Share </button> <app-product-alerts [product]="product" (notify)="onNotify()"> </app-product-alerts> -
Try out the "Notify Me" button:
Learn more: See Component Interaction for more information about listening for events from child components, reading child properties or invoking child methods, and using a service for bi-directional communication within the family.
Next steps
Congratulations! You've completed your first Angular app!
You have a basic online store catalog, with a product list, "Share" button, and "Notify Me" button. You've learned about the foundation of Angular: components and template syntax. You've also learned how the component class and template interact, and how components communicate with each other.
To continue exploring Angular, choose either of the following options:
- Continue to the "Routing" section to create a product details page that can be accessed by clicking a product name and that has its own URL pattern.
- Skip ahead to the "Deployment" section to deploy your app to Firebase or move to local development.