NB Web Client
This sketch connects an Arduino MKR NB 1500 board to the Arduino homepage, http://arduino.cc, through the NB network. It then prints the content of the page through the serial monitor of the Arduino Software (IDE).
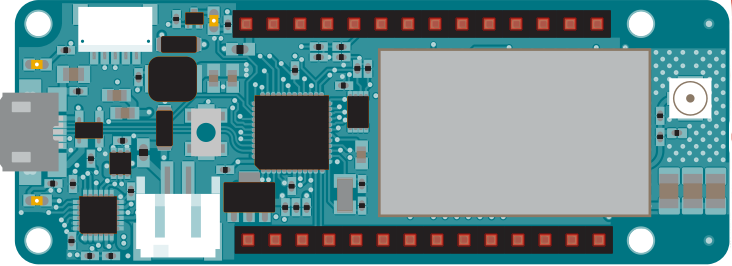
Hardware Required
- Arduino MKR NB 1500
- antenna
- SIM card enable for Data
Circuit
Code
First, import the NB library
#include <MKRNB.h>
SIM cards may have a PIN number that enables their functionality. Define the PIN for your SIM. If your SIM has no PIN, you can leave it blank :
#define PINNUMBER ""
Initialize instances of the classes you're going to use. You're going to need the NB, GPRS, and NBClient classes.
GPRS gprs;
NB nbAccess;
Create some variables to hold the server, path, and port you wish to connect to.
char path[] = "/";
int port = 80;
In setup, open a serial connection to the computer. After opening the connection, send a message indicating the sketch has started.
Serial.begin(9600);
Serial.println("Starting Arduino web client.");
Create a local variable to track the connection status. You'll use this to keep the sketch from starting until the SIM is connected to the network :
Connect to the network by calling nbAccess.begin(). It takes the SIM card's PIN as an argument. You'll also connect to the GPRS network using gprs.attachGPRS(). By placing this inside a while() loop, you can continually check the status of the connection and wait for them to both become true before proceeding.
When the modem does connect and has attached itself to the GPRS network, nbAccess() will return NB_READY. Use this as a flag to set the connected variable to true or false. Once connected, the remainder of setup will run.
{
if ((nbAccess.begin(PINNUMBER) == GSM_READY) &&
(gprs.attachGPRS() == GPRS_READY)) {
connected = true;
else
{
Serial.println("Not connected");
delay(1000);
}
}
Attempt to connect to the server using client.connect(). connect() requires two arguments, the server and port. Once connected to the server, make a HTTP request by calling client.print(). A typical web request looks like "GET pathname HTTP/1.0". print will send the message, just as a browser would.
{
Serial.println("connected");
client.print("GET ");
client.print(path);
client.println(" HTTP/1.0");
client.println();
}
If the connection to the server failed, make a note of it in the serial monitor, and close up setup.
{
Serial.println("connection failed");
}
}
Inside loop, check to see if there are bytes returned from the server. If so, read them and print them to the serial monitor.
{
char c = client.read();
Serial.print(c);
}
If the server disconnects, which it will typically do once it has completed the HTTP request, stop the client locally and close the loop.
{
Serial.println();
Serial.println("disconnecting.");
client.stop();
// do nothing forevermore:
for(;;)
;
}
}
Once your code is uploaded, open the serial monitor. You should see the HTML of http://example.org print out on screen when it is received. It will takes about one minute, so don't worry if you haven't a feedback immediately!
The complete sketch is below.
Web client
This sketch connects to a website through a MKR NB 1500 board. Specifically,
this example downloads the URL "http://example.org/" and
prints it to the Serial monitor.
Circuit:
- MKR NB 1500 board
- Antenna
- SIM card with a data plan
created 8 Mar 2012
by Tom Igoe
*/
// libraries
#include <MKRNB.h>
#include "arduino_secrets.h"
// Please enter your sensitive data in the Secret tab or arduino_secrets.h
// PIN Number
const char PINNUMBER[] = SECRET_PINNUMBER;
// initialize the library instance
NBClient client;
GPRS gprs;
NB nbAccess;
// URL, path and port (for example: example.org)
char server[] = "example.org";
char path[] = "/";
int port = 80; // port 80 is the default for HTTP
void setup() {
// initialize serial communications and wait for port to open:
Serial.begin(9600);
while (!Serial) {
; // wait for serial port to connect. Needed for native USB port only
}
Serial.println("Starting Arduino web client.");
// connection state
boolean connected = false;
// After starting the modem with NB.begin()
// attach to the GPRS network with the APN, login and password
while (!connected) {
if ((nbAccess.begin(PINNUMBER) == NB_READY) &&
(gprs.attachGPRS() == GPRS_READY)) {
connected = true;
} else {
Serial.println("Not connected");
delay(1000);
}
}
Serial.println("connecting...");
// if you get a connection, report back via serial:
if (client.connect(server, port)) {
Serial.println("connected");
// Make a HTTP request:
client.print("GET ");
client.print(path);
client.println(" HTTP/1.1");
client.print("Host: ");
client.println(server);
client.println("Connection: close");
client.println();
} else {
// if you didn't get a connection to the server:
Serial.println("connection failed");
}
}
void loop() {
// if there are incoming bytes available
// from the server, read them and print them:
if (client.available()) {
Serial.print((char)client.read());
}
// if the server's disconnected, stop the client:
if (!client.available() && !client.connected()) {
Serial.println();
Serial.println("disconnecting.");
client.stop();
// do nothing forevermore:
for (;;)
;
}
}
See Also
- GPRS Constructor
- MKRNBattachGPRS()
- GSMClient Constructor
- ready()
- connect()
- beginWrite()
- write()
- endWrite()
- connected()
- read()
- available()
- peek()
- flush()
- stop()
- Arduino MKR NB 1500 – Complete product description.
- Getting started with the MKR NB 1500 – Get everything set up in minutes.
- MKRNB library – Your reference for the NB Library.
- MKRNBExamplesNBWebServer - A web server that when gets a request from a client sends back the value read on Analog inputs.
- Tutorial.MKRNBToolsTestGPRS – Tries to access the internet over GPRS.
Last revision 2018/11/21 by SM
