Examples > Robot
Disco bot
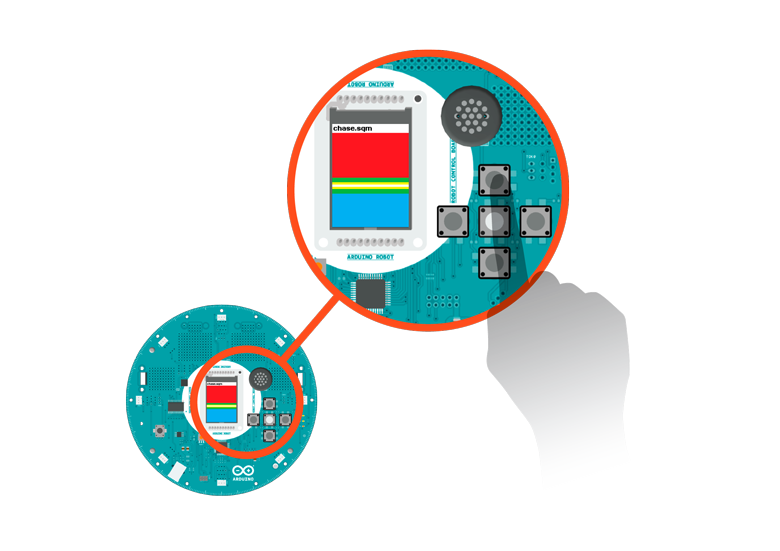
This sketch demonstrates how to play a melody with the robot, by playing back some sound files.
You can choose between three melodies specially composed for the Arduino Robot using the buttons on the control board. Once you get the music you like, put the robot on the floor and it will dance for you.
Hardware Required
- Arduino Robot
- Your best dance outfit
Instruction
- Upload the example, unplug USB and turn on power.
- Place the robot on the ground
- After the starting screen, the robot will be dancing with music playing and flashing colors on the screen
- You can press left/right button to switch music
- If you're not satisfied with the dancing moves, change the example to make it dance differently :
- Locate the line
char danceScript[]="S4L1R1S2F1B1S1\0" - S: stop, L: turn left, R: turn right, F: go forward, B: go backwards
- The number after each command decides how long it lasts. 1 = 500ms, 2=1000ms, 3=1500ms, and so forth.
- Locate the line
Try it out
Choose a tune
Code
/* Disco Bot
This sketch shows you how to use the melody playing
feature of the robot, with some really cool 8-bit music.
Music will play when the robot is turned on, and it
will show you some dance moves.
Circuit:
* Arduino Robot
created 1 May 2013
by X. Yang
modified 12 May 2013
by D. Cuartielles
This example is in the public domain
*/
#include <ArduinoRobot.h> // include the robot library
#include <Wire.h>
/* Dancing steps:
S: stop
L: turn left
R: turn right
F: go forward
B: go backwards
The number after each command determines how long
each step lasts. Each number is 1/2 second long.
The "\0" indicates end of string
*/
char danceScript[] = "S4L1R1S2F1B1S1\0";
int currentScript = 0; // what step are we at
int currentSong = 0; // keep track of the current song
static const int SONGS_COUNT = 3; // number of songs
// an array to hold the songs
char musics[][11] = {
"melody.sqm",
"menu.sqm",
"chase.sqm",
};
// variables for non-blocking delay
long waitFrom;
long waitTime = 0;
void setup() {
// initialize the Robot, SD card, display, and speaker
Robot.begin();
Robot.beginSpeaker();
Robot.beginSD();
Robot.beginTFT();
// draw "lg0.bmp" and "lg1.bmp" on the screen
Robot.displayLogos();
// Print instructions to the screen
Robot.text("1. Use left and\n right key to switch\n song", 5, 5);
Robot.text("2. Put robot on the\n ground to dance", 5, 33);
// wait for a few soconds
delay(3000);
setInterface(); // display the current song
play(0); //play the first song in the array
resetWait(); //Initialize non-blocking delay
}
void loop() {
// read the butttons on the robot
int key = Robot.keyboardRead();
// Right/left buttons play next/previous song
switch (key) {
case BUTTON_UP:
case BUTTON_LEFT:
play(-1); //play previous song
break;
case BUTTON_DOWN:
case BUTTON_RIGHT:
play(1); //play next song
break;
}
// dance!
runScript();
}
// Dancing function
void runScript() {
if (!waiting()) { // if the previous instructions have finished
// get the next 2 commands (direction and duration)
parseCommand(danceScript[currentScript], danceScript[currentScript + 1]);
currentScript += 2;
if (danceScript[currentScript] == '\0') { // at the end of the array
currentScript = 0; // start again at the beginning
}
}
}
// instead of delay, use this timer
boolean waiting() {
if (millis() - waitFrom >= waitTime) {
return false;
} else {
return true;
}
}
// how long to wait
void wait(long t) {
resetWait();
waitTime = t;
}
// reset the timer
void resetWait() {
waitFrom = millis();
}
// read the direction and dirstion of the steps
void parseCommand(char dir, char duration) {
//convert the scripts to action
switch (dir) {
case 'L':
Robot.motorsWrite(-255, 255);
break;
case 'R':
Robot.motorsWrite(255, -255);
break;
case 'F':
Robot.motorsWrite(255, 255);
break;
case 'B':
Robot.motorsWrite(-255, -255);
break;
case 'S':
Robot.motorsStop();
break;
}
//You can change "500" to change the pace of dancing
wait(500 * (duration - '0'));
}
// display the song
void setInterface() {
Robot.clearScreen();
Robot.stroke(0, 0, 0);
Robot.text(musics[0], 0, 0);
}
// display the next song
void select(int seq, boolean onOff) {
if (onOff) { //select
Robot.stroke(0, 0, 0);
Robot.text(musics[seq], 0, 0);
} else { //deselect
Robot.stroke(255, 255, 255);
Robot.text(musics[seq], 0, 0);
}
}
// play the slected song
void play(int seq) {
select(currentSong, false);
if (currentSong <= 0 && seq == -1) { //previous of 1st song?
currentSong = SONGS_COUNT - 1; //go to last song
} else if (currentSong >= SONGS_COUNT - 1 && seq == 1) { //next of last?
currentSong = 0; //go to 1st song
} else {
currentSong += seq; //next song
}
Robot.stopPlayFile();
Robot.playFile(musics[currentSong]);
select(currentSong, true); //display the current song
}
Explore further
The melodies are stored on the SD card. They are created with a tracker program.
To write your own music, use a tracker program as explained in the Squawk library reference.
See Also:
- begin()
- beginTFT()
- beginSD()
- beginSpeaker()
- playFile()
- motorsWrite()
- turn()
