On this page... (hide)
Sending and Receiving String via UDP
In this example, you will use your Ethernet Shield and your Arduino to send and receive text strings via the UDP protocol (Universal Datagram Packet). You'll need another device to send to and from. The Processing sketch included at the end of the code will send to and receive from your Arduino running this example.
Hardware Required
- Arduino or Genuino Board
- Arduino Ethernet Shield
Circuit
The Ethernet shield allows you to connect a WIZNet Ethernet controller to the Arduino or Genuino boards via the SPI bus. It uses the ICSP header pins and pin 10 as chip select for the SPI connection to the Ethernet controller chip. Later models of the Ethernet shield also have an SD Card on board. Digital pin 4 is used to control the slave select pin on the SD card.
The shield should be connected to a network with an Ethernet cable. You will need to change the network settings in the program to correspond to your network.
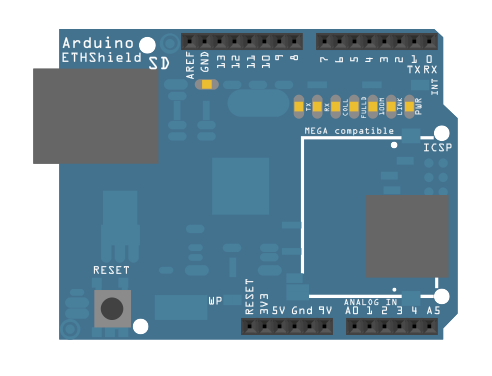
Image developed using Fritzing. For more circuit examples, see the Fritzing project page
In the above image, the Arduino or Genuino board would be stacked below the Ethernet shield.
Schematic

Code
UDPSendReceiveString:
This sketch receives UDP message strings, prints them to the serial port
and sends an "acknowledge" string back to the sender
A Processing sketch is included at the end of file that can be used to send
and received messages for testing with a computer.
created 21 Aug 2010
by Michael Margolis
This code is in the public domain.
*/
#include <Ethernet.h>
#include <EthernetUdp.h>
// Enter a MAC address and IP address for your controller below.
// The IP address will be dependent on your local network:
byte mac[] = {
0xDE, 0xAD, 0xBE, 0xEF, 0xFE, 0xED
};
IPAddress ip(192, 168, 1, 177);
unsigned int localPort = 8888; // local port to listen on
// buffers for receiving and sending data
char packetBuffer[UDP_TX_PACKET_MAX_SIZE]; // buffer to hold incoming packet,
char ReplyBuffer[] = "acknowledged"; // a string to send back
// An EthernetUDP instance to let us send and receive packets over UDP
EthernetUDP Udp;
void setup() {
// You can use Ethernet.init(pin) to configure the CS pin
//Ethernet.init(10); // Most Arduino shields
//Ethernet.init(5); // MKR ETH shield
//Ethernet.init(0); // Teensy 2.0
//Ethernet.init(20); // Teensy++ 2.0
//Ethernet.init(15); // ESP8266 with Adafruit Featherwing Ethernet
//Ethernet.init(33); // ESP32 with Adafruit Featherwing Ethernet
// start the Ethernet
Ethernet.begin(mac, ip);
// Open serial communications and wait for port to open:
Serial.begin(9600);
while (!Serial) {
; // wait for serial port to connect. Needed for native USB port only
}
// Check for Ethernet hardware present
if (Ethernet.hardwareStatus() == EthernetNoHardware) {
Serial.println("Ethernet shield was not found. Sorry, can't run without hardware. :(");
while (true) {
delay(1); // do nothing, no point running without Ethernet hardware
}
}
if (Ethernet.linkStatus() == LinkOFF) {
Serial.println("Ethernet cable is not connected.");
}
// start UDP
Udp.begin(localPort);
}
void loop() {
// if there's data available, read a packet
int packetSize = Udp.parsePacket();
if (packetSize) {
Serial.print("Received packet of size ");
Serial.println(packetSize);
Serial.print("From ");
IPAddress remote = Udp.remoteIP();
for (int i=0; i < 4; i++) {
Serial.print(remote[i], DEC);
if (i < 3) {
Serial.print(".");
}
}
Serial.print(", port ");
Serial.println(Udp.remotePort());
// read the packet into packetBufffer
Udp.read(packetBuffer, UDP_TX_PACKET_MAX_SIZE);
Serial.println("Contents:");
Serial.println(packetBuffer);
// send a reply to the IP address and port that sent us the packet we received
Udp.beginPacket(Udp.remoteIP(), Udp.remotePort());
Udp.write(ReplyBuffer);
Udp.endPacket();
}
delay(10);
}
/*
Processing sketch to run with this example
=====================================================
// Processing UDP example to send and receive string data from Arduino
// press any key to send the "Hello Arduino" message
import hypermedia.net.*;
UDP udp; // define the UDP object
void setup() {
udp = new UDP( this, 6000 ); // create a new datagram connection on port 6000
//udp.log( true ); // <-- printout the connection activity
udp.listen( true ); // and wait for incoming message
}
void draw()
{
}
void keyPressed() {
String ip = "192.168.1.177"; // the remote IP address
int port = 8888; // the destination port
udp.send("Hello World", ip, port ); // the message to send
}
void receive( byte[] data ) { // <-- default handler
//void receive( byte[] data, String ip, int port ) { // <-- extended handler
for(int i=0; i < data.length; i++)
print(char(data[i]));
println();
}
*/
Processing Code
Copy the Processing sketch from the code sample above. When you type any letter in the Processing sketch window, it will send a string to the Arduino via UDP.
See also
- Arduino Ethernet Shield – Product description.
- Getting started with the Ethernet Shield – Get everything set up in minutes.
- Ethernet library – Your reference for the Ethernet Library.
- ChatServer - A simple server that distributes any incoming messages to all connected clients.
- WebClient – Query the web and get the answer through the serial monitor
- WebClientRepeating - How to make repeated HTTP requests using the Ethernet shield.
- WebServer - A simple web server that shows the value of the analog input.
- DhcpAddressPrinter – Get a DHCP address and print it on serial monitor.
- DhcpChatServer – Connect to a Telnet server and print on serial monitor all the received messages; uses DHCP.
- TelnetClient - Connect to a Telnet server and print on serial monitor all the received messages
- BarometricPressureWebServer – Post data read from a pressure sensor using SPI.
- UdpNtpClient - query a Network Time Protocol (NTP) server and get the information through serial monitor.
Last revision 2018/09/07 by SM
