Kitematic tutorial: Set up a Minecraft server
Estimated reading time: 1 minuteLegacy desktop solution. Kitematic is a legacy solution, bundled with Docker Toolbox. We recommend updating to Docker Desktop for Mac or Docker Desktop for Windows if your system meets the requirements for one of those applications.
This is a quick tutorial demonstrating how to set up a local Minecraft server using Kitematic and Docker.
Create Minecraft server container
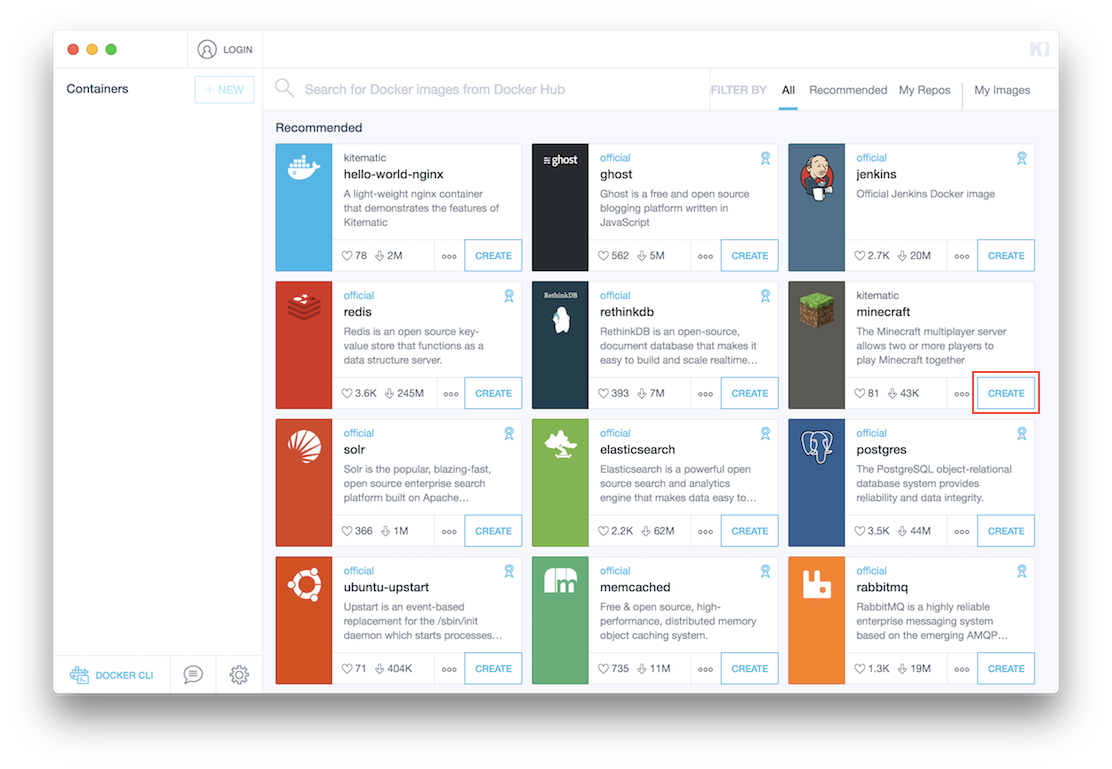
First, if you haven’t yet done so, download and start Kitematic. Once installed and running, the app should look like this:
Create a container from the recommended Minecraft image by clicking the “Create” button.
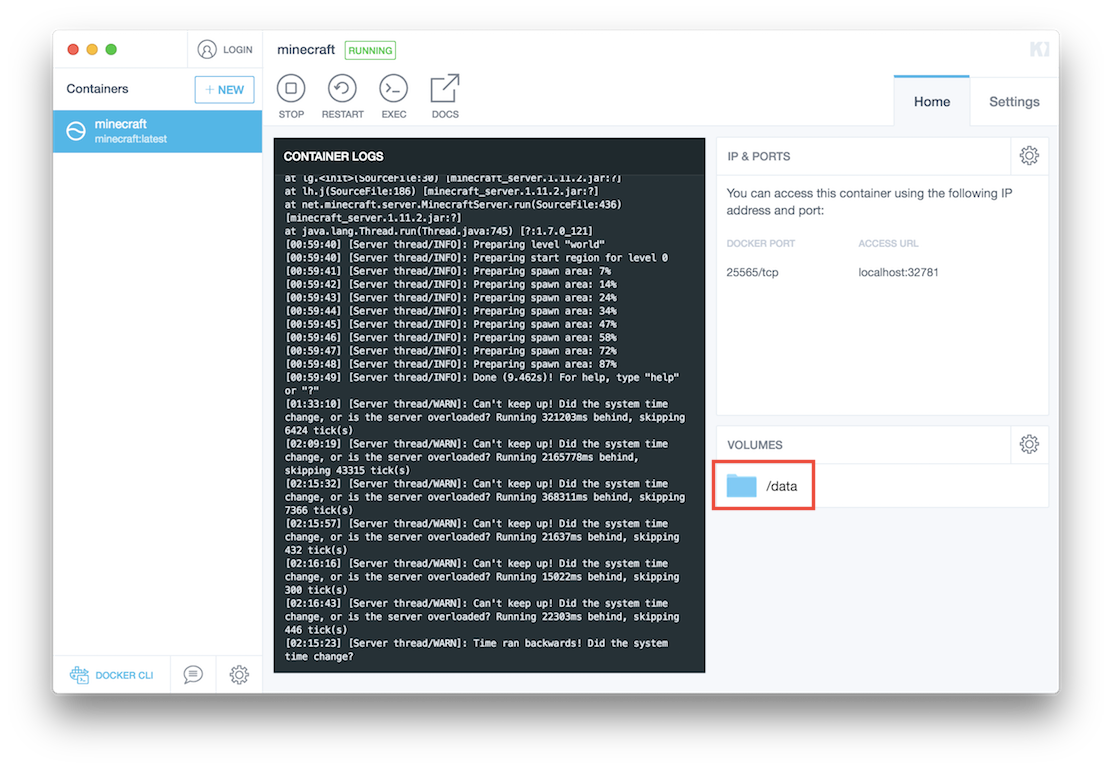
After the image finishes downloading, you see the home screen for the Minecraft container. Your Minecraft server is now up and running inside a Docker container. We’ve marked the IP and port you can use to connect to your Minecraft server in red (your IP and port may be different from what’s shown).

Connect to Minecraft server
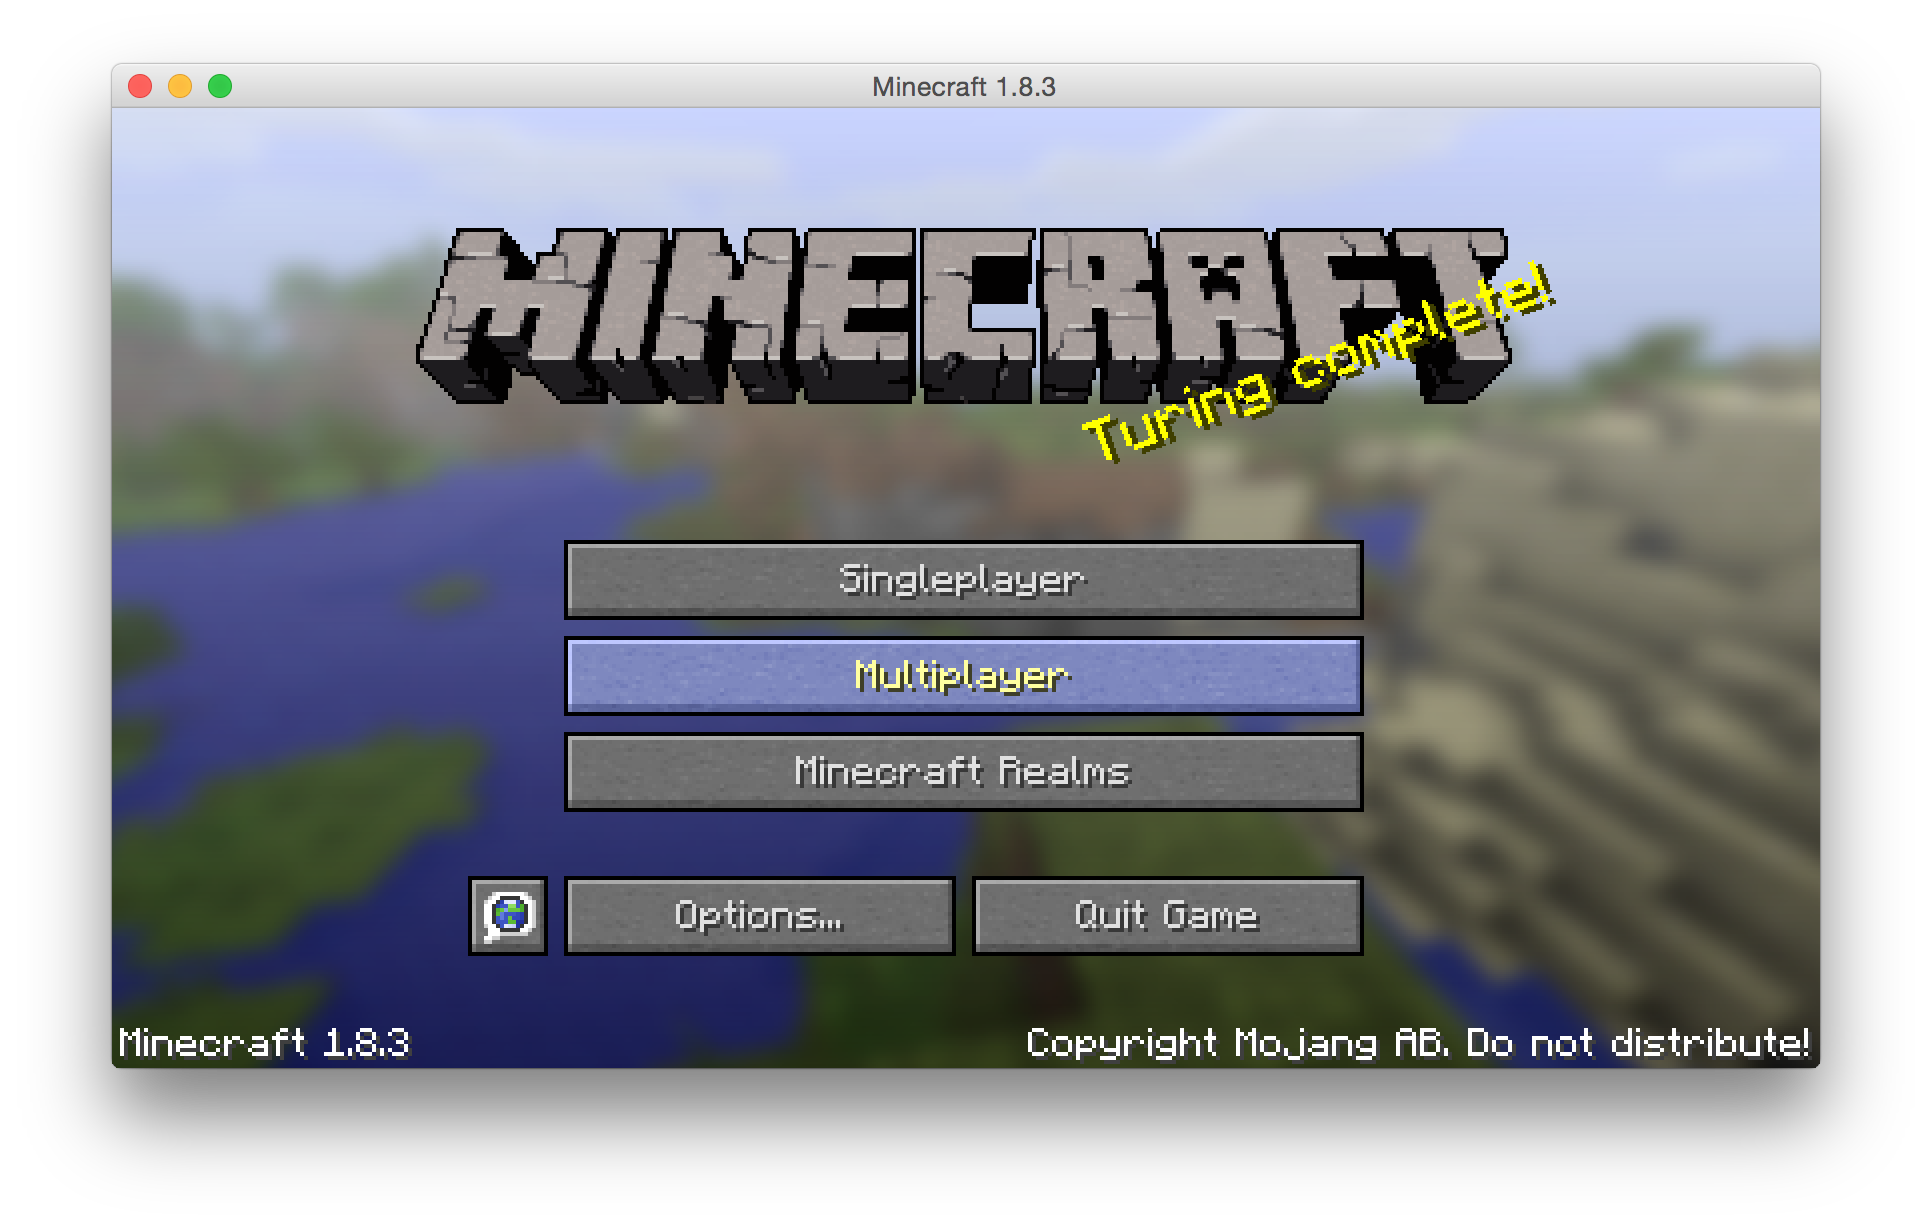
Open your Minecraft client, log in with your Minecraft account and click on the “Multiplayer” button.
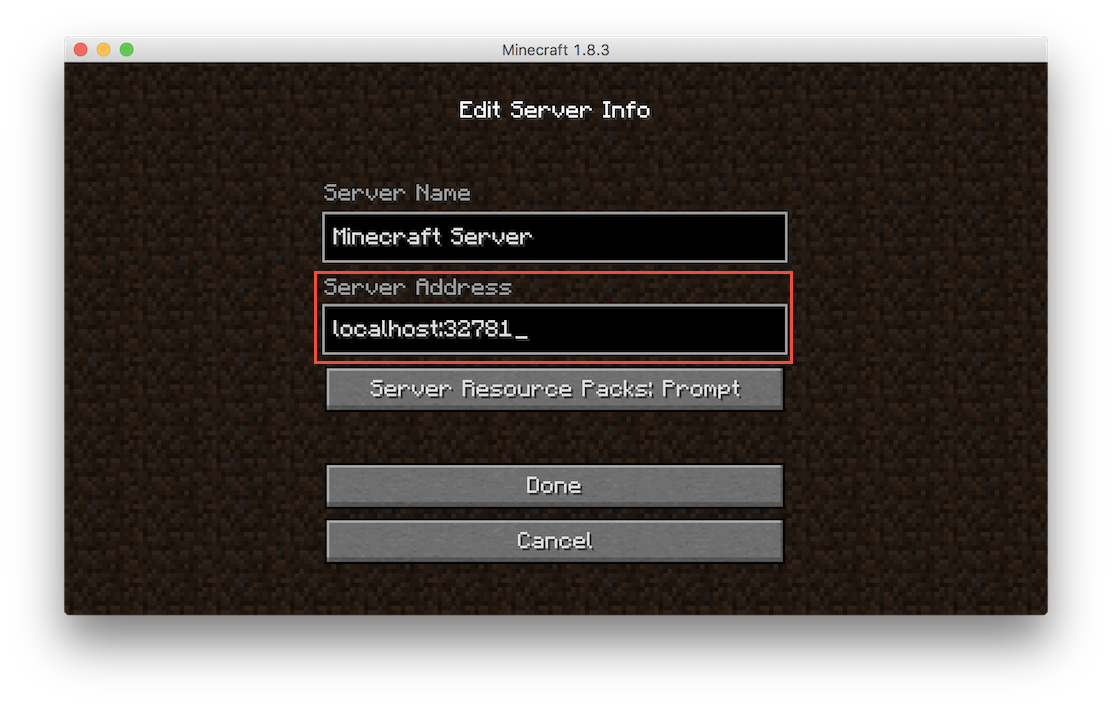
Click the “Add Server” button to add the Minecraft server you want to connect to.
Fill in the “Server Address” text box with the marked IP and port from Kitematic you saw earlier.
Click on the play button to connect to your Minecraft server and enjoy!
Change map using Docker volume
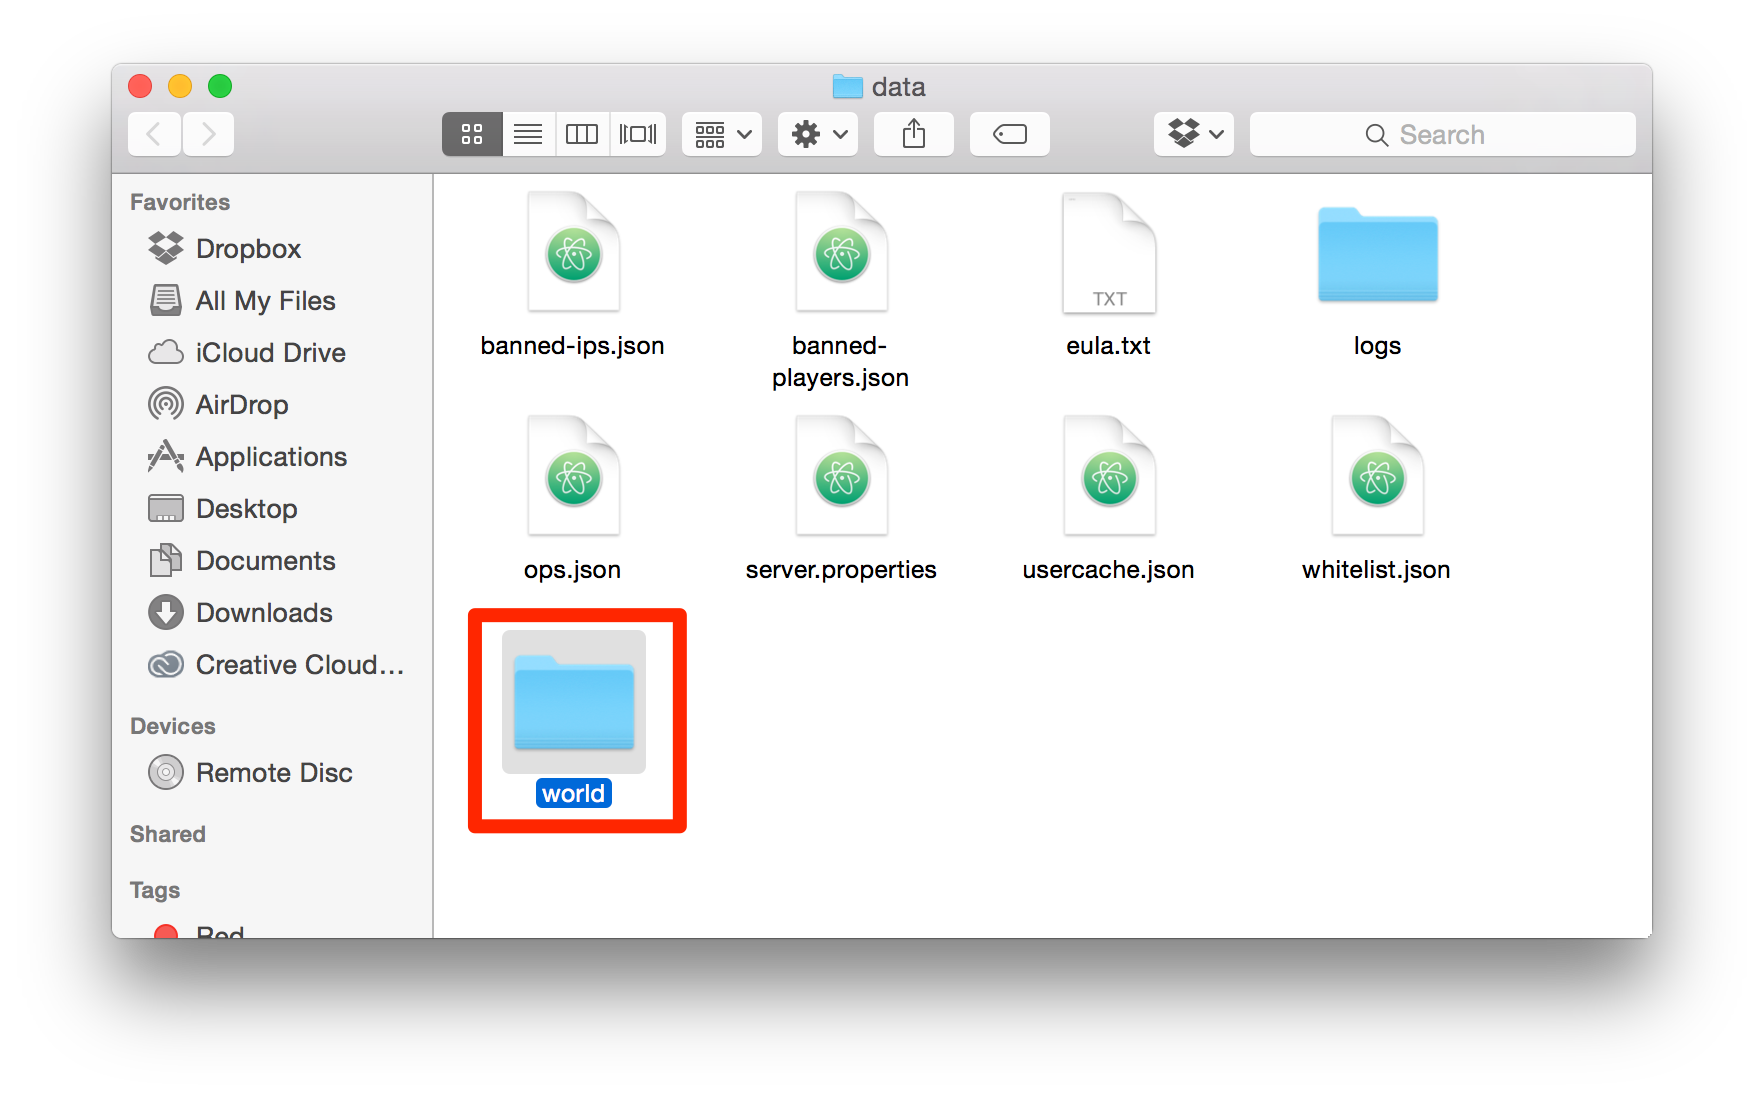
Open the “data” folder from Kitematic (Select “Enable all volumes to edit files via Finder”). We use Docker Volume to map the folder from the Minecraft Docker container onto your computer.
The Finder opens, allowing you to replace your current map with the new one you desire.
Restart your container by clicking the “Restart” button.

Go back to your Minecraft client and join your server. The new map should load.
Next steps
For an example using Kitematic to run Nginx, take a look at the Nginx web server page.