

Chef App for Splunk
Note
This documentation is meant to support existing Chef customers using Analytics.
If you are a new Chef customer, or are looking to gain better insight into your fleet, try Chef Automate. You’ll get a graphical interface and query language that gives you insight into operational, compliance, and workflow events. Download Chef Automate here.
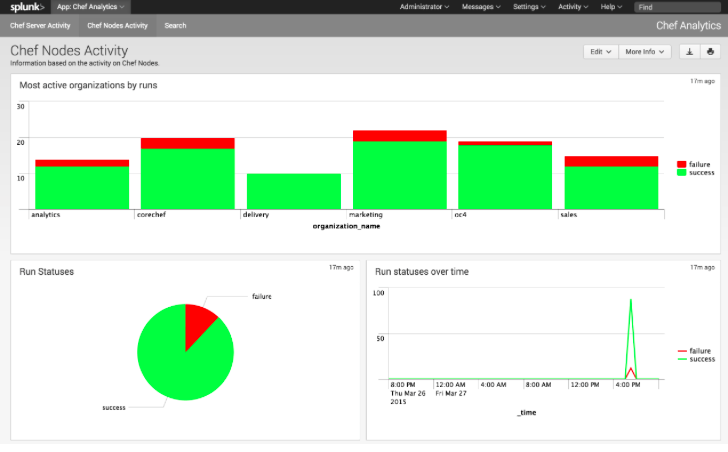
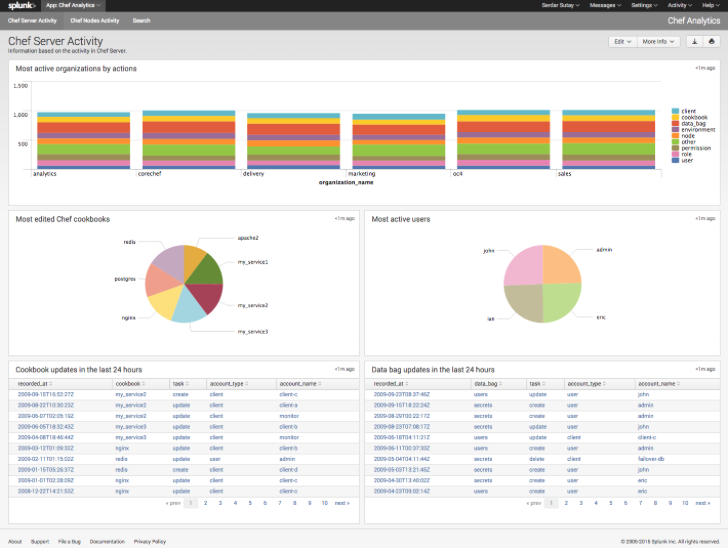
Use the Chef App for Splunk to gather insights about nodes that are under management by Chef. The Chef App for Splunk requires Chef Analytics version 1.1.4 (or later).
Note
Splunk Enterprise is required to use the Chef App for Splunk. Splunk light does not support the installation of packaged Splunk applications.
To set up the Chef App for Splunk, do the following:
Download and install Chef Analytics.
Configure a notification for the Splunk server.
Go to the Notifications tab in the Chef Analytics web user interface.
Click the plus symbol (+) and select Splunk.
Name the configuration. For example:
splunk-notifier.Configure the hostname, port, username, and password for the Splunk server.
The default port is
8089; modify to match your Splunk install.You can choose what data to send to the Splunk server by type. Valid types are
action,run_converge,run_resource,run_control, andrun_control_group. Add the following rules to enable data to be sent to the Splunk server:rules 'Splunk' rule on action when true then notify('splunk-notifier') end rule on run_converge when true then notify('splunk-notifier') end rule on run_resource when true then notify('splunk-notifier') end end
The rules block MUST be exactly as shown. If these rules do not match exactly, the Chef App for Splunk may not work correctly.