

Integrate Chef Automate Workflow with GitHub

Chef Automate’s GitHub integration allows you to use GitHub as the canonical git repository for your projects while benefiting from Chef Automate’s workflow and pipeline automation. When you enable the integration on a project in Chef Automate, you will be able to:
- Review pull requests and make code comments in the GitHub UI.
- Browse code (including in-flight changes in the Chef Automate pipeline) using GitHub.
- Have the target branch (usually master) of your GitHub project repository managed by Chef Automate. When a change is approved in Chef Automate, it will perform the merge in GitHub.
Chef Automate’s GitHub integration is designed for use with GitHub.com and GitHub Enterprise 2.x, and supports connecting a Chef Automate enterprise with a single GitHub server URL.
Note
The Delivery CLI from the latest ChefDK (version 0.19 or higher) must be installed on any workstations that setup and initialize GitHub-integrated projects.
Setting up integration with GitHub
To enable the GitHub integration, you will need:
A Chef Automate user account with
adminrole in the Chef Automate enterprise you wish to connect.The URL for your GitHub instance.
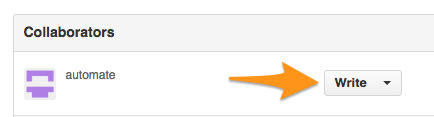
A GitHub user to use as the service account. This user must have full access (read/write) to the projects you wish to add to Chef Automate.
A Personal Access token generated by your GitHub service account.
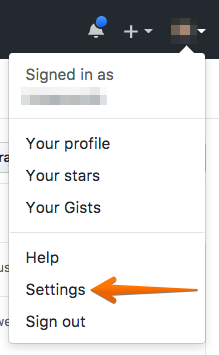
To create a token, sign in to GitHub as your service account.
Select Settings from the menu at the top right.
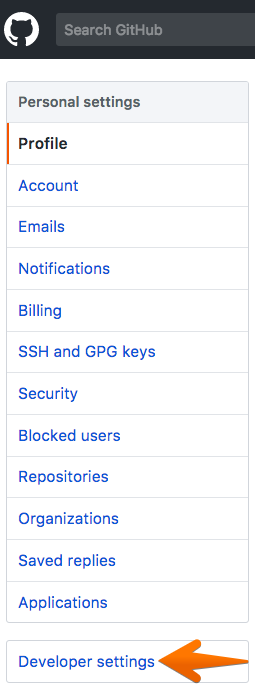
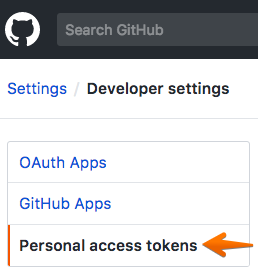
Go to Developer settings and click Personal access tokens.
Click Generate new token.

Fill in a description of the purpose of this token and select the checkboxes for the following permissions:
repo,public_repo,write:public_key, andadmin:repo_hook.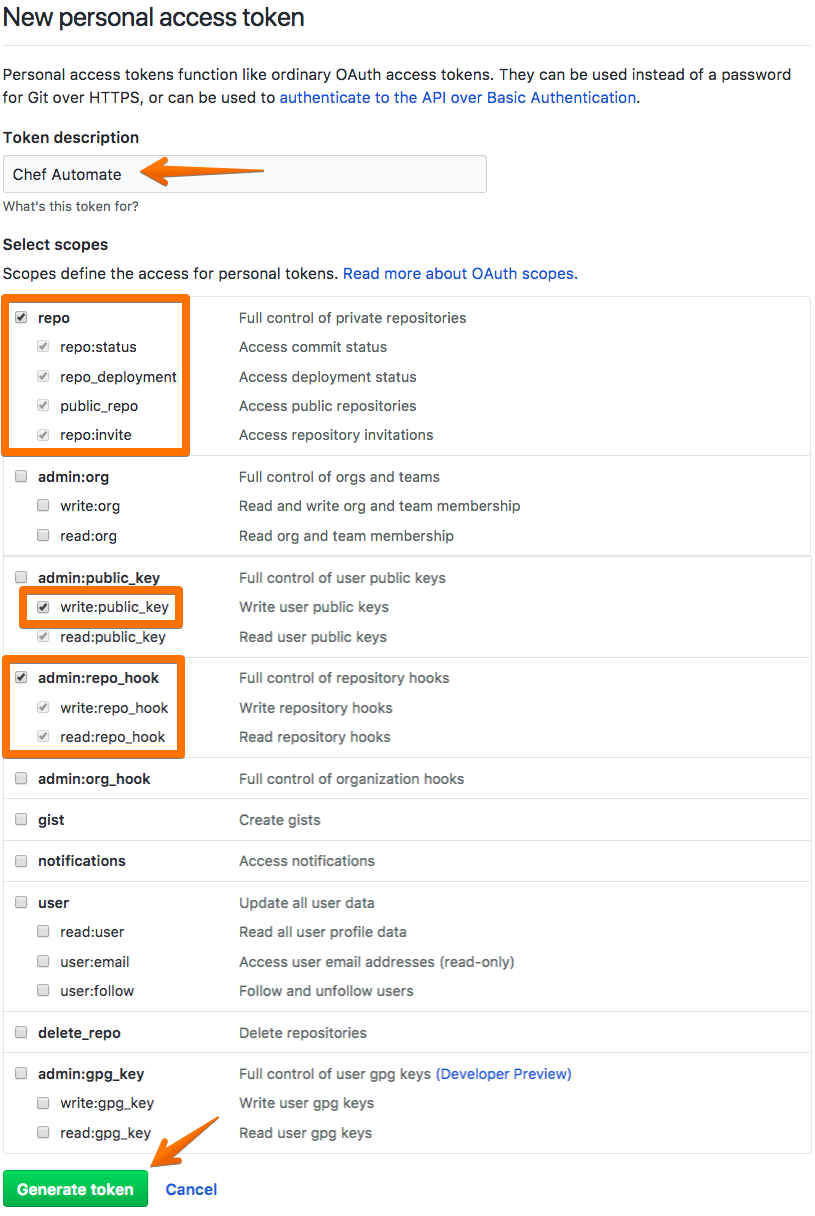
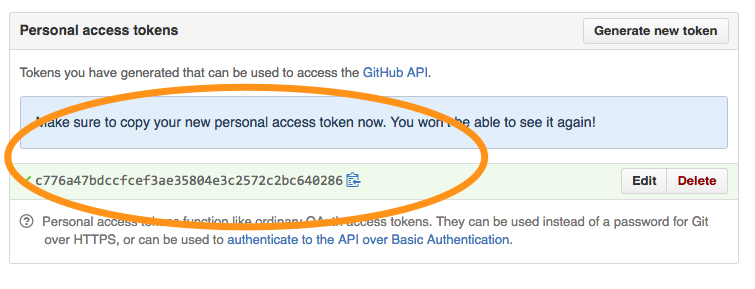
Click Generate token. The next screen will contain the token you need. Make sure to copy it before you leave this screen!
Trusting a Self-Signed SSL Certificate
This procedure is only needed when connecting to GitHub Enterprise, and when your GitHub Enterprise server uses a self-signed SSL certificate.
Note
Even when trusted, self-signed certificates only work when the certificate subject is the same as the host running the service. For example, if the certificate subject is an IP address such as 10.10.10.10, but the GitHub Enterprise server is reachable at github.example.com, the URL https://github.example.com will fail SSL certificate validation while the URL https://10.10.10.10 will pass.
Debian
Log into your Chef Automate Server as root.
Change directory to
ca-certificates.cd /usr/local/share/ca-certificatesCopy your certificate into the
/usr/local/share/ca-certificatesdirectory.openssl s_client -showcerts -connect {your-GitHub-server}:443 </dev/null 2>/dev/null|openssl x509 -outform PEM >{your-GitHub-server}.crt
Update the CA store on the Chef Automate server.
update-ca-certificates
Rhel/Centos 6.x and greater
Log into your Chef Automate Server as root.
Install the
ca-certificatespackage.yum install ca-certificates
Note
You only need to do this once for 6.x servers.
Enable the dynamic CA configuration feature.
update-ca-trust force-enable
Note
You only need to do this once for 6.x servers.
Change directory to the
anchorsdirectory.cd /etc/pki/ca-trust/source/anchors/Copy your certificate into the
/etc/pki/ca-trust/source/anchors/directory.openssl s_client -showcerts -connect {your-GitHub-server}:443 </dev/null 2>/dev/null|openssl x509 -outform PEM >{your-GitHub-server}.crt
Create or update the generated CA certificate bundle files located in the
/etc/pki/ca-trust/extracteddirectory hierarchy.update-ca-trust extract
Associating Chef Automate with your GitHub instance
In Chef Automate’s web UI, click the
Adminbutton in the top navigation.From the left navigation, click
SCM Setup.Click the
GitHubtab.Fill out the following fields.
GitHub URL- The URL for your GitHub instance.GitHub Username- The username of the service account that Chef Automate will use to interact with GitHub.GitHub Token- Token generated by the service account on GitHub.
Submit the form.
Updating the integration with GitHub
If you need to change the GitHub credentials, follow these steps:
- In Chef Automate’s web UI, click the
Adminbutton in the top navigation. - From the left navigation, click
Scm Setup. - Click the
GitHubtab. - Correct the appropriate information.
- Click the
Updatebutton.
Creating a new GitHub-integrated project
You can repeat these steps for each GitHub project you want to add to Chef Automate.
To begin, you will need:
- A project repository in GitHub with at least one commit.
- A service account used by Chef Automate that has full access to your GitHub repository.
- Your teams set up with read-only access to this repository. Chef Automate will manage creation of pull requests and merging of pull requests.
Initializing a new GitHub project in Chef Automate
Create a local clone of the project from GitHub and
cdinto it.Create a
.delivery/cli.tomlusingdelivery setup:delivery setup --ent=$AUTOMATE_ENTERPRISE --org=$AUTOMATE_ORG --user=$AUTOMATE_USER_NAME --server=$AUTOMATE_SERVER
If the desired default pipeline is not master, manually edit
.delivery/cli.tomlto reflect the desired pipeline.Start the initialization process by running:
delivery init --github $GITHUB_ORGANIZATION --repo-name $REPOSITORY_NAME
By default, Chef Automate will use the current directory name as the new project name. If you want to name the project something else, you may specify the project name as an argument (
--project=$AUTOMATE_PROJECT_NAME).After importing your code, this command generates a .delivery/config.json file, creates a build cookbook, and submits a change to Chef Automate that initializes a pipeline for the project. Your browser will open to the change in Chef Automate. At this point, you should be able to see a corresponding pull request in GitHub.
Note
You may also specify a different pipeline than the default (
master) by specifying the argument--pipeline=$PIPELINE; however, this will not update the.delivery/cli.tomlfile.
Multiple pipelines
If multiple pipelines are desired:
- Push the desired branch to the Chef Automate server using
git push delivery $BRANCH_NAME. - Navigate to the project’s page (
/$ENT_NAME/organizations/$ORG_NAME/projects/$PROJECT_NAME) in the Chef Automate web UI and click thePipelinestab. - Click
Add A New Pipelineon the top of the page. - Give the new pipeline a descriptive name and input the base branch.
Integrating an existing project with GitHub
You will need:
- A project repository in GitHub with at least one commit.
- A service account used by Chef Automate that has full access to your GitHub repository.
- Your teams set up with read-only access to this repository. Chef Automate will manage creation of pull requests and merging of pull requests.
Do the following steps:
- In Chef Automate’s web UI, click the
Workflowbutton in the top navigation. - Select
Workflow Orgsfrom the left navigation. - Click the organization you want to add a project to.
- Click the pencil button of the project you wish to update.
- Click the
GitHubtab. - Fill in the project key and repository name.
- Click
Save & Close.
Updating GitHub information for a project
- In Chef Automate’s web UI, click the
Workflowbutton in the top navigation. - Select
Workflow Orgsfrom the left navigation. - Click the organization you want to add a project to.
- Click the pencil button of the project you wish to update.
- Click the
GitHubtab. - Update your project key and/or repo name with updated information.
- Click
Save & Close.
Removing GitHub integration from an existing project
- Merge or close all open changes for the project.
- In Chef Automate’s web UI, click the
Workflowbutton in the top navigation. - Select
Workflow Orgsfrom the left navigation. - Click the organization you want to add a project to.
- Click the pencil button of the project you wish to update.
- Click the
Chef Deliverytab. - Click
Save & Close.
Removing GitHub integration from Chef Automate
- Remove GitHub integrations for existing projects.
- In Chef Automate’s web UI, click the
Adminbutton in the top navigation. - From the left navigation, click
Scm Setup. - Click the
GitHubtab. - Click the
Remove Linkbutton.
Chef Automate workflow with GitHub
This section describes the setup and workflow that a member of a team would use to interact with a project using Chef Automate’s GitHub integration. Here we assume that the initial project creation, import, and pipeline setup has already occurred.
Configure your Delivery CLI and clone your project’s code
In your command shell, create or navigate to a directory where you will store project repositories. Use
delivery setupwith arguments as shown below to create a.delivery/cli.tomlfile:delivery setup --ent=$AUTOMATE_ENTERPRISE --org=$AUTOMATE_ORG --user=$AUTOMATE_USER --server=$AUTOMATE_SERVER
Create a local clone of the project repository.
delivery clone $PROJECTNote
If you clone from GitHub instead (or make use of a pre-existing clone), you will need to add a
deliveryremote. The Chef Automate clone URL can be found on the project’s page in the Chef Automate UI. To create the remote, run the following:git remote add delivery $AUTOMATE_CLONE_URL
Creating a Change (Pull Request)
- Create and check out a topic branch for your change, based on the current state of your project’s pipeline (usually ‘master’). For example,
git checkout -b great-feature. - Make and commit changes to your project as you normally do.
- Submit your change to Chef Automate with the command
delivery review. If you desire to target a pipeline other than the default one, add the pipeline flag--pipeline=$PIPELINE. This command will output a URL to view the details and progress of the change through Chef Automate; the Verify phase will begin automatically and a corresponding Pull Request will be opened in GitHub.
Code Review
You may conduct a code review using either Chef Automate or GitHub; however, the merging of a pull request is handled by Chef Automate and occurs when a change in Chef Automate is approved.
Warning
Do not merge the pull request from within GitHub.
To perform code review using Chef Automate:
- Use the URL created by
delivery reviewto go directly to the change, or browse to the change from the Chef Automate Dashboard or from the link provided in the first comment of your GitHub pull request. - Click the
Reviewtab. - Browse the changes and make comments.
Approving a Change (Merging a Pull Request)
When the Verify phase has passed in Chef Automate and the code has been reviewed and is ready to be merged, approve the change in Chef Automate; the pull request will be merged and closed in GitHub. The feature branch will also be deleted in GitHub.
- Use the URL created by
delivery reviewto go directly to the change, or browse to the change from the Delivery Dashboard or from the link provided in the first comment of your GitHub pull request. - Click the
Reviewtab. - Click
Approve.
Deleting a Change (Declining a Pull Request)
When the Verify phase has passed in Chef Automate and the code has been reviewed and it is decided the change should never be approved, delete the change in Chef Automate; the pull request will be declined and closed in GitHub. The feature branch will also be deleted in GitHub.
- Use the URL created by
delivery reviewto go directly to the change, or browse to the change from the Chef Automate Dashboard or from the link provided in the first comment of your GitHub pull request. - Click the
Reviewtab. - Click
Delete.