Users

The following tasks are available for user management in Chef server:
- Creating users
- Editing a user’s profile
- Changing a password
- Recovering a password
- Regenerating a private key
- Viewing a user’s profile
chef-server-ctl
The Chef server includes a command-line utility named chef-server-ctl. This command-line tool is used to start and stop individual services, reconfigure the Chef server, run chef-pedant, and then tail Chef server log files.
Use the user-create, user-delete, user-edit, user-list and user-show subcommands to manage users.
org-create
The org-create subcommand is used to create an organization. (The validation key for the organization is returned to STDOUT when creating an organization with this command.)
Syntax
This subcommand has the following syntax:
$ chef-server-ctl org-create ORG_NAME "ORG_FULL_NAME" (options)
where:
- The name must begin with a lower-case letter or digit, may only contain lower-case letters, digits, hyphens, and underscores, and must be between 1 and 255 characters. For example:
chef. - The full name must begin with a non-white space character and must be between 1 and 1023 characters. For example:
"Chef Software, Inc.".
Options
This subcommand has the following options:
-a USER_NAME,--association_user USER_NAME- Associate a user with an organization and add them to the
adminsandbilling_adminssecurity groups. -f FILE_NAME,--filename FILE_NAME- Write the ORGANIZATION-validator.pem to
FILE_NAMEinstead of printing it toSTDOUT.
org-delete
The org-delete subcommand is used to delete an organization.
Syntax
This subcommand has the following syntax:
$ chef-server-ctl org-delete ORG_NAME
org-list
The org-list subcommand is used to list all of the organizations currently present on the Chef server.
Syntax
This subcommand has the following syntax:
$ chef-server-ctl org-list (options)
Options
This subcommand has the following options:
-a,--all-orgs- Show all organizations.
-w,--with-uri- Show the corresponding URIs.
org-show
The org-show subcommand is used to show the details for an organization.
Syntax
This subcommand has the following syntax:
$ chef-server-ctl org-show ORG_NAME
org-user-add
Warning
Early RC candidates for the Chef server 12 release named this command org-associate. This is the same command, with the exception of the --admin flag, which is added to the command (along with the rename) for the upcoming final release of Chef server 12.
The org-user-add subcommand is used to add a user to an organization.
Syntax
This subcommand has the following syntax:
$ chef-server-ctl org-user-add ORG_NAME USER_NAME (options)
Options
This subcommand has the following options:
--admin- Add the user to the
adminsgroup.
org-user-remove
Warning
Early RC candidates for the Chef server 12 release named this command org-disociate. This is the same command, but renamed for the upcoming final release of Chef server 12.
The org-user-remove subcommand is used to remove a user from an organization.
Syntax
This subcommand has the following syntax:
$ chef-server-ctl org-user-remove ORG_NAME USER_NAME (options)
user-create
The user-create subcommand is used to create a user. (The validation key for the organization may be returned to STDOUT when creating a user with this command.)
Syntax
This subcommand has the following syntax:
$ chef-server-ctl user-create USER_NAME FIRST_NAME [MIDDLE_NAME] LAST_NAME EMAIL 'PASSWORD' (options)
Options
This subcommand has the following options:
-f FILE_NAME,--filename FILE_NAME- Write the USER.pem to a file instead of
STDOUT.
user-delete
The user-delete subcommand is used to delete a user.
Syntax
This subcommand has the following syntax:
$ chef-server-ctl user-delete USER_NAME
user-edit
The user-edit subcommand is used to edit the details for a user. The data will be made available in the $EDITOR for editing.
Syntax
This subcommand has the following syntax:
$ chef-server-ctl user-edit USER_NAME
user-list
The user-list subcommand is used to view a list of users.
Syntax
This subcommand has the following syntax:
$ chef-server-ctl user-list (options)
Options
This subcommand has the following options:
-w,--with-uri- Show the corresponding URIs.
user-show
The user-show subcommand is used to show the details for a user.
Syntax
This subcommand has the following syntax:
$ chef-server-ctl user-show USER_NAME (options)
Options
This subcommand has the following options:
-l,--with-orgs- Show all organizations.
Chef Manage
This section is an alphabetical list of the various user-specific tasks that can be performed when using Chef management console.
Change Password
To change a user’s password:
Open the Chef management console.
From the drop-down list next to your username, select My Profile.
Under Users, click Change Password.
In the Change Password, enter the old password and then the new password.
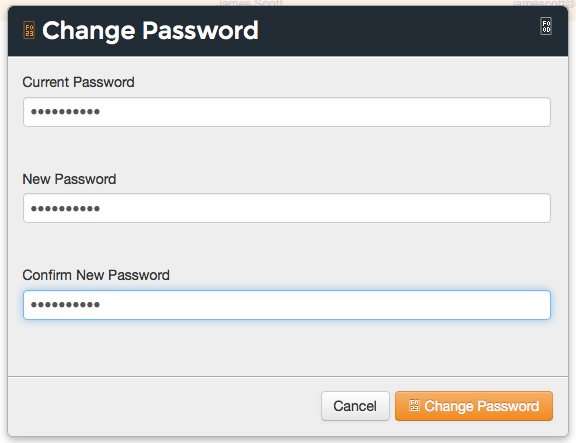
When finished, click Change Password.
Invite a User
To invite a user to an organization:
Open the Chef management console.
Click Administration.
Click Organizations.
Click Invite User.
In the Invite User dialog box, enter the Chef server user name for the user to be invited, and then click the Invite button:
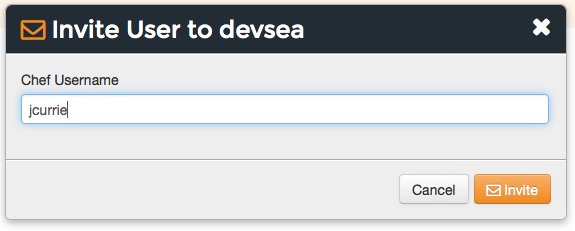
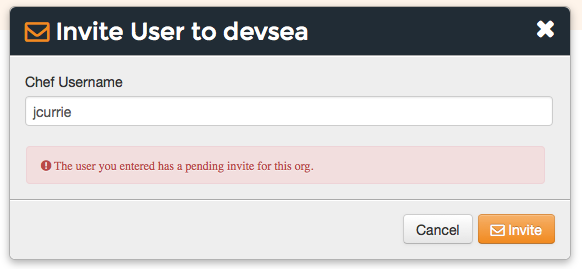
After the user accepts the invitation, they will be a member of this organization.
Cancel invite for User
Canceling a pending invite for a user can currently be completed using knife:
As a user that is a member of the
adminsgroup, replaceORGNAMEwith your ownORGNAMEand run:knife raw 'association_requests' -s https://api.opscode.com/organizations/ORGNAMEYou may see an empty list or you may see a populated list of invites. No invites looks like this
[

]
A single invite looks like this
[
  {
    "id": "f6240e73d35b1e3ce3238ab8a5131ccb",
    "username": "testuser"
  }
]
To cancel the above pending invite you would run
knife raw -m DELETE 'association_requests/f6240e73d35b1e3ce3238ab8a5131ccb' -s https://api.opscode.com/organizations/ORGNAME
Leave Org
To leave an organization:
Open the Chef management console.
Click Administration.
Click Organizations.
Click Leave Organization.
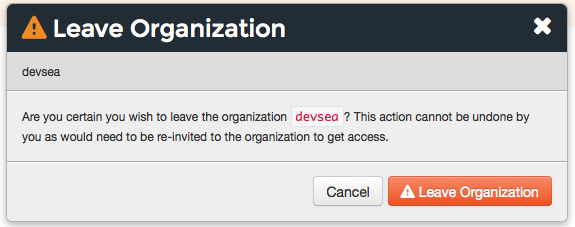
In the Leave Organization dialog box, confirm that you want to leave the organization, and then click the Leave Organization button:
Remove User from Org
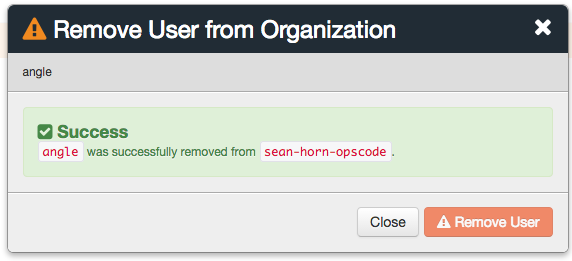
To remove a user from an organization:
Open the Chef management console.
From the drop-down list next to your username, select My Profile.
Under Users, click Leave Organization.
In the Leave Organization dialog box, confirm that the key should be regenerated and click the Leave Organization button:

Remove Admin User from Org
Removing a member of the admins group from an organization requires the user to be removed from the admins group before they can be removed from the organization:
Open the Chef management console.
Click Administration.
Click Groups.
Select the Groups group.
Select a user to be removed from the Groups group:

Click Remove.

Click Users.
Select a user.
Click Remove from Organization.
Reset User Key
To reset a user’s validation key:
Open the Chef management console.
From the drop-down list next to your username, select My Profile.
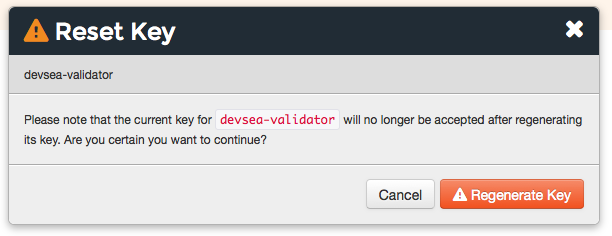
Under Users, click Reset Key.
In the Reset Key dialog box, confirm that the key should be regenerated and click the Regenerate Key button:
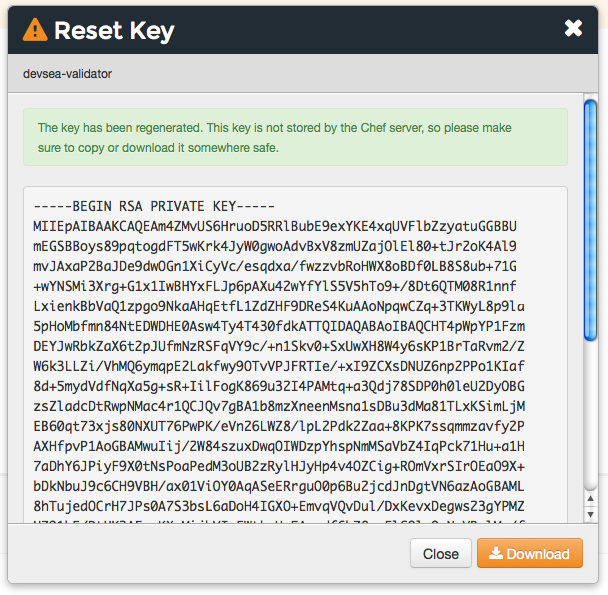
In the Reset Key dialog box, copy the key directly from the dialog box or click the Download button to download the key to your local machine:
View User Account Details
To view user account settings:
- Open the Chef management console.
- From the drop-down list next to your username, select My Profile.

