

Scanner
Automate allows you to define the configuration and security needs of your systems with compliance profiles. Use the compliance scanner to put the profile into action with an ad-hoc or scheduled scan. The Automate compliance scanner lets you add and edit nodes and scan jobs using the user interface.
This Compliance Scanner is available in Chef Automate 1.8.3 or later; it can also be enabled in Chef Automate 1.7.114 by typing beta anywhere in the UI, and selecting the feature via the popup that appears.
Note
Credentials are required to perform a compliance scan. See Credentials.
Note
Profiles must be installed from the Profile Store before performing a compliance scan. See Profile Store.
Scan Jobs
View and delete scan job results.

- Jobs: Scan jobs are listed by name and can be sorted alphabetically
- Nodes: The number of nodes assigned to the scan job.
- Last Scan: Time elapsed since the scan job was last run. Scan jobs can be sorted chronologically.
- Status: The scan job is either not yet run, running, completed, or failed.
failedmeans that the job could not run on the selected nodes. Scans can be sorted by job status. - Report: Compliance report allows view your compliance report filtered by the selected scan job. For more information, see Reporting.
- Edit: Change the scan job name, schedule, add or remove nodes, and add or remove compliance profiles.
- Delete the scan job.
Create a Job
If you have not already added compliance profiles to your user account from the Profile Store or uploaded custom profiles, you will need to move to the Profile Store and complete this step.
As of Chef Automate 1.7.114, you have the option of creating ad-hoc and scheduled compliance scans. Ad-hoc scans begin immediately after creation. In contrast, a scheduled scan can be set to begin at a later date and time. Scheduled scans may also repeat every minute, hour, day, week, or month for a period of time that you can specify.
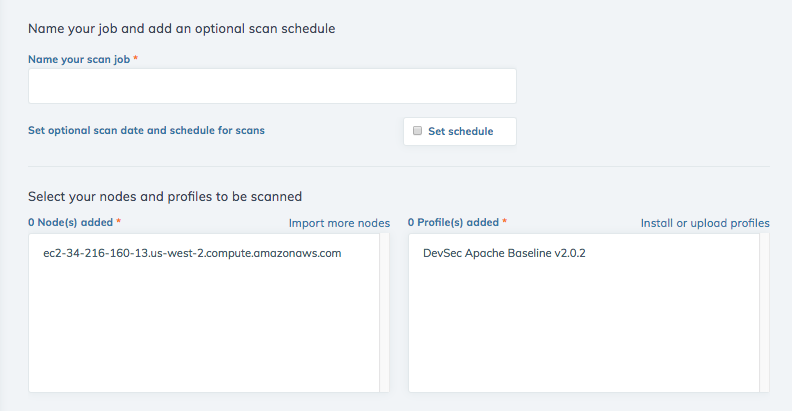
- Select the Create New Job button to make a new scan job.
- From the Scan Job Creation form, enter a name for your new job.(Required)
- Toggle the
Set Scheduleoption to determine a scan date and time. Toggle theRepeat Everyoption to define the repeat cycle. Toggle theEnd Timeoption to set a date and time for ending repeated scans. The date picker will consider “end of day” in UTC. (Optional) - Select one or more nodes that will be scanned in this job from the list of nodes.(Required)
- Select one or more profiles to run against the nodes. (Required)
- Select the Create Job button to save and launch the scan job.
Nodes
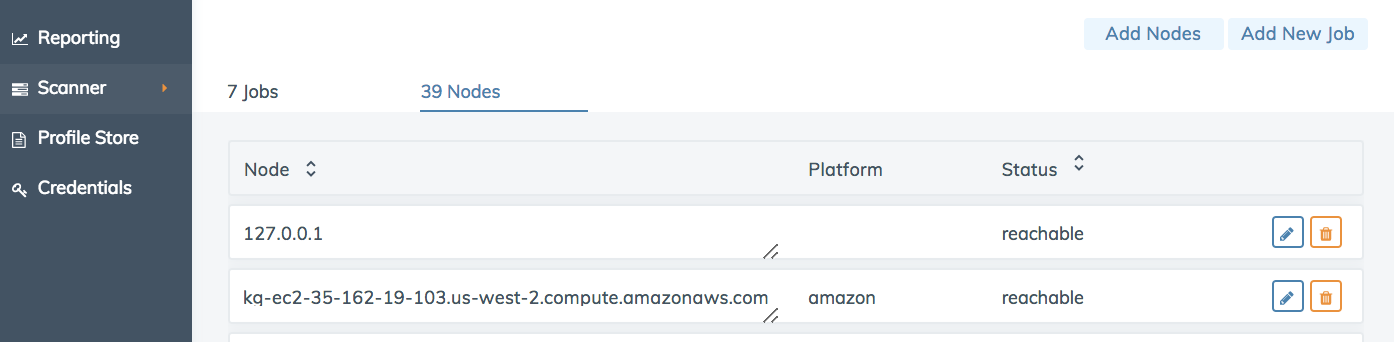
- Nodes: The name of the node and any prefix assigned to it. Nodes can be sorted alphabetically.
- Platform: The platform running on the node, such as Amazon Linux, RHEL, SUSE, Ubuntu, or Windows. Platforms can be sorted alphabetically.
- Status: The node is either reachable or unreachable. Nodes can be sorted by status.
- Edit: Rename, add nodes, and change credentials.
- Delete the node.
Add Nodes
From the Automate Compliance Scanner view select the Add Nodes button, which opens a form titled “Enter node details to add nodes”.
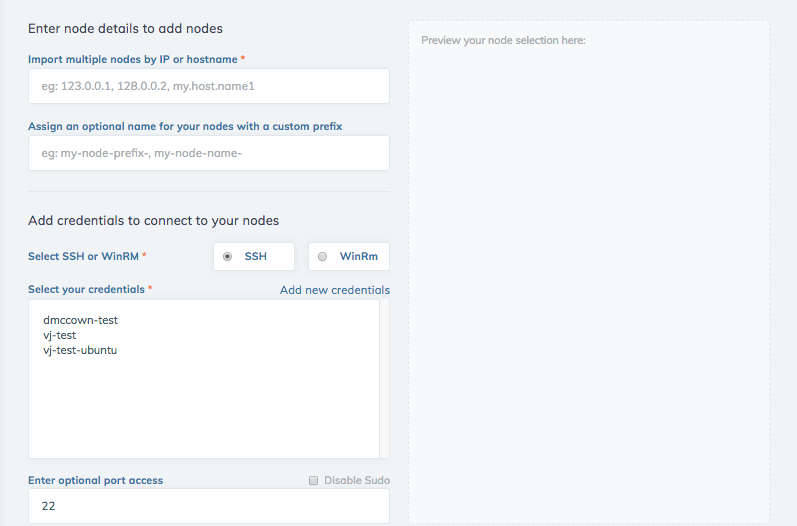
- Enter the Public DNS or Public IP for one or more nodes titled “Import multiple nodes by IP or hostname.” Multiple nodes must be separated by a comma or space. (Required)
- Add an optional a prefix tag to the nodes created using this form. Prefixes are reusable and helpful in retrieving groups of nodes. (Optional)
- In the “Add credentials to connect your nodes” section of the form, select the type of credential, either SSH or WinRm, that you will use to connect to your nodes. (Required)
- Select credentials that you will use to access your nodes. If you need to add a new credential, select the “Add new credentials” text, which will direct you to the Credentials view. Navigating away from the Add Nodes view will result in the loss of unsaved nodes.(Required)
- Customize the default port access setting, if needed. (Optional)
- Disable the
sudosetting, if needed. (Optional) - Nodes will appear in the “Preview” section on the right side of the form as they are entered.
- Select the Add Nodes button above the form button to finish adding nodes. The button display changes with the number of nodes added.
Return to the Overview page and move to the Nodes view to examine your new nodes. These nodes are now available for use with jobs.