Custom builds for Android
Godot provides the option to use custom build Android templates. Instead of using the already pre-built template that ships with Godot, an actual Android Java project gets installed into your project folder. Godot will then build it and use it as an export template every time you export the project.
There are some reasons why you may want to do this:
- Modify the project before it’s built.
- Add external SDKs that build with your project.
Configuring the custom build is a more or less straightforward process, but it may take a while to get used to how the Android SDK works.
Instructions will be provided as detailed as possible to do this process.
Set up the custom build environment
Go to the Project menu, and install the Custom Build template:
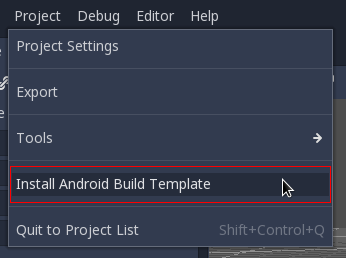
Make sure export templates are downloaded. If not, this menu will help you download them.
This will create an Gradle-based Android project in res://android/build and
place a .gdignore file in res://android so the Godot filesystem ignores
this folder. Editing these files is not needed unless you want to create
your own add-ons, or you really need to modify the project.
Install the Android SDK (command-line version)
These are the steps for installing the Android SDK using command line. The advantage of this approach is the simplicity and small download/install size. It can be more challenging though. The Android Studio approach is easier, but it requires downloading and installing Android Studio (which may require more than 1 GB of storage).
Install a JDK
The Android SDK doesn’t come with Java, so it needs to be installed manually. You need to install a Java SDK (not just the runtime or JRE). OpenJDK 8 is recommended. Oracle JDK 8 should also work. Later versions may not work for Android development.
Download the command-line tools
Go to the Android Studio download page. To save disk space, you don’t want the full IDE, so don’t download it.
Note
If you do want Android Studio, read further down for instructions for doing the same using Android Studio.
Look on that page for the Command line tools only section. Currently, they are listed under Download Options. Scroll down a bit until you see them.

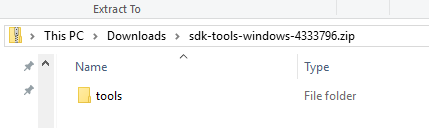
Download the ZIP file for your platform, there will be a single tools
folder inside:
This may appear a little confusing, but be sure to follow these instructions carefully:
Create a new folder anywhere you want named android-sdk (it must be
an empty directory). On Windows, the following path is usually good enough:
C:\users\<yourusername>\Documents\android-sdk
Unzip the Android SDK ZIP file you just downloaded there. The only thing in the
directory you created in the previous step should be the tools folder with
its contents inside, like this:
android-sdk/
android-sdk/tools/
android-sdk/tools/allthefiles
Accepting the licenses
To be able to use the Android SDK tools, Google requires you to accept its licenses.
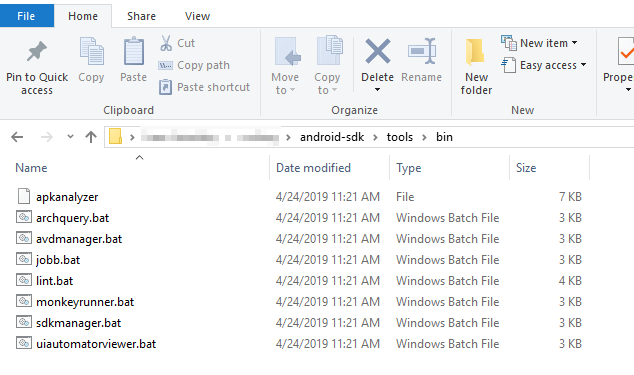
To do this, the sdkmanager must be executed from the command line with a
special argument. Navigate to the tools/bin directory inside the SDK folder
(instructions provided for Windows users, as Linux and macOS users are expected
to understand how command line navigation works):
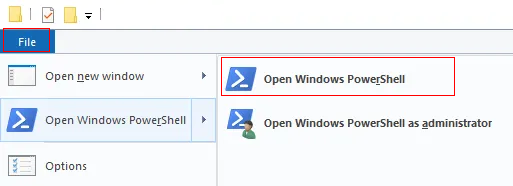
Then open a command line window:
In there, run sdkmanager --licenses:

This will ask you to accept several licenses, just write y and press Enter
on every of them until it’s done.
Afterwards, install the platform tools (this is required to install adb):

Generating the keystore
Once the platform tools are installed, the last step is to generate a debug keystore (this is needed to build). Go up two folders by writing:
cd ..\..
(or open a new shell in the android-sdk folder).
And you need to input the following line (on Linux and macOS, this should work out of the box, for Windows there are further instructions below):
keytool -keyalg RSA -genkeypair -alias androiddebugkey -keypass android -keystore debug.keystore -storepass android -dname "CN=Android Debug,O=Android,C=US" -validity 9999
On Windows, the full path to Java should be provided. You need to add & at
the beginning of the line if you use PowerShell; it’s not needed for the regular
cmd.exe console.
To make it clearer, here is an capture of a line that works on PowerShell (by
adding & and the full Java path before keytool.exe). Again, keep in mind that you
need Java installed:
(right-click and open the image in a new tab if this appears too small)
Setting up Godot
Go to the Editor Settings and set up a few fields in Export > Android. Make sure they look like the following:
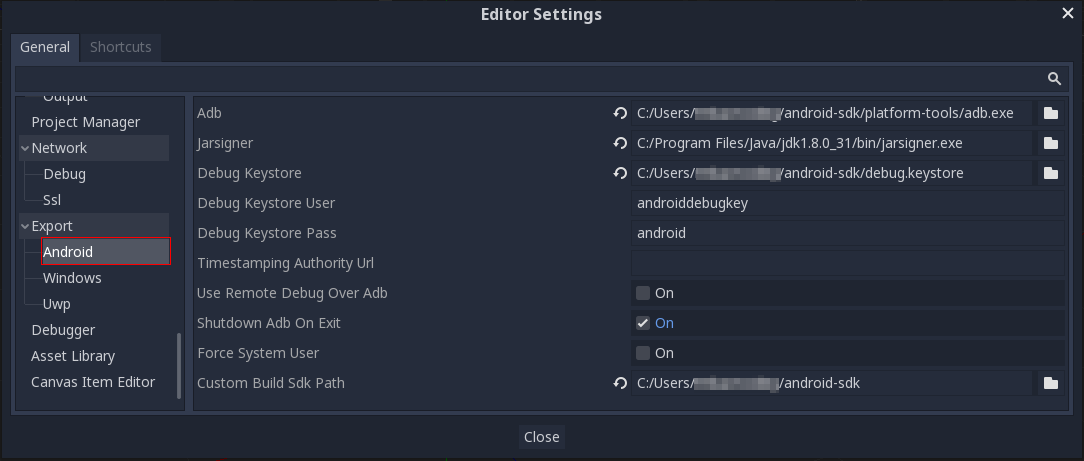
(right-click and open the image in a new tab if this appears too small)
As it can be seen, most paths are inside either the android-sdk folder you
originally created, or inside the Java install. For Linux and macOS users,
jarsigner is often located in /usr/bin.
With this, you should be all set.
Install the Android SDK (Android Studio)
If you just finished installing the SDK via the command-line tools, feel free to skip this section entirely. The Android Studio path is easier, but it takes up more disk space. It’s also useful if you plan to develop Godot for Android (modify the Java source code) or if you plan to develop add-ons.
Download and install Android Studio
Download the latest version of Android Studio. When installing, pay attention to where the android-sdk directory is created.
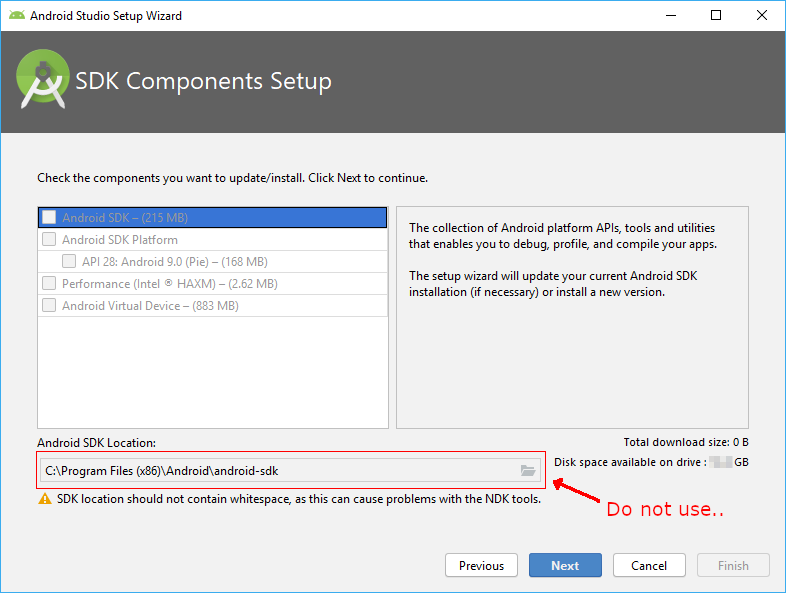
Note
This is funny, the path it proposes by default contains whitespace (and complains about it). It must be changed.
In any case, it’s better to select a different path inside your user folders. The recommended one is usually:
C:\Users\<yourusername>\Documents\android-sdk
Replace yourusername by your actual user name. Once it’s correct, select from the list above in the same screen:
- Android SDK
- Android SDK Platform
The rest are not needed, because the build system will fetch them itself. After selecting them, go on with the installation.
Generating the keystore
Go to the folder where you installed android-sdk in the previous step, use File
Explorer and open a command line tool there:
The actual command line to type is the following. On Linux and macOS, it should work out of the box, but on Windows, it needs additional details (keep reading afterwards).
keytool -keyalg RSA -genkeypair -alias androiddebugkey -keypass android -keystore debug.keystore -storepass android -dname "CN=Android Debug,O=Android,C=US" -validity 9999
On Windows, the full path to Java should be provided (and & needs to be
added at the beginning on the line if you use PowerShell, it’s not needed for
the regular cmd.exe console). Don’t worry, at least by using Android Studio
on Windows, Java comes bundled with it.
To make it clearer, here is a screen capture of a line that works on PowerShell
(by adding & and the full Java Path to keytool.exe; remove & if you
use cmd.exe). It uses a path to the Java version that comes with Android
Studio:

(right-click and open the image in a new tab if this appears too small)
Setting up Godot
Go to the Editor Settings and set up a few fields in Export > Android. Make sure they look like the following:
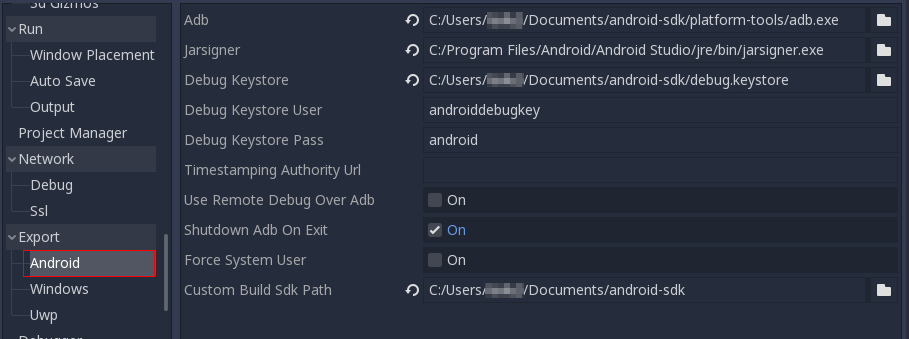
(right-click and open the image in a new tab if this appears too small)
As it can be seen, most paths are inside either the android-sdk folder you
originally created, or inside the Java install. For Linux and macOS users,
jarsigner is often located in /usr/bin.
With this, you should be all set.
Enabling the custom build and exporting
When setting up the Android project in the Project > Export dialog, Custom Build needs to be enabled:
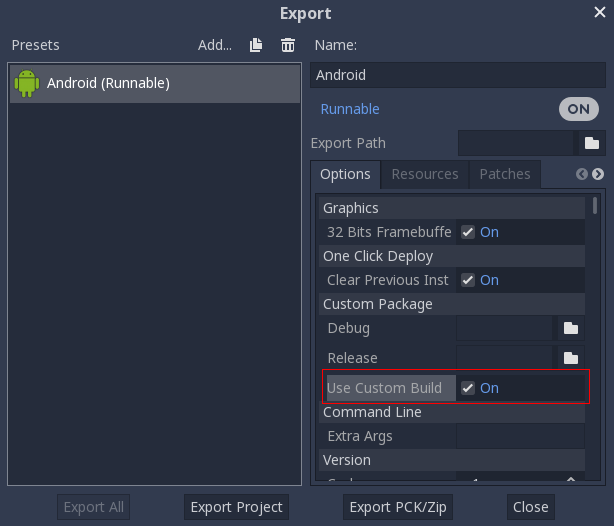
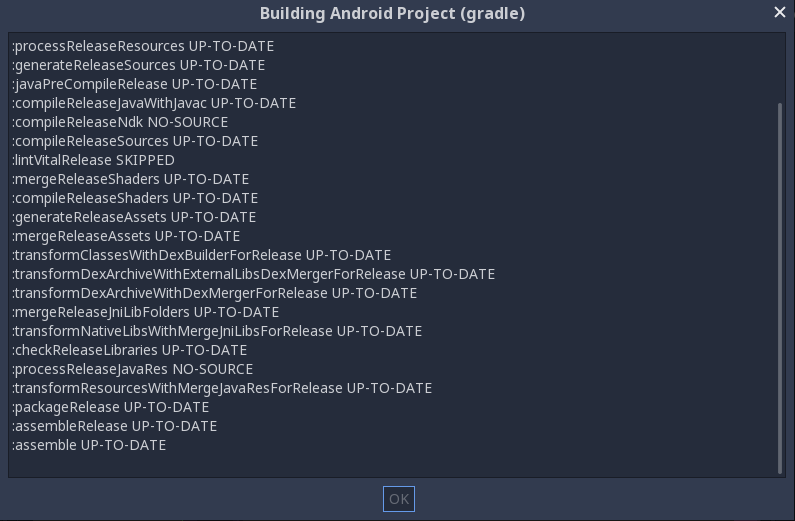
From now on, attempting to export the project or one-click deploy will call the Gradle build system to generate fresh templates (this window will appear every time):
The templates built will be used automatically afterwards, so no further configuration is needed.