BBCode in RichTextLabel
Introduction
Label nodes are great for displaying basic text, but they have limits. If you want to change the color of the text, or its alignment, that change affects all of the text in the Label node. You can’t have only one part of the text be one color, or only one part of the text be centered. To get around this limitation you would use a RichTextLabel.
RichTextLabel allows the display of complex text markup in a Control. It has a built-in API for generating the markup, but can also parse a BBCode.
Note that the BBCode tags can also be used, to some extent, in the XML source of the class reference.
Using BBCode
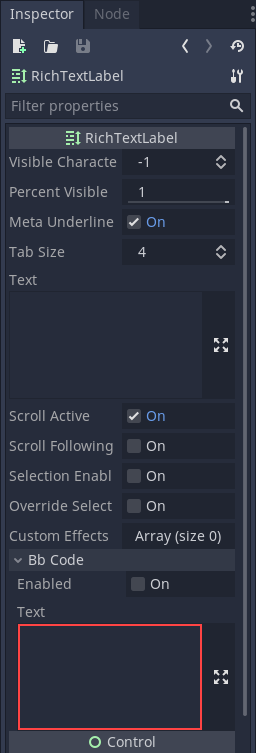
For uniformly formatted text you can write in the “Text” property, but if you want
to use BBCode markup you should use the “Text” property in the “Bb Code” section
instead (bbcode_text). Writing to this property will trigger the parsing of your
markup to format the text as requested. Before this happens, you need to toggle the
“Enabled” checkbox in the “Bb Code” section (bbcode_enabled).
For example, BBCode [color=blue]blue[/color] would render the word “blue” with
a blue color.
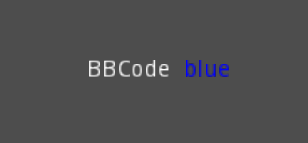
You’ll notice that after writing in the BBCode “Text” property the regular “Text” property now has the text without the BBCode. While the text property will be updated by the BBCode property, you can’t edit the text property or you’ll lose the BBCode markup. All changes to the text must be done in the BBCode parameter.
Note
For BBCode tags such as [b] (bold) or [i] (italics) to work you must
set up custom fonts for the RichTextLabel node first.
Reference
| Command | Tag | Description |
| bold | [b]{text}[/b] |
Makes {text} bold. |
| italics | [i]{text}[/i] |
Makes {text} italics. |
| underline | [u]{text}[/u] |
Makes {text} underline. |
| strikethrough | [s]{text}[/s] |
Makes {text} strikethrough. |
| code | [code]{text}[/code] |
Makes {text} monospace. |
| center | [center]{text}[/center] |
Makes {text} centered. |
| right | [right]{text}[/right] |
Makes {text} right-aligned. |
| fill | [fill]{text}[/fill] |
Makes {text} fill width. |
| indent | [indent]{text}[/indent] |
Increase indent level of {text}. |
| url | [url]{url}[/url] |
Show {url} as such. |
| url (ref) | [url=<url>]{text}[/url] |
Makes {text} reference <url>. |
| image | [img]{path}[/img] |
Insert image at resource {path}. |
| resized image | [img=<width>]{path}[/img] |
Insert image at resource {path} using <width> (keeps ratio). |
| resized image | [img=<width>x<height>]{path}[/img] |
Insert image at resource {path} using <width> & <height>. |
| font | [font=<path>]{text}[/font] |
Use custom font at <path> for {text}. |
| color | [color=<code/name>]{text}[/color] |
Change {text} color; use name or # format, such as #ff00ff. |
Built-in color names
List of valid color names for the [color=<name>] tag:
- aqua
- black
- blue
- fuchsia
- gray
- green
- lime
- maroon
- navy
- purple
- red
- silver
- teal
- white
- yellow
Hexadecimal color codes
For opaque RGB colors, any valid 6-digit hexadecimal code is supported, e.g. [color=#ffffff]white[/color].
For transparent RGB colors, any 8-digit hexadecimal code can be used, e.g. [color=#88ffffff]translucent white[/color].
In this case, note that the alpha channel is the first component of the color code, not the last one.
Image vertical offset
You use a custom font for your image in order to align it vertically.
- Create a
BitmapFontresource - Set this bitmap font with a positive value for the
ascentproperty, that’s your height offset - Set the BBCode tag this way:
[font=<font-path>][img]{image-path}[/img][/font]
Animation effects
BBCode can also be used to create different text animation effects. Five customizable effects are provided out of the box, and you can easily create your own.
Wave

Wave makes the text go up and down. Its tag format is [wave amp=50 freq=2][/wave].
amp controls how high and low the effect goes, and freq controls how fast the
text goes up and down.
Tornado
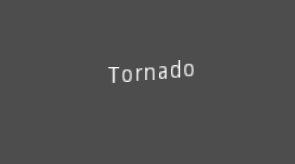
Tornao makes the text move around in a circle. Its tag format is
[tornado radius=5 freq=2][/tornado].
radius is the radius of the circle that controls the offset, freq is how
fast the text moves in a circle.
Shake
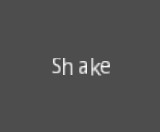
Shake makes the text shake. Its tag format is [shake rate=5 level=10][/shake].
rate controls how fast the text shakes, level controls how far the text is
offset from the origin.
Fade
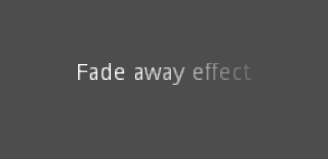
Fade creates a fade effect over the text that is not animated. Its tag format is
[fade start=4 length=14][/fade].
start controls the starting position of the falloff relative to where the fade
command is inserted, length controls over how many characters should the fade
out take place.
Rainbow

Rainbow gives the text a rainbow color that changes over time. Its tag format is
[rainbow freq=0.2 sat=10 val=20][/rainbow].
freq is the number of full rainbow cycles per second, sat is the saturation
of the rainbow, val is the value of the rainbow.
Custom BBCode tags and text effects
You can extend the RichTextEffect resource type to create your own custom
BBCode tags. You begin by extending the RichTextEffect resource type. Add
the tool prefix to your GDScript file if you wish to have these custom effects run
within the editor itself. The RichTextLabel does not need to have a script attached,
nor does it need to be running in tool mode.
There is only one function that you need to extend: _process_custom_fx(char_fx).
Optionally, you can also provide a custom BBCode identifier simply by adding a member
name bbcode. The code will check the bbcode property automatically or will
use the name of the file to determine what the BBCode tag should be.
_process_custom_fx
This is where the logic of each effect takes place and is called once per character during the draw phase of text rendering. This passes in a CharFXTransform object, which holds a few variables to control how the associated character is rendered:
identityspecifies which custom effect is being processed. You should use that for code flow control.relative_indextells you how far into a given custom effect block you are in as an index.absolute_indextells you how far into the entire text you are as an index.elapsed_timeis the total amount of time the text effect has been running.visiblewill tell you whether the character is visible or not and will also allow you to hide a given portion of text.offsetis an offset position relative to where the given character should render under normal circumstances.coloris the color of a given character.- Finally,
envis a Dictionary of parameters assigned to a given custom effect. You can use get() with an optional default value to retrieve each parameter, if specified by the user. For example[custom_fx spread=0.5 color=#FFFF00]test[/custom_fx]would have a floatspreadand Colorcolorparameters in its ` env` Dictionary. See below for more usage examples.
The last thing to note about this function is that it is necessary to return a boolean
true value to verify that the effect processed correctly. This way, if there’s a problem
with rendering a given character, it will back out of rendering custom effects entirely until
the user fixes whatever error cropped up in their custom effect logic.
Here are some examples of custom effects:
Ghost
tool
extends RichTextEffect

# Syntax: [ghost freq=5.0 span=10.0][/ghost]

# Define the tag name.
var bbcode = "ghost"

func _process_custom_fx(char_fx):
    # Get parameters, or use the provided default value if missing.
    var speed = char_fx.env.get("freq", 5.0)
    var span = char_fx.env.get("span", 10.0)

    var alpha = sin(char_fx.elapsed_time * speed + (char_fx.absolute_index / span)) * 0.5 + 0.5
    char_fx.color.a = alpha
    return true
Pulse
tool
extends RichTextEffect

# Syntax: [pulse color=#00FFAA height=0.0 freq=2.0][/pulse]

# Define the tag name.
var bbcode = "pulse"

func _process_custom_fx(char_fx):
    # Get parameters, or use the provided default value if missing.
    var color = char_fx.env.get("color", char_fx.color)
    var height = char_fx.env.get("height", 0.0)
    var freq = char_fx.env.get("freq", 2.0)

    var sined_time = (sin(char_fx.elapsed_time * freq) + 1.0) / 2.0
    var y_off = sined_time * height
    color.a = 1.0
    char_fx.color = char_fx.color.linear_interpolate(color, sined_time)
    char_fx.offset = Vector2(0, -1) * y_off
    return true
Matrix
tool
extends RichTextEffect

# Syntax: [matrix clean=2.0 dirty=1.0 span=50][/matrix]

# Define the tag name.
var bbcode = "matrix"

func _process_custom_fx(char_fx):
    # Get parameters, or use the provided default value if missing.
    var clear_time = char_fx.env.get("clean", 2.0)
    var dirty_time = char_fx.env.get("dirty", 1.0)
    var text_span = char_fx.env.get("span", 50)

    var value = char_fx.character

    var matrix_time = fmod(char_fx.elapsed_time + (char_fx.absolute_index / float(text_span)), \
                           clear_time + dirty_time)

    matrix_time = 0.0 if matrix_time < clear_time else \
                  (matrix_time - clear_time) / dirty_time

    if value >= 65 && value < 126 && matrix_time > 0.0:
        value -= 65
        value = value + int(1 * matrix_time * (126 - 65))
        value %= (126 - 65)
        value += 65
    char_fx.character = value
    return true
This will add a few new BBCode commands, which can be used like so:
[center][ghost]This is a custom [matrix]effect[/matrix][/ghost] made in
[pulse freq=5.0 height=2.0][pulse color=#00FFAA freq=2.0]GDScript[/pulse][/pulse].[/center]