Install Docker Trusted Registry
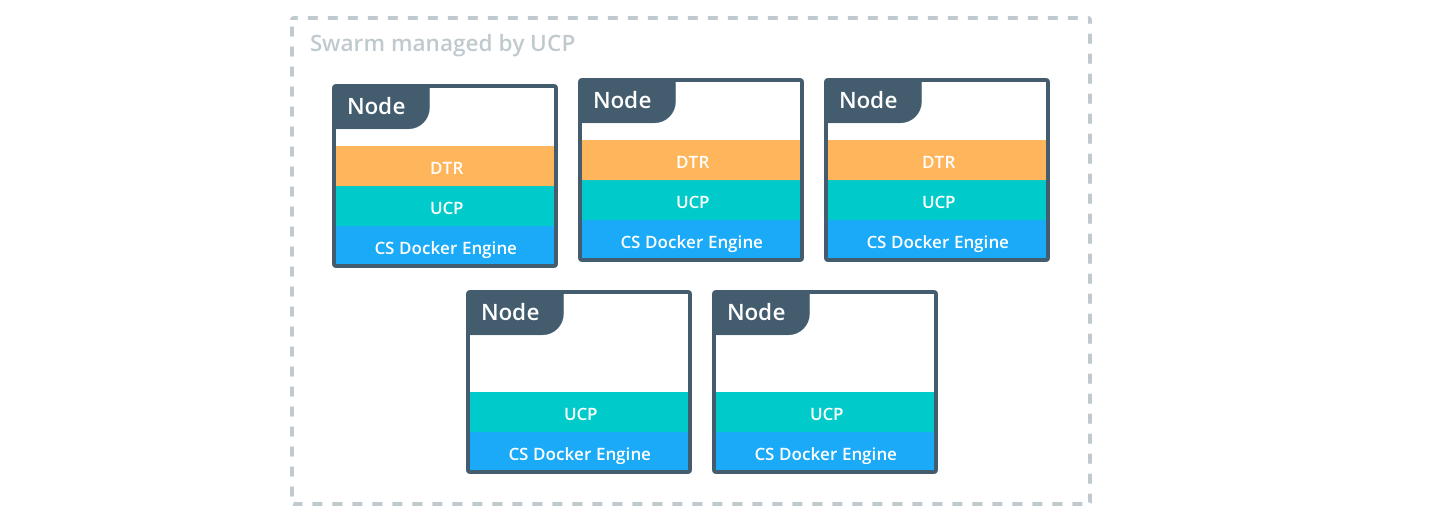
Estimated reading time: 3 minutesDocker Trusted Registry (DTR) is a containerized application that runs on a swarm managed by Docker Universal Control Plane (UCP). It can be installed on-premises or on a cloud infrastructure.
Use these instructions to install DTR.
Step 1. Validate the system requirements
The first step in installing DTR, is ensuring your infrastructure has all the requirements DTR needs to run.
Step 2. Install UCP
Since DTR requires Docker Universal Control Plane (UCP) to run, you need to install UCP on all the nodes where you plan to install DTR. Learn how to install UCP.
DTR needs to be installed on a worker node that is being managed by UCP. You can’t install DTR on a standalone Docker Engine.
Step 3. Install DTR
To install DTR you use the docker/dtr image. This image has commands to
install, configure, and backup DTR.
Run the following command to install DTR:
# Pull the latest version of DTR
$ docker pull docker/dtr

# Install DTR
$ docker run -it --rm \
  docker/dtr install \
  --ucp-node <ucp-node-name> \
  --ucp-insecure-tls
Where the --ucp-node is the hostname of the UCP node where you want to deploy
DTR. --ucp-insecure-tls tells the installer to trust the certificates used
by UCP.
By default the install command runs in interactive mode and prompts for additional information like:
- DTR external url: the url clients use to read DTR. If you’re using a load balancer for DTR, this is the IP address or DNS name of the load balancer
- UCP url: the url clients use to reach UCP
- UCP username and password: administrator credentials for UCP
You can also provide this information to the installer command so that it runs without prompting. Check the reference documentation to learn more.
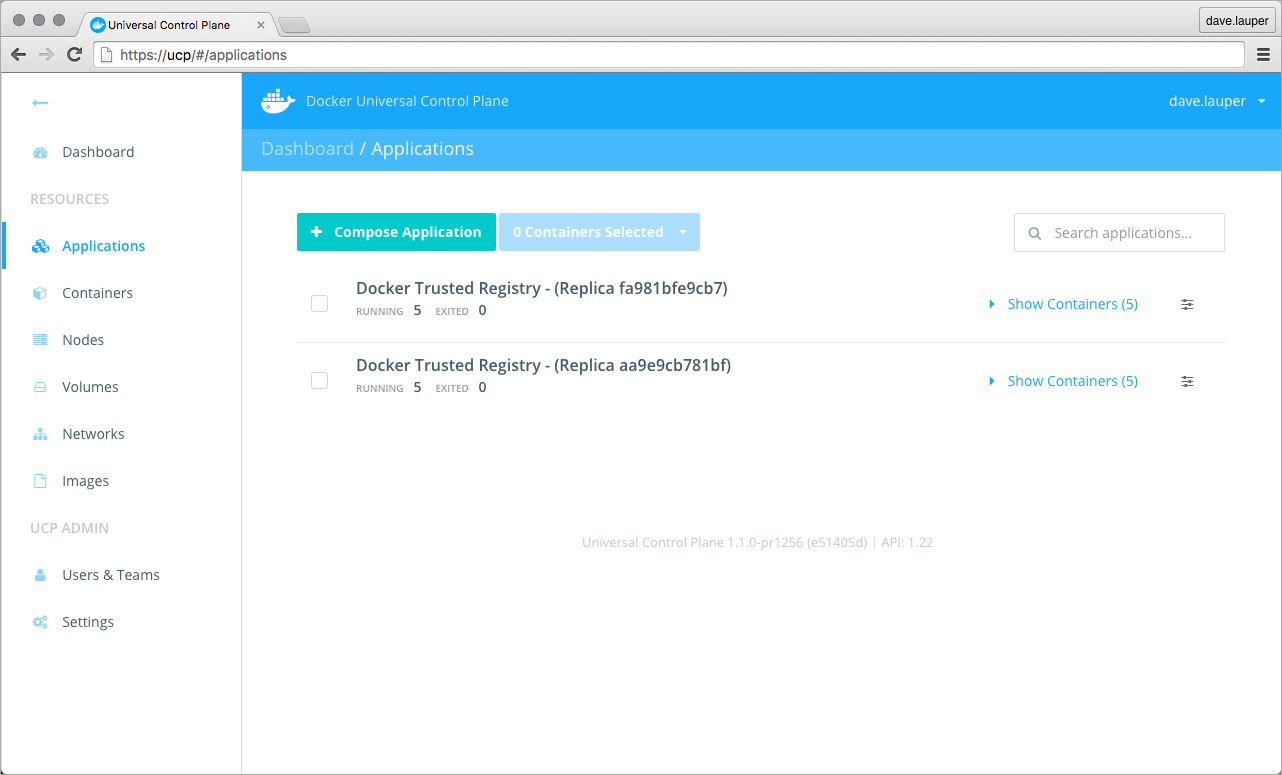
Step 4. Check that DTR is running
In your browser, navigate to the Docker Universal Control Plane web UI, and navigate to the Applications screen. DTR should be listed as an application.
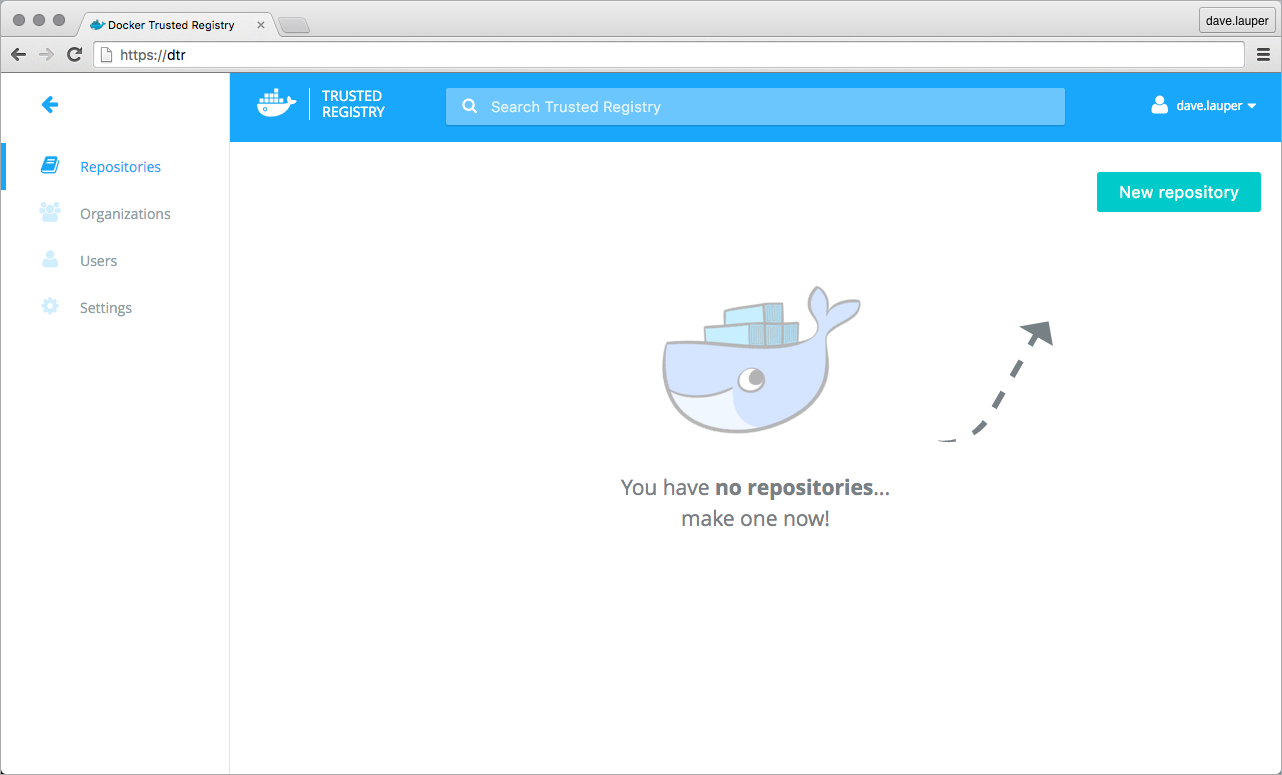
You can also access the DTR web UI, to make sure it is working. In your browser, navigate to the address were you installed DTR.
Step 5. Configure DTR
After installing DTR, you should configure:
- The certificates used for TLS communication. Learn more.
- The storage backend to store the Docker images. Learn more.
To perform these configurations, navigate to the Settings page of DTR.

Step 6. Test pushing and pulling
Now that you have a working installation of DTR, you should test that you can push and pull images to it. Learn how to push and pull images.
Step 7. Join replicas to the cluster
This step is optional.
To set up DTR for high availability, you can add more replicas to your DTR cluster. Adding more replicas allows you to load-balance requests across all replicas, and keep DTR working if a replica fails.
For high-availability you should set 3, 5, or 7 DTR replicas. The nodes where you’re going to install these replicas also need to be managed by UCP.
To add replicas to a DTR cluster, use the docker/dtr join command:
-
Load your UCP user bundle.
-
Run the join command.
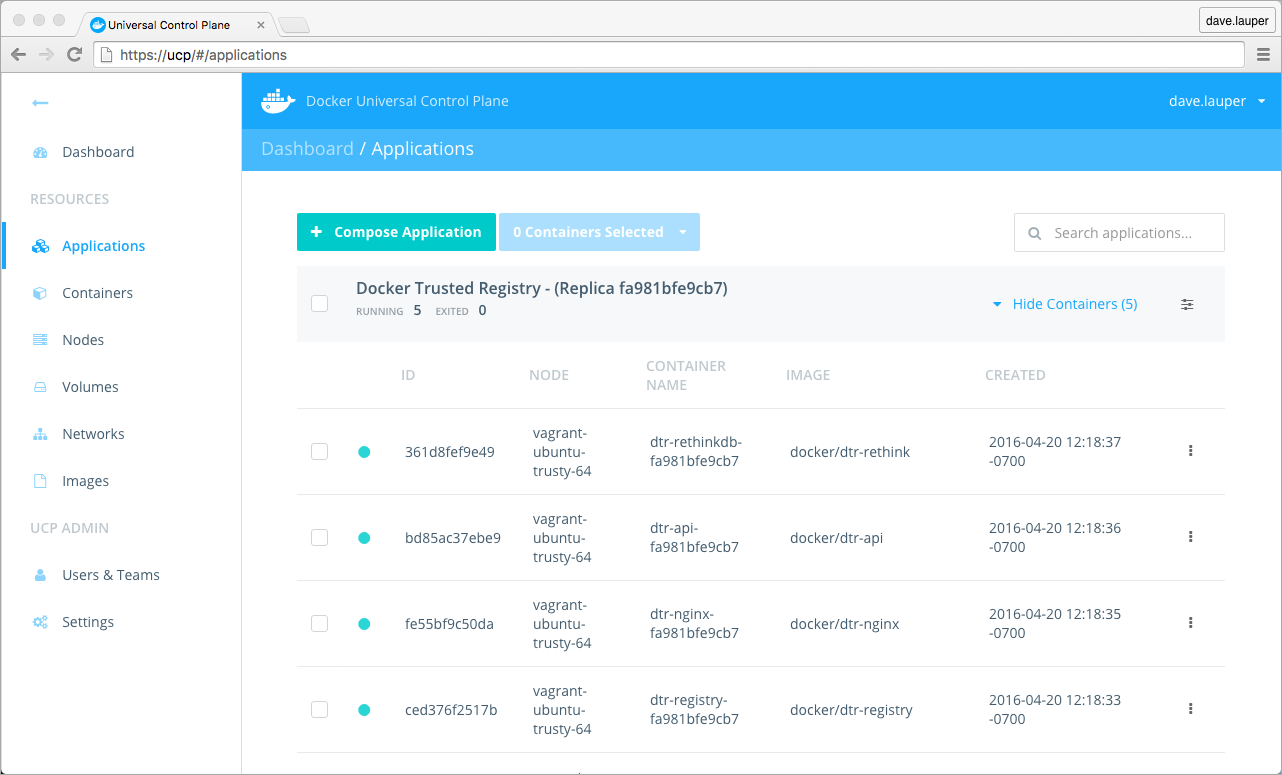
When you join a replica to a DTR cluster, you need to specify the ID of a replica that is already part of the cluster. You can find an existing replica ID by going to the Applications page on UCP.
Then run:
docker run -it --rm \ docker/dtr join \ --ucp-node <ucp-node-name> \ --ucp-insecure-tls -
Check that all replicas are running.
In your browser, navigate to the Docker Universal Control Plane web UI, and navigate to the Applications screen. All replicas should be displayed.