Use domain names to access services
Estimated reading time: 8 minutesYou can make it easier for users to access your HTTP and HTTPS services by making them accessible from a domain name, instead of an IP address.

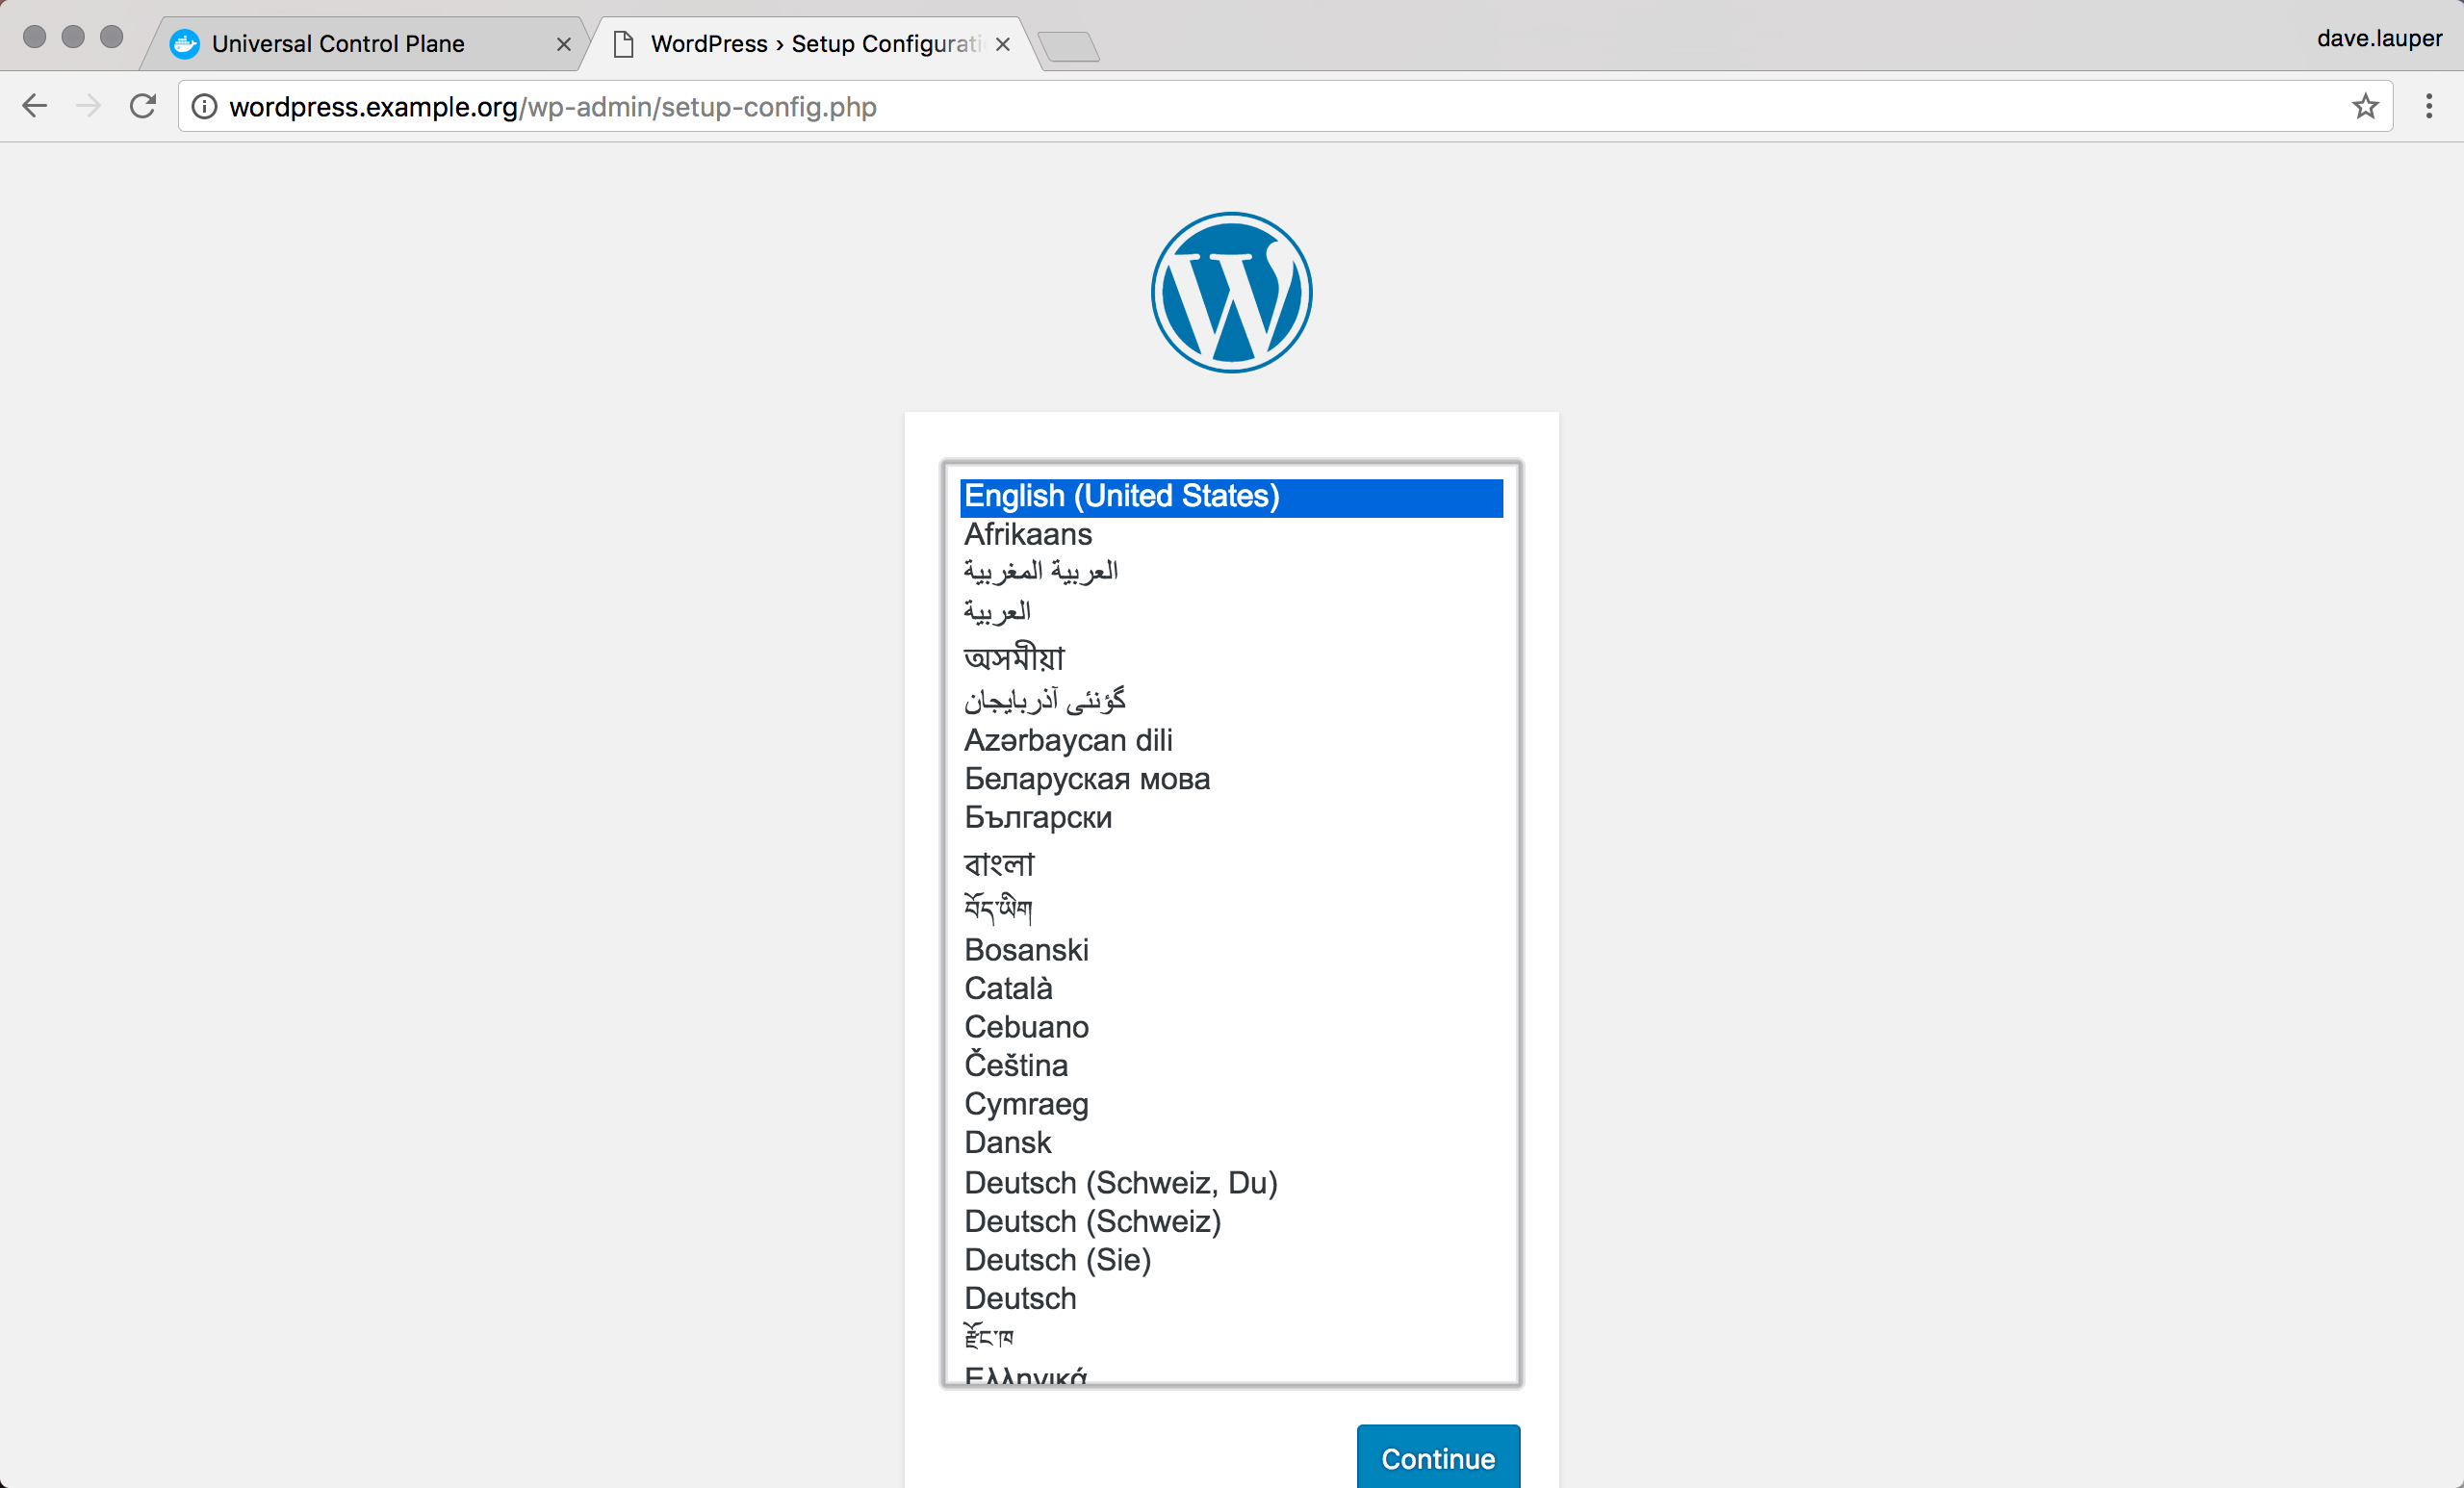
In this example, we’re going to deploy a WordPress service and make it accessible
to users at http://wordpress.example.org.
Enable the HTTP routing mesh
Before you start, make sure an administrator user has
enabled the HTTP routing mesh service.
You also need permissions to attach services to the ucp-hrm network.
Deploy WordPress
Log in to the UCP web UI, navigate to the Services page, and click Create Service. Then create a WordPress service with the following configuration:
| Field | Value |
|---|---|
| Service name | wordpress |
| Image name | wordpress:latest |
In the left pane, click Network. In the Ports section, click Publish Port and assign the following values.
| Field | Value |
|---|---|
| Internal port | 80 |
| Protocol | tcp |
| Publish Mode | ingress |
| Public port | 8000 |
Click Add Hostname based routes and assign the routing values.
| Field | Value |
|---|---|
| External scheme | http:// |
| Routing mesh host | wordpress.example.com |
Finally, you need to connect the service to the ucp-hrm network. This is
what ensures traffic sent to the HTTP routing mesh is redirected to your
service. In the Networks section, click Attach Network and select
ucp-hrm from the dropdown list.
When creating the service, make sure to publish both internal and public ports. This example maps the port 80 on the container running the service, to port 8000 on the ingress routing mesh.
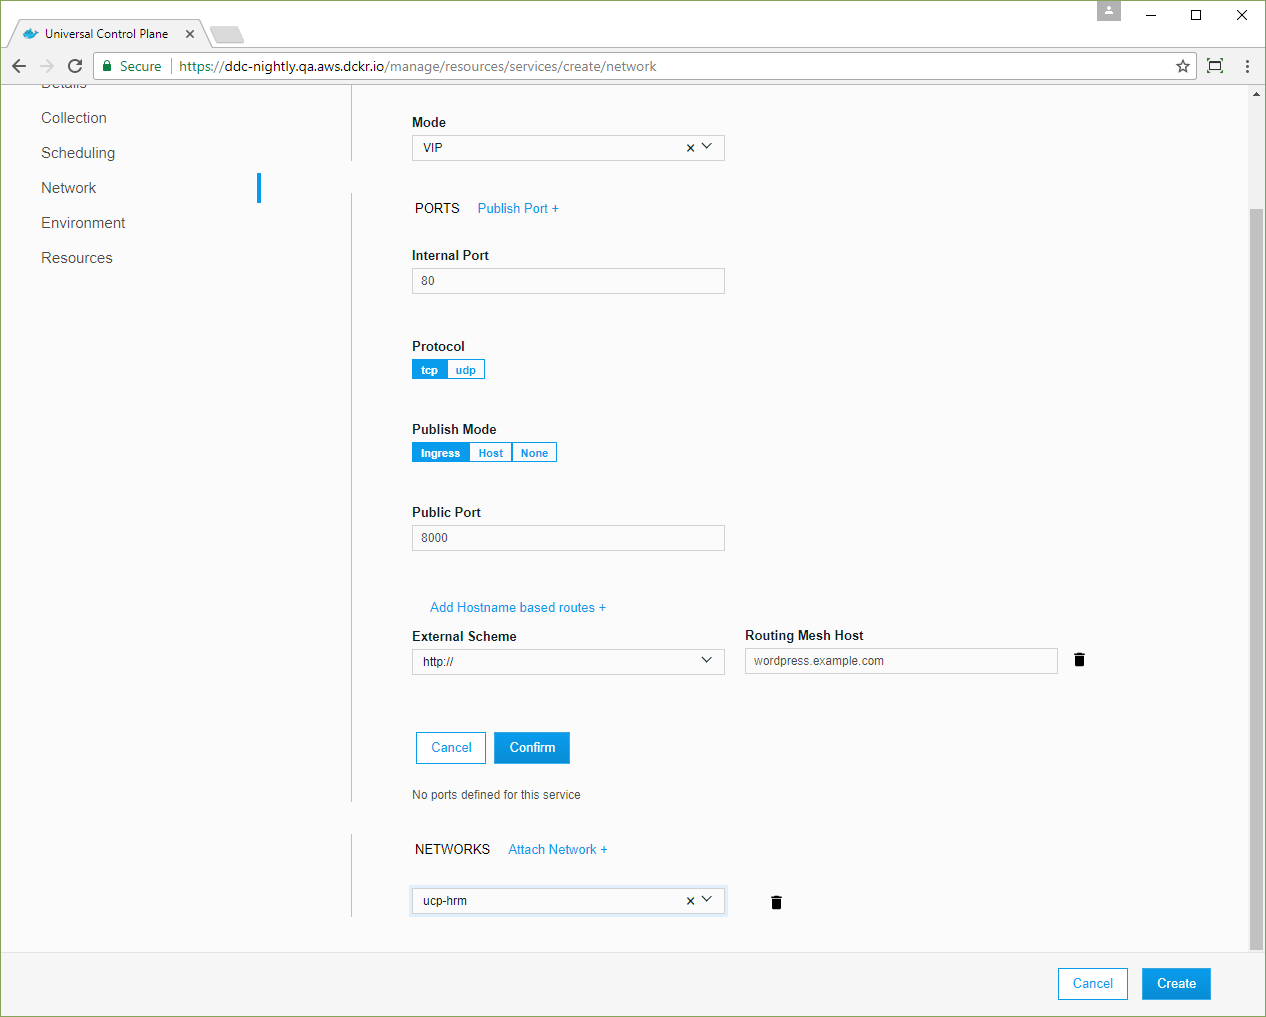
Click Confirm to assign the network configuration, and click Create
to deploy your service. Once the service is deployed, the HTTP routing mesh
service is reconfigured to redirect HTTP requests with the hostname set to
wordpress.example.org, to the WordPress service.
Add a DNS entry
Now that WordPress is deployed, add a new DNS entry that maps
wordpress.example.org to the IP address of any node in the UCP cluster.
When testing locally, you can also change your /etc/hosts file to
create this mapping, instead of using a DNS service.
HRM with Windows Server:
Windows Server doesn’t support Swarm Mode Routing Mesh yet (not considering Windows Server version 1709 which will be out soon). This means the hrm service is exposed only through the manager node’s ip (since Windows Server cannot be a manager node). DNS entry for the host name(‘wordpress.example.org’ in this example) should therefore be mapped to manager nodes or any non-windows worker nodes.
Once this is done, you can access the wordpress service from your browser.
From the CLI
To deploy the WordPress service from the CLI, you need to add labels to the service that are specific to the HTTP routing mesh.
Once you get your UCP client bundle, you can run:
docker service create \
  --publish target=80,published=8000 \
  --network ucp-hrm \
  --label com.docker.ucp.mesh.http=external_route=http://wordpress.example.org,internal_port=80 \
  --name wordpress \
  wordpress:latest
Under the hood
Under the hood, UCP relies on labels to configure your services to use the HTTP routing mesh. The UCP web UI automatically adds labels to your services, but when deploying from the CLI or using compose files, you need to add labels to your services.
The HTTP routing mesh can route to a service, as long as that service:
- Is attached to a network that has the
com.docker.ucp.mesh.httplabel. You can use the defaultucp-hrmnetwork or create your own. - Has one or more labels with the prefix
com.docker.ucp.mesh.http, specifying the ports to route to.
Service labels
The HTTP routing mesh label that you apply to your services needs to have a list of keys and values separated by a comma, specifying how to route the traffic to your service.
The label for the WordPress service you just created looks like this:
- Key:
com.docker.ucp.mesh.http.80-1 - Value:
internal_port=8000,external_route=http://wordpress.example.com
The label syntax looks like this:
com.docker.ucp.mesh.http[.label-number]=<key-1>=<value-1>,<key-2>=<value-2>
Where .label-number is an optional number that you can include in your label
name if you want to have multiple routes to the same service. As an example
you could have one route for HTTP and another for HTTPS. In that case you’d
apply two labels:
com.docker.ucp.mesh.http.1=<key-1>=<value-1>
com.docker.ucp.mesh.http.2=<key-1>=<value-1>
The keys and values in your label are what defined the route configuration. These keys are supported:
| Key | Mandatory | Values | Description |
|---|---|---|---|
| external_route | yes | http://domain-name, or sni://domain-name | The external URL to route to this service |
| internal_port | yes, if the service publishes no ports or multiple ports | port-number | The internal port to use for the service |
| sticky_sessions | no | cookie-name | Always route a user to the same service, using HTTP cookies. This option can’t be used with HTTPS routes |
| redirect | no | http://domain-name, or sni://domain-name | Redirect incoming requests to another route using an HTTP 301 redirect |
| include_forwarded_for | no | true | If present, include the X-Forwarded-For header in requests |
Known issue
For SNI (HTTPS) routes, HRM forwards to service tasks before any task health checks have passed. This may result in traffic loss if a task is not ready to serve traffic immediately after it is scheduled.
Sticky sessions
You can use the sticky_sessions value to always route a user to the same
backend service. The first time a user makes a request, the service includes
a cookie in the response. When the user makes a new request, their browser
will send the cookie, and the HTTP routing mesh can use it to decide to which
service to route to.
Since this requires the HTTP routing mesh to read the cookie, this option only works with HTTP routes.
Sticky sessions might stop temporarily if the service is reconfigured to change the number of replicas, or if the replicas are restarted.
HTTP redirects
You can use the redirect option to redirect requests from one route to
another.
This allows you to redirect traffic to a new domain name if you’ve renamed the domain you’re using to serve your services. For that, you apply two labels to your service:
com.docker.ucp.mesh.http.1=external_route=http://old.example.org,redirect=http://new.example.org
com.docker.ucp.mesh.http.2=external_route=http://new.example.org
You can also use this to redirect HTTP requests to an HTTPS route. For that you apply two labels to your service:
com.docker.ucp.mesh.http.1=external_route=http://example.org,redirect=https://example.org
com.docker.ucp.mesh.http.2=external_route=sni://example.org
Note: It is not possible to redirect HTTPS to HTTP.
X-Forwarded-For header
Because HRM forwards traffic to your application, the requests that your application receives will all appear to come from HRM’s IP address. If you add include_forwarded_for=true in the HRM label for your service, HRM will add an HTTP header to every request called X-Forwarded-For that will contain the IP address that the original request came from. This feature will only work if your external_route field begins with http://.
Default Service
If you want a particular service to serve all requests that don’t match an otherwise defined external_route, set an external_route to a blank hostname. For example:
com.docker.ucp.mesh.http.1=external_route=http://
com.docker.ucp.mesh.http.2=external_route=sni://
If you don’t define external_route=sni:// on any service, HRM will default to use the UCP controller itself as the default SNI route. If you don’t define external_route=http:// on any service, HRM will return an http 503 error.
Keep services isolated
If you want to keep the services from sharing the same network, before enabling the HTTP routing mesh:
- Create multiple networks and apply the
com.docker.ucp.mesh.httplabel to them - Enable the HTTP routing mesh
- Attach each service to one of the different networks you’ve created
The HTTP routing mesh will route to all services in these networks, but services on different networks can’t communicate directly.
When using a UCP client bundle for an admin user, or a user with administrator privileges,
you can create an overlay network that contains the com.docker.mesh.http label by running the following command.
docker network create -d overlay --label com.docker.ucp.mesh.http=true new-hrm-network
If you’re creating a new HRM network you need to disable the HRM service first, or disable and enable the HRM service after you create the network else HRM will not be available on new network.