Deploy application resources to a collection
Estimated reading time: 3 minutesDocker Universal Control Plane enforces role-based access control when you deploy services. By default, you don’t need to do anything, because UCP deploys your services to a default collection, unless you specify another one. You can customize the default collection in your UCP profile page. Learn more about access control and collections.
UCP defines a collection by its path. For example, a user’s default collection
has the path /Shared/Private/<username>. To deploy a service to a collection
that you specify, assign the collection’s path to the access label of the
service. The access label is named com.docker.ucp.access.label.
When UCP deploys a service, it doesn’t automatically create the collections that correspond with your access labels. An administrator must create these collections and grant users access to them. Deployment fails if UCP can’t find a specified collection or if the user doesn’t have access to it.
Deploy a service to a collection by using the CLI
Here’s an example of a docker service create command that deploys a service
to a /Shared/database collection:
docker service create \
  --name redis_2 \
  --label com.docker.ucp.access.label="/Shared/database"
  redis:3.0.6
Deploy services to a collection by using a Compose file
You can also specify a target collection for a service in a Compose file.
In the service definition, add a labels: dictionary, and assign the
collection’s path to the com.docker.ucp.access.label key.
If you don’t specify access labels in the Compose file, resources are placed in the user’s default collection when the stack is deployed.
You can place a stack’s resources into multiple collections, but most of the time, you won’t need to do this.
Here’s an example of a Compose file that specifies two services, WordPress and
MySQL, and gives them the access label /Shared/wordpress:
version: '3.1'

services:

  wordpress:
    image: wordpress
    ports:
      - 8080:80
    environment:
      WORDPRESS_DB_PASSWORD: example
    deploy:
      labels:
        com.docker.ucp.access.label: /Shared/wordpress
  mysql:
    image: mysql:5.7
    environment:
      MYSQL_ROOT_PASSWORD: example
    deploy:
      labels:
        com.docker.ucp.access.label: /Shared/wordpress
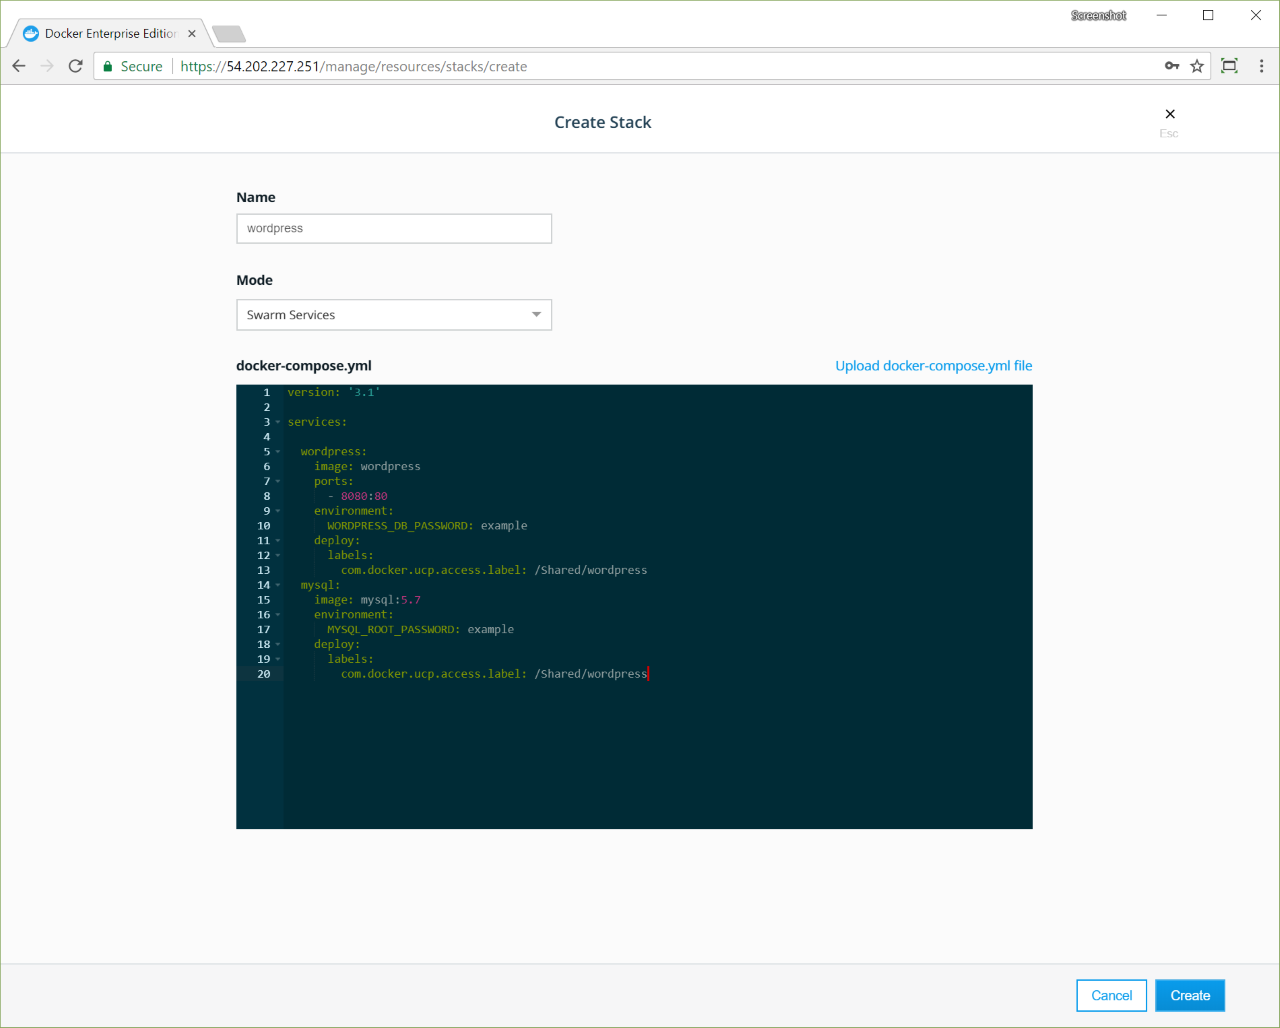
To deploy the application:
- In the UCP web UI, navigate to the Stacks page and click Create Stack.
- Name the app “wordpress”.
- From the Mode dropdown, select Swarm Services.
- Copy and paste the previous compose file into the docker-compose.yml editor.
-
Click Create to deploy the application, and click Done when the deployment completes.
If the /Shared/wordpress collection doesn’t exist, or if you don’t have
a grant for accessing it, UCP reports an error.
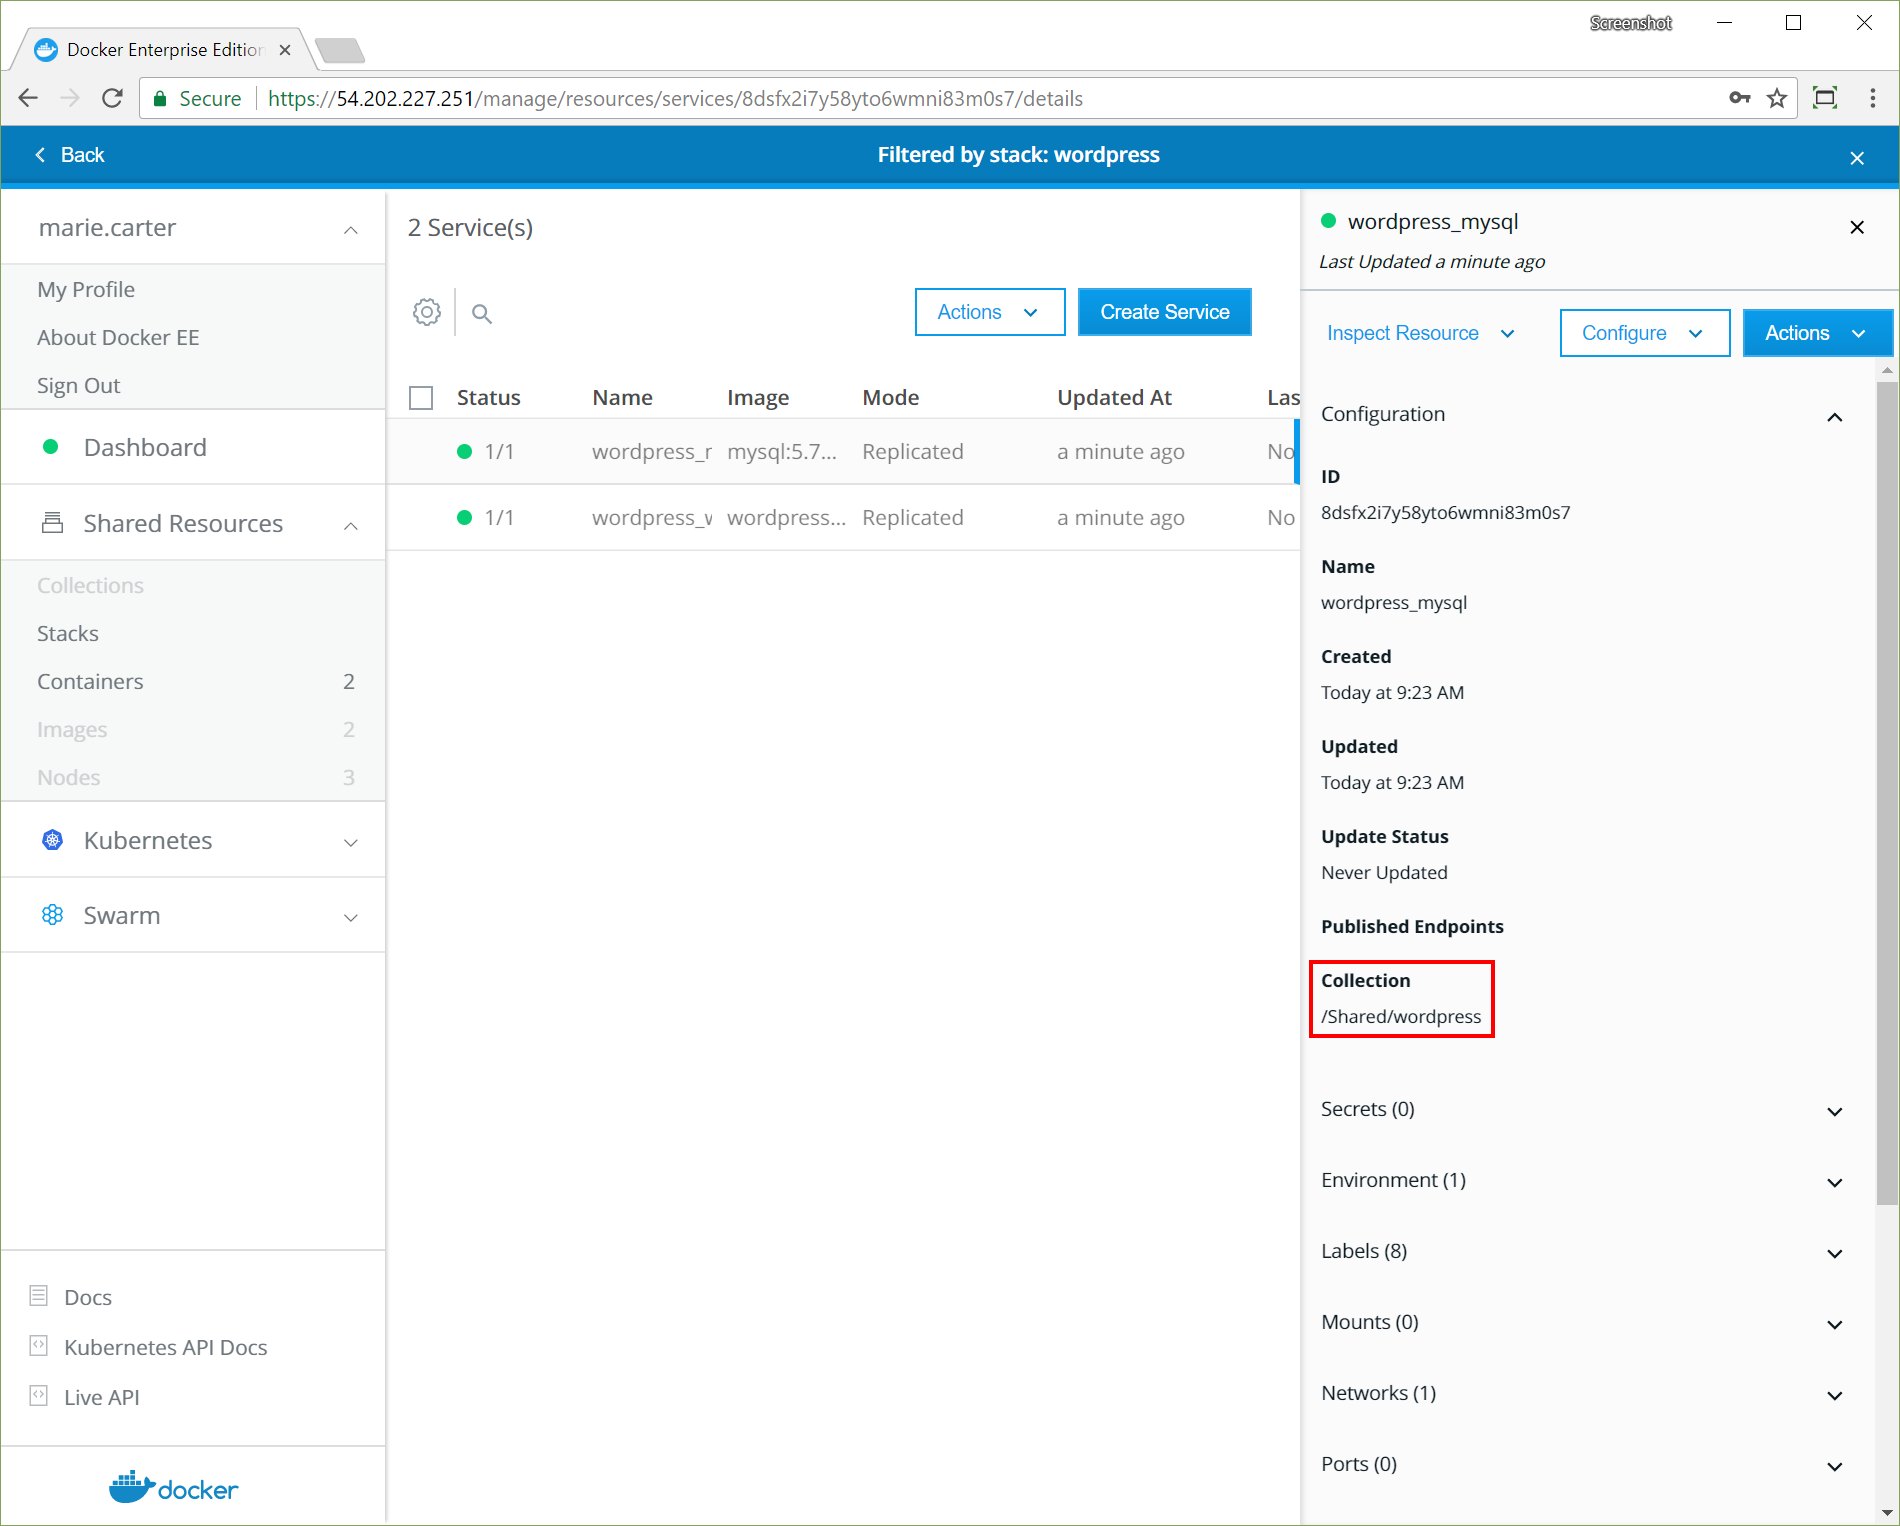
To confirm that the service deployed to the /Shared/wordpress collection:
- In the Stacks page, click wordpress.
- In the details pane, click Inspect Resource and select Services.
- On the Services page, click wordpress_mysql. In the details pane,
make sure that the Collection is
/Shared/wordpress.
Where to go next
- Deploy a Compose-based app to a Kubernetes cluster
- Set metadata on a service (-l, –label)
- Docker object labels