Add labels to swarm nodes
Estimated reading time: 3 minutesWith Docker UCP, you can add labels to your nodes. Labels are metadata that describe the node, like its role (development, QA, production), its region (US, EU, APAC), or the kind of disk (hdd, ssd). Once you have labeled your nodes, you can add deployment constraints to your services, to ensure they are scheduled on a node with a specific label.
For example, you can apply labels based on their role in the development lifecycle, or the hardware resources they have.

Don’t create labels for authorization and permissions to resources. Instead, use collections to organize access to your swarm. Learn about managing access with collections.
Apply labels to a node
In this example we apply the ssd label to a node. Then we deploy
a service with a deployment constraint to make sure the service is always
scheduled to run on a node that has the ssd label.
Log in with administrator credentials in the UCP web UI, navigate to the Nodes page, and choose the node you want to apply labels to. In the details pane, click Configure.
In the Edit Node page, scroll down to the Labels section.
Click Add Label, and add a label with the key disk and a value of ssd.
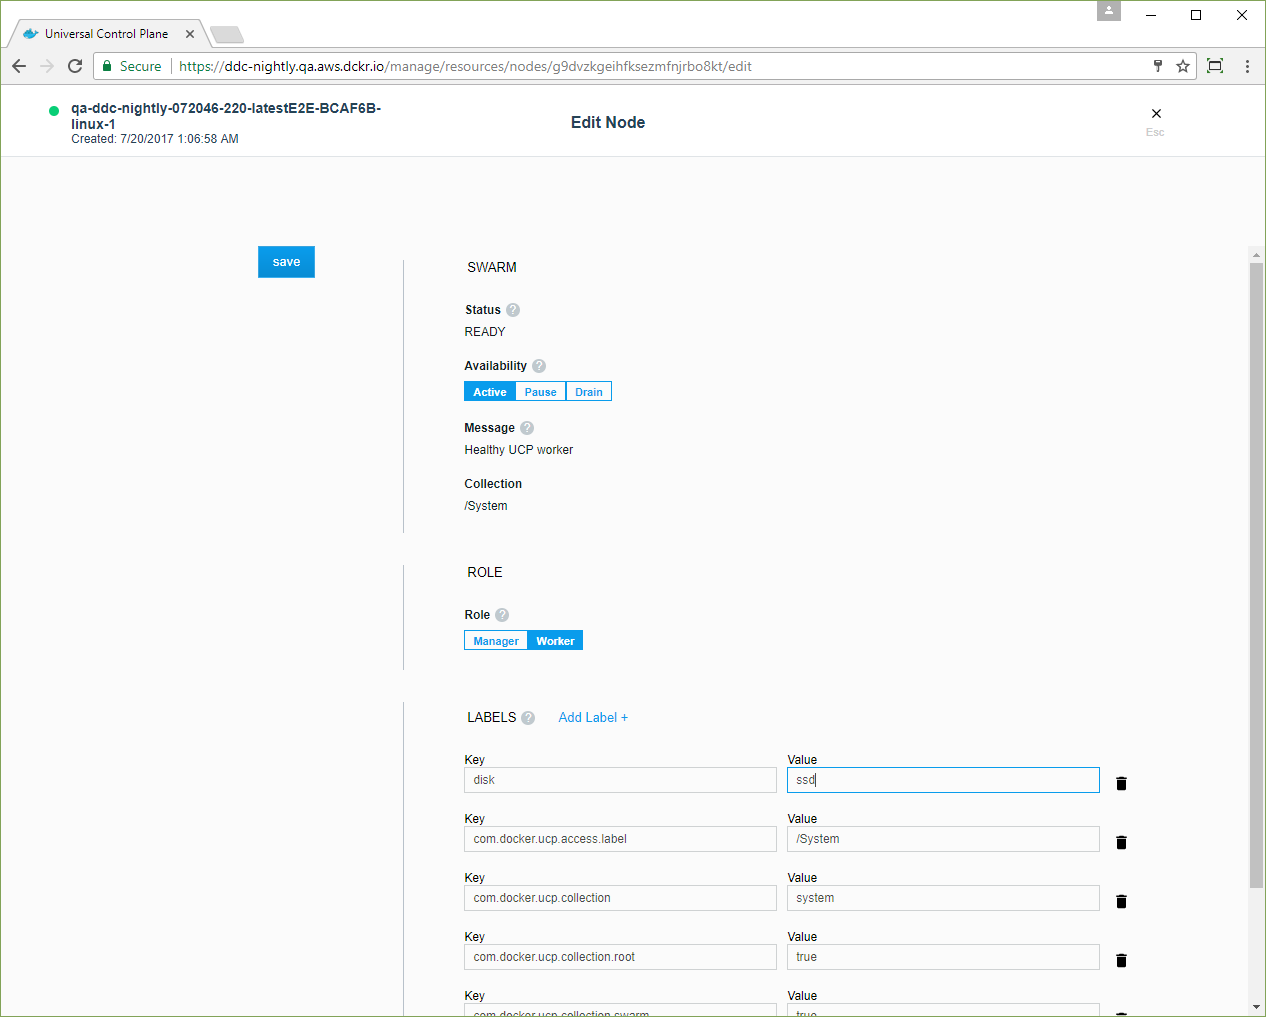
Click Save and dismiss the Edit Node page. In the node’s details pane, click Labels to view the labels that are applied to the node.
You can also do this from the CLI by running:
$ docker node update --label-add <key>=<value> <node-id>
Deploy a service with constraints
When deploying a service, you can specify constraints, so that the service gets scheduled only on a node that has a label that fulfills all of the constraints you specify.
In this example, when users deploy a service, they can add a constraint for the service to be scheduled only on nodes that have SSD storage.
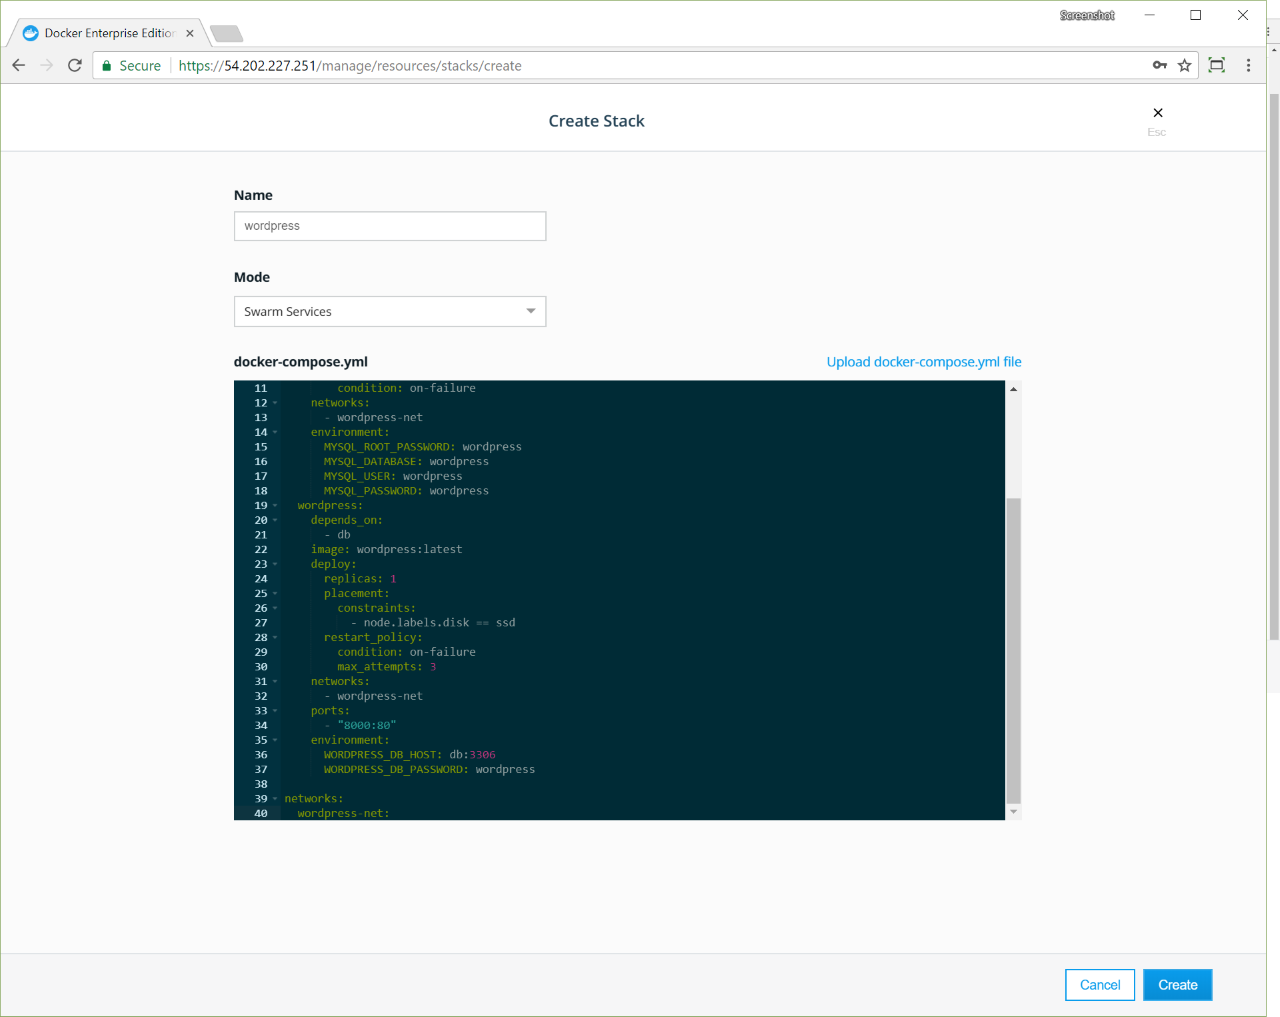
Navigate to the Stacks page. Name the new stack “wordpress”, and in the Mode dropdown, check Services.
In the Compose.yml editor, paste the following stack file.
version: "3.1"

services:
  db:
    image: mysql:5.7
    deploy:
      placement:
        constraints:
          - node.labels.disk == ssd
      restart_policy:
        condition: on-failure
    networks:
      - wordpress-net
    environment:
      MYSQL_ROOT_PASSWORD: wordpress
      MYSQL_DATABASE: wordpress
      MYSQL_USER: wordpress
      MYSQL_PASSWORD: wordpress
  wordpress:
    depends_on:
      - db
    image: wordpress:latest
    deploy:
      replicas: 1
      placement:
        constraints:
          - node.labels.disk == ssd
      restart_policy:
        condition: on-failure
        max_attempts: 3
    networks:
      - wordpress-net
    ports:
      - "8000:80"
    environment:
      WORDPRESS_DB_HOST: db:3306
      WORDPRESS_DB_PASSWORD: wordpress

networks:
  wordpress-net:
Click Create to deploy the stack, and when the stack deploys, click Done.
Navigate to the Nodes page, and click the node that has the
disk label. In the details pane, click the Inspect Resource
dropdown and select Containers.

Dismiss the filter and navigate to the Nodes page. Click a node that
doesn’t have the disk label. In the details pane, click the
Inspect Resource dropdown and select Containers. There are no
WordPress containers scheduled on the node. Dismiss the filter.
Add a constraint to a service by using the UCP web UI
You can declare the deployment constraints in your docker-stack.yml file or when you’re creating a stack. Also, you can apply them when you’re creating a service.
To check if a service has deployment constraints, navigate to the Services page and choose the service that you want to check. In the details pane, click Constraints to list the constraint labels.
To edit the labels on the service, click Configure and select Environment.
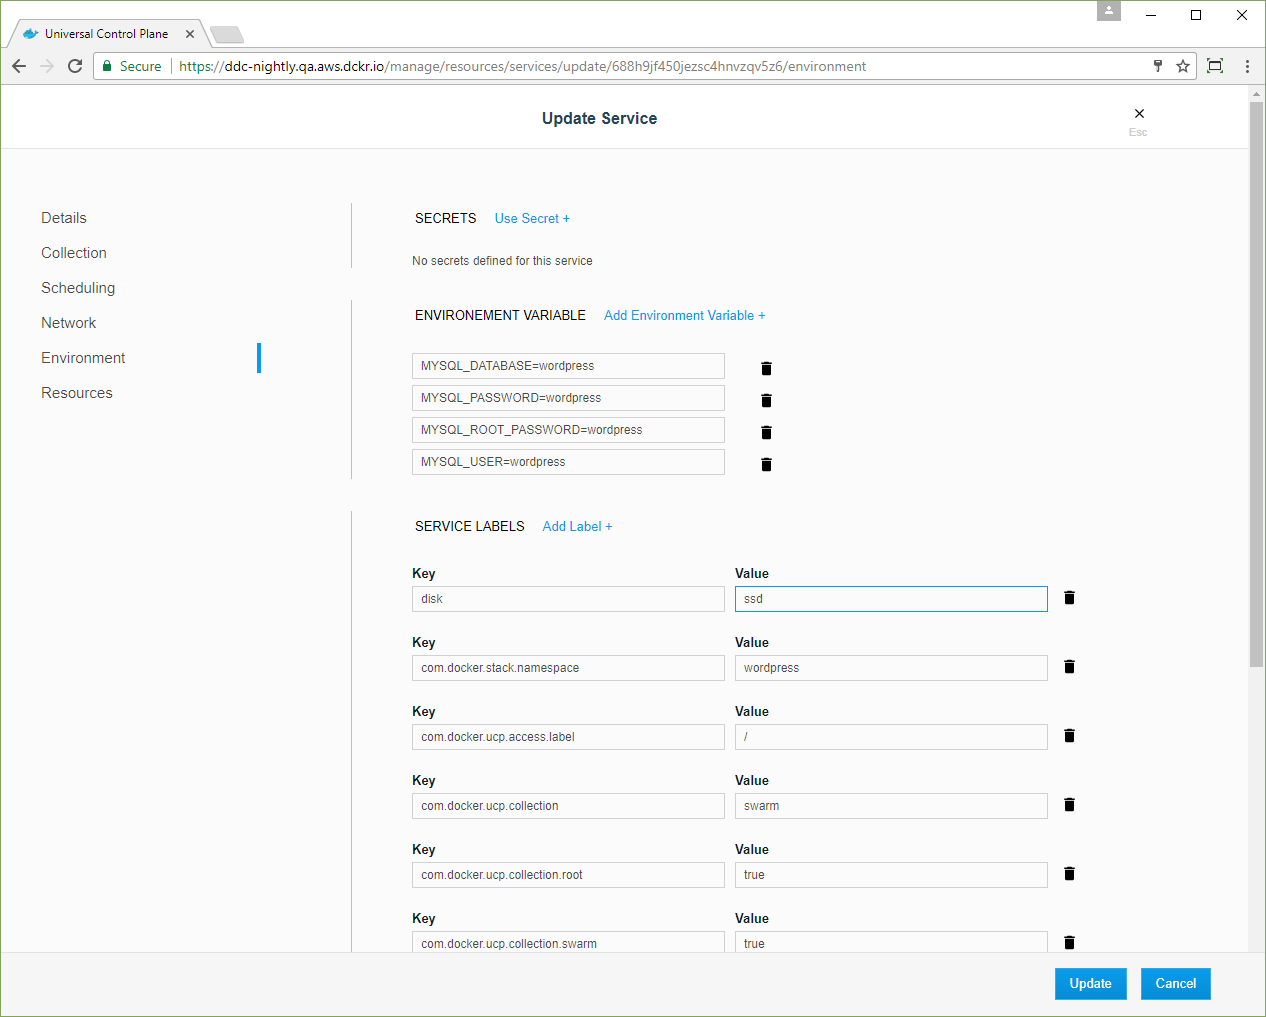
You can add or remove deployment constraints on this page.