Garbage collection
Estimated reading time: 4 minutesYou can configure Docker Trusted Registry to automatically delete unused image layers, thus saving you disk space. This process is also known as garbage collection.
How DTR deletes unused layers
First you configure DTR to run a garbage collection job on a fixed schedule. At the scheduled time DTR:
- Identifies and marks unused image layers.
- Deletes the marked image layers.
When garbage collection starts, DTR is put into read-only mode by default.
Improved garbage collection (Experimental)
Starting in DTR 2.5, you can configure DTR to run garbage collection jobs without putting DTR in read-only. This feature is still experimental.
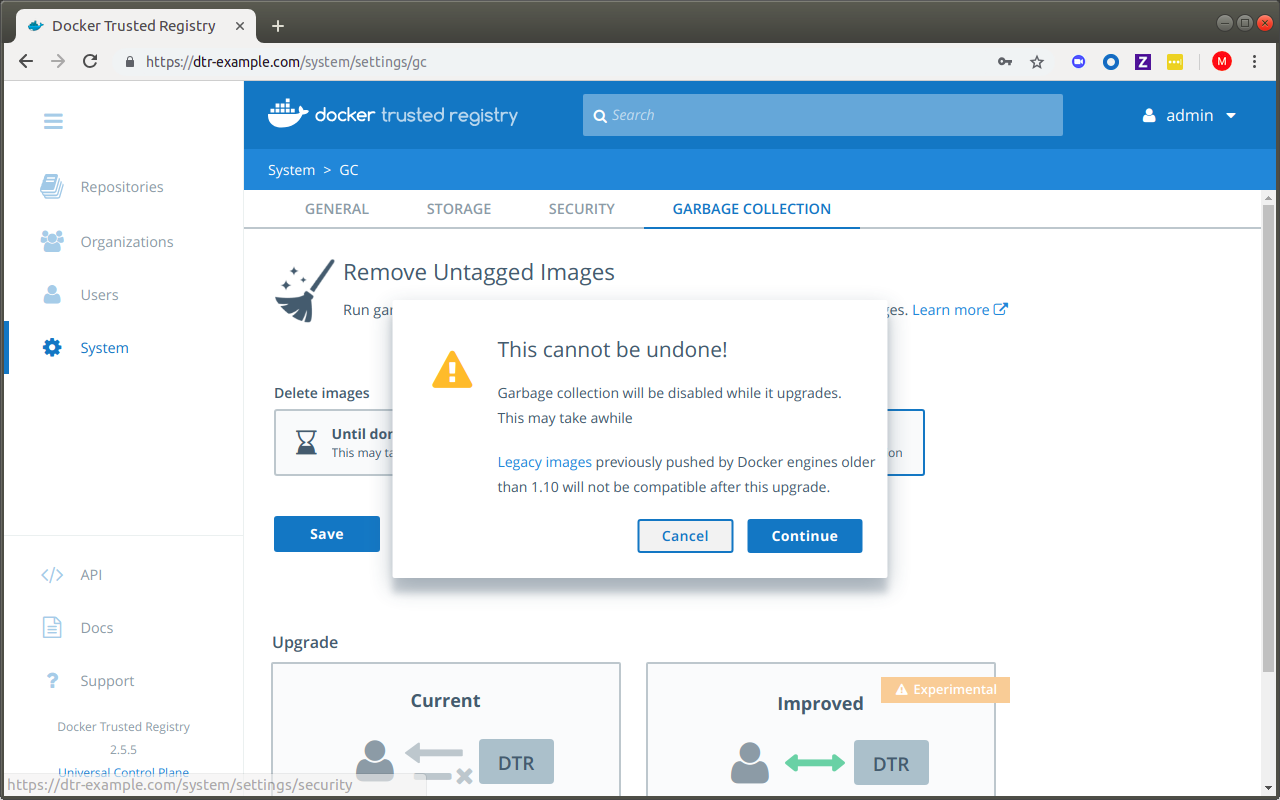
To enable this, navigate to the DTR web interface. Select Settings > Garbage collection.
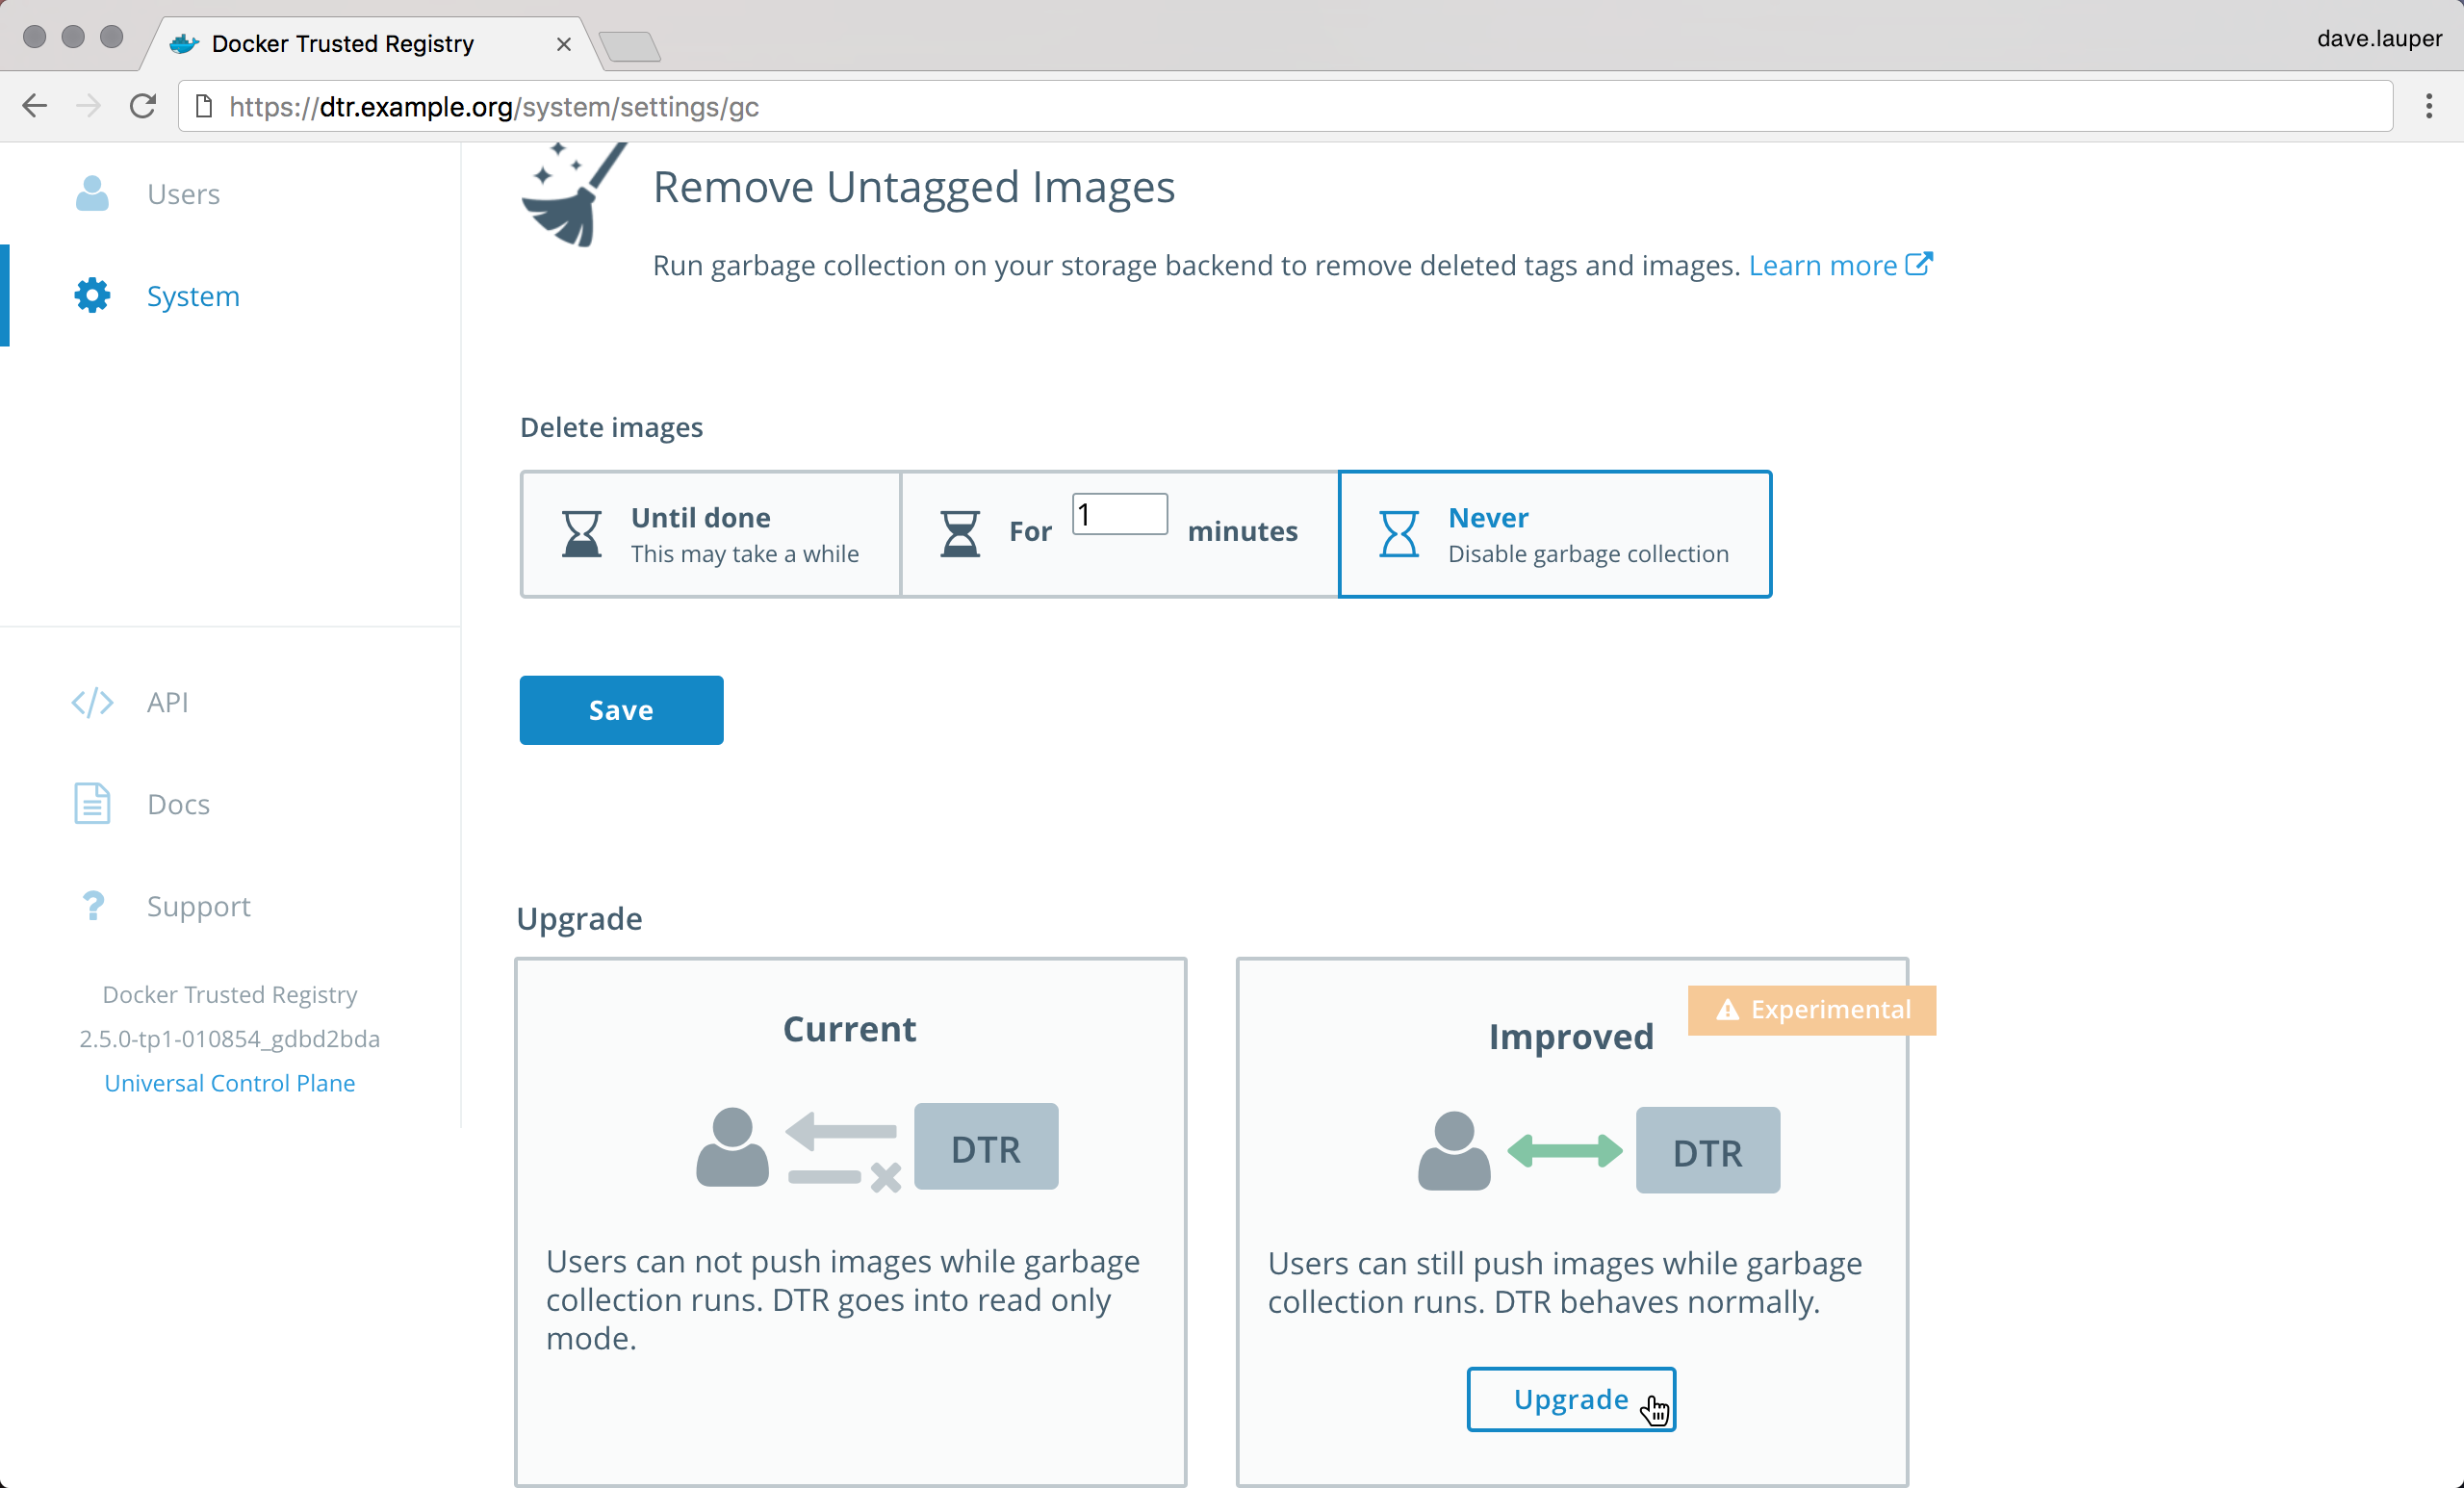
Once enabled, this setting can’t be changed back. The upgrade process might take a while depending on the amount of Docker images that you have stored. Garbage collection is temporarily disabled during the upgrade to the experimental version.
Metadata Store Migration
After a successful upgrade, the system will run a metadatastoremigration job which is necessary for online garbage collection. If the migration fails, the system will retry twice. If all three attempts fail, you will have to retrigger the metadatastoremigration job manually via the API. To check for the status of the metadatastoremigration job:
-
Select API from the bottom left navigation pane of the DTR web interface.
-
Scroll down to the Jobs resource and use the
GET /api/v0/jobsendpoint. -
Filter by action
metadatastoremigrationand click “Execute”. You should see the resultingcurlrequest and the job status in the Server response.
curl -X GET "https://<dtr-external-url>/api/v0/jobs?action=metadatastoremigration&worker=any&running=any" -H "accept: application/json"
To retrigger the job manually, see 2.5 to 2.6 upgrade. To learn more about troubleshooting jobs using the API, see Audit Jobs via the API.
Schedule garbage collection
Navigate to the Settings page, and choose Garbage collection.
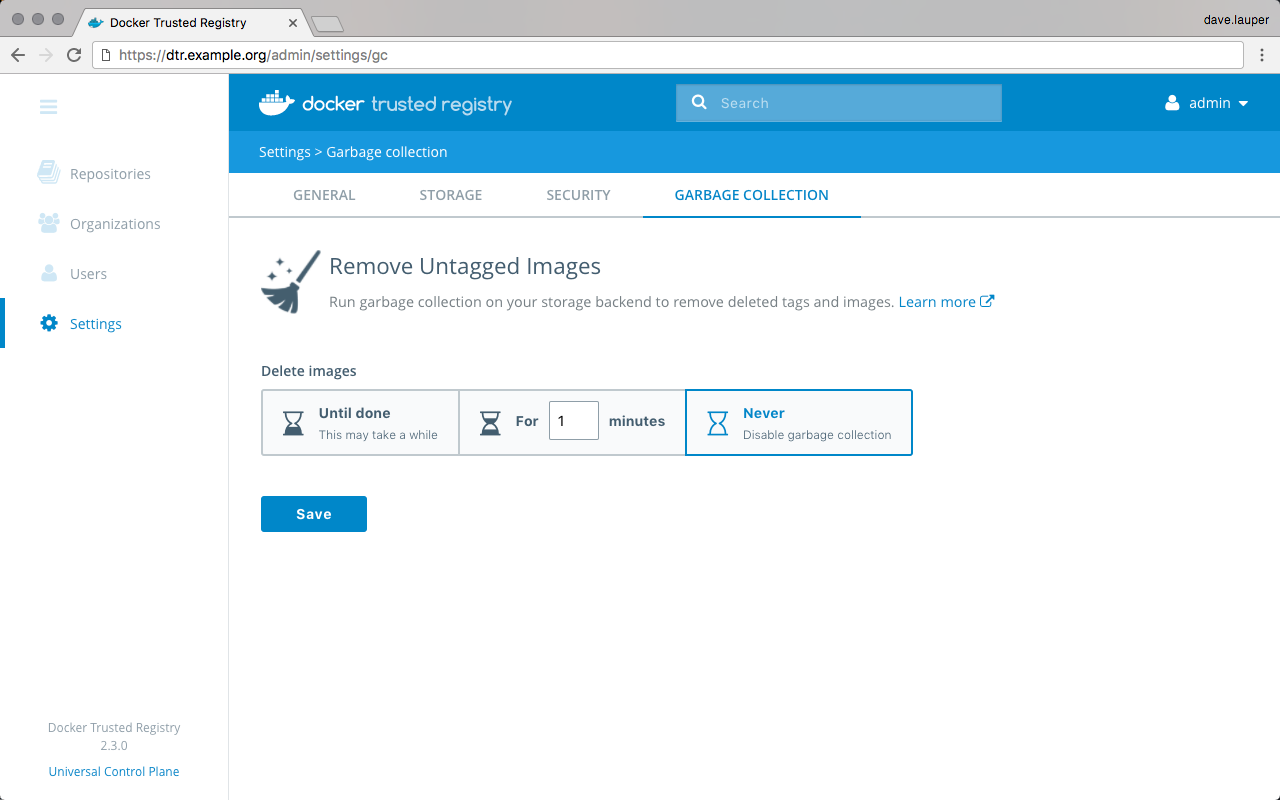
Select for how long the garbage collection job should run:
- Until done: Run the job until all unused image layers are deleted.
- For x minutes: Only run the garbage collection job for a maximum of x minutes at a time.
- Never: Never delete unused image layers.
Once you select for how long to run the garbage collection job, you can configure its schedule (in UTC time) using the cron format.

Once everything is configured you can chose to Save & start to immediately run the garbage collection job, or just Save to run the job on the next scheduled interval. If you’ve upgraded to the experimental version, you should be able to push and pull images while garbage collection is running.
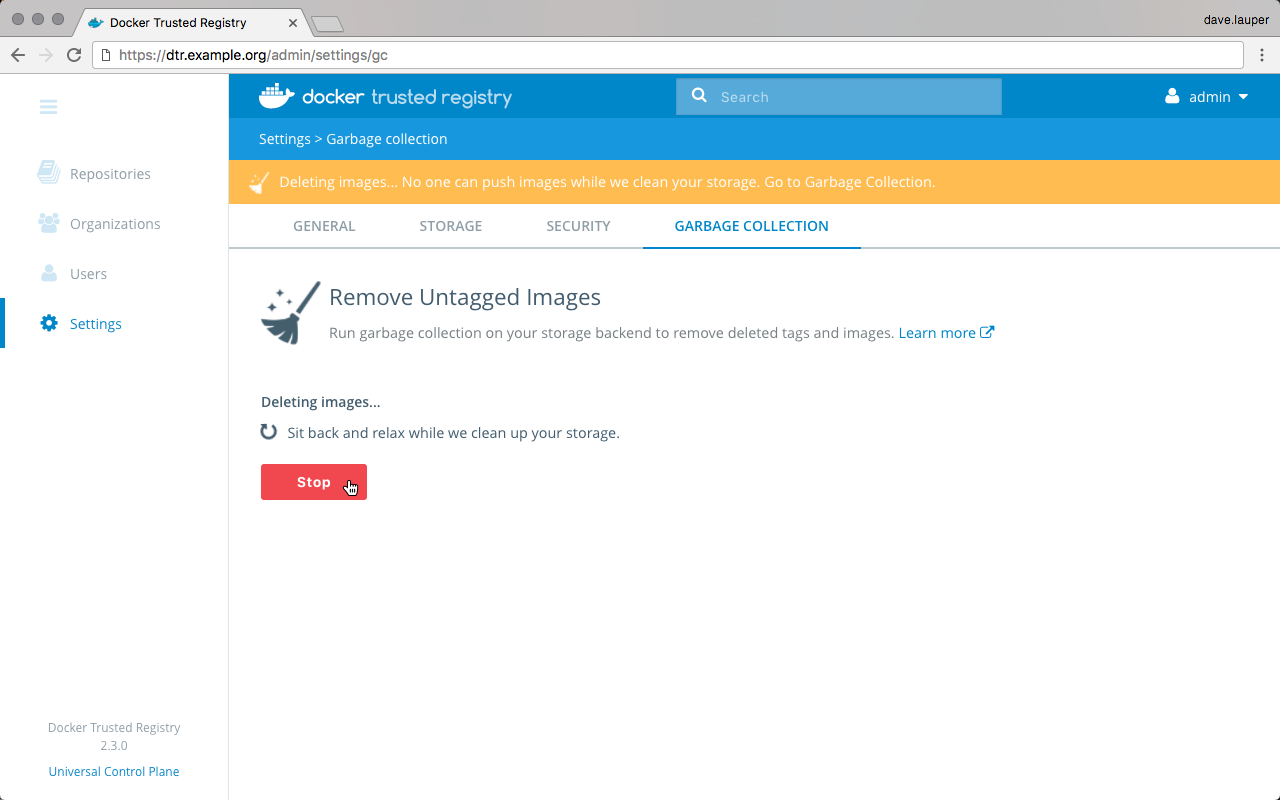
Stop the garbage collection job
Once the garbage collection job starts running, a banner is displayed on the web interface explaining that users can’t push images. If you’re an administrator, you can click the banner to stop the garbage collection job.
Under the hood
Each image stored in DTR is made up of multiple files:
- A list of image layers that represent the image filesystem.
- A configuration file that contains the architecture of the image and other metadata.
- A manifest file containing the list of all layers and configuration file for an image.
All these files are stored in a content-addressable way in which the name of the file is the result of hashing the file’s content. This means that if two image tags have exactly the same content, DTR only stores the image content once, even if the tag name is different.
As an example, if wordpress:4.8 and wordpress:latest have the same content,
they will only be stored once. If you delete one of these tags, the other won’t
be deleted.
This means that when users delete an image tag, DTR can’t delete the underlying files of that image tag since it’s possible that there are other tags that also use the same files.
To delete unused image layers, DTR:
- Becomes read-only to make sure that no one is able to push an image, thus changing the underlying files in the filesystem.
- Check all the manifest files and keep a record of the files that are referenced.
- If a file is never referenced, that means that no image tag uses it, so it can be safely deleted.