Create and manage teams
Estimated reading time: 4 minutesYou can extend the user’s default permissions by granting them fine-grained permissions over resources. You do this by adding the user to a team.
To create a new team, go to the UCP web UI, and navigate to the Organizations page.

If you want to put the team in a new organization, click Create Organization and give the new organization a name, like “engineering”. Click Create to create it.
In the list, click the organization where you want to create the new team. Name the team, give it an optional description, and click Create to create a new team.

Add users to a team
You can now add and remove users from the team. In the current organization’s teams list, click the new team, and in the details pane, click Add Users. Choose the users that you want to add to the team, and when you’re done, click Add Users.

Enable Sync Team Members
To sync the team with your organization’s LDAP directory, click Yes.
If UCP is configured to sync users with your organization’s LDAP directory server, you have the option to enable syncing the new team’s members when creating a new team or when modifying settings of an existing team. Learn how to configure integration with an LDAP directory. Enabling this option expands the form with additional fields for configuring the sync of team members.
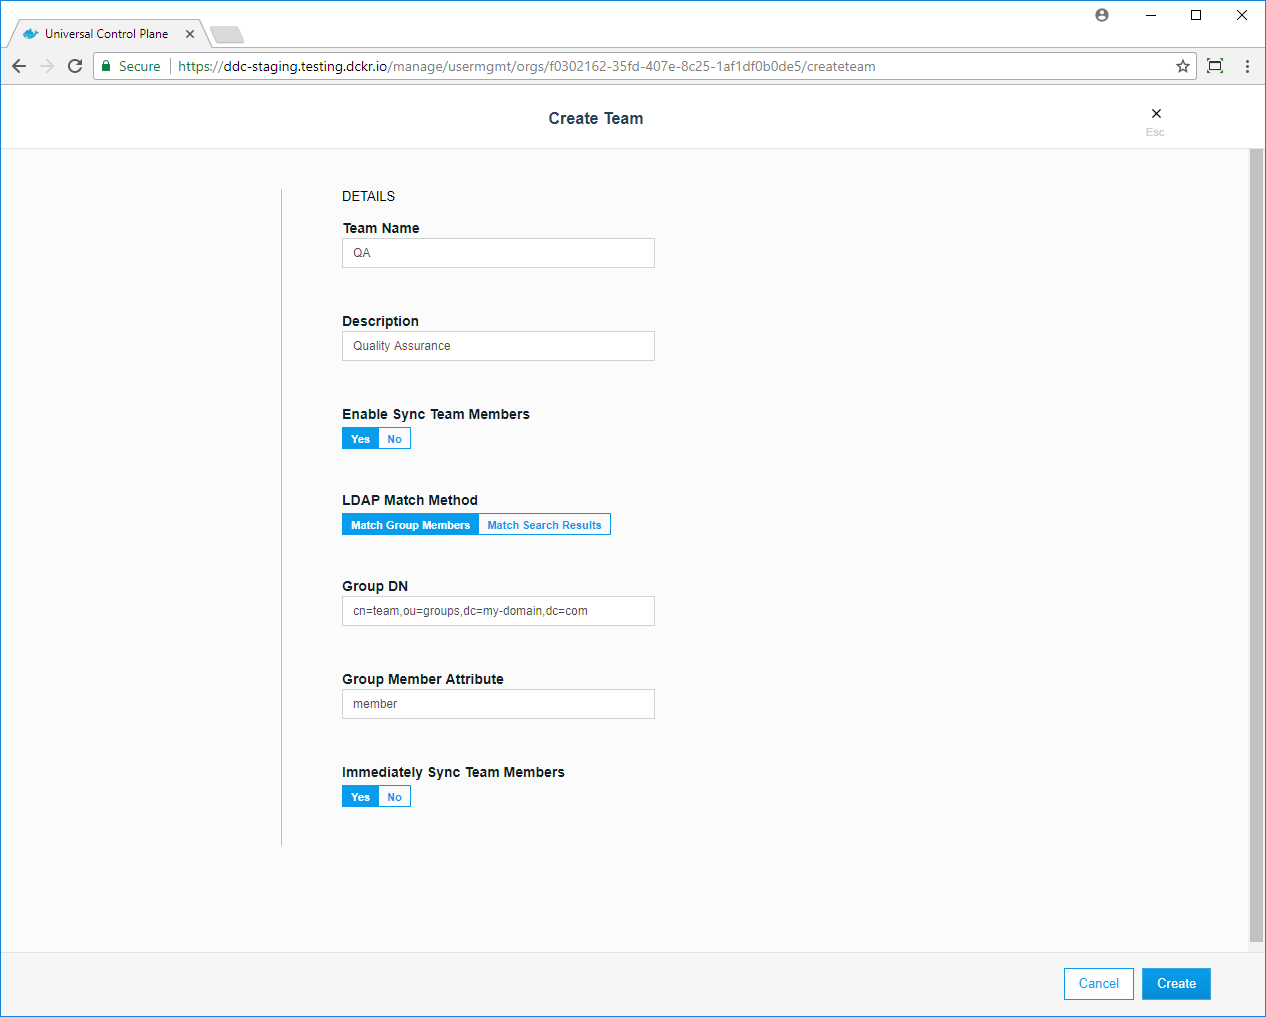
There are two methods for matching group members from an LDAP directory:
Match Group Members
This option specifies that team members should be synced directly with members of a group in your organization’s LDAP directory. The team’s membership will by synced to match the membership of the group.
| Field | Description |
|---|---|
| Group DN | This specifies the distinguished name of the group from which to select users. |
| Group Member Attribute | The value of this group attribute corresponds to the distinguished names of the members of the group. |
Match Search Results
This option specifies that team members should be synced using a search query against your organization’s LDAP directory. The team’s membership will be synced to match the users in the search results.
| Field | Description |
|---|---|
| Search Base DN | The distinguished name of the node in the directory tree where the search should start looking for users. |
| Search Filter | The LDAP search filter used to find users. If you leave this field empty, all existing users in the search scope will be added as members of the team. |
| Search subtree instead of just one level | Whether to perform the LDAP search on a single level of the LDAP tree, or search through the full LDAP tree starting at the Base DN. |
Immediately Sync Team Members
Select this option to run an LDAP sync operation immediately after saving the configuration for the team. It may take a moment before the members of the team are fully synced.
Manage team permissions
Create a grant to manage the team’s permissions. Learn how to grant permissions to users based on roles. In this example, you create a collection for the “Data Center” team, where they can deploy services and resources, and you create a grant that gives the team permission to access the collection.

- Navigate to the Organizations & Teams page.
- Select docker-datacenter, and click Create Team. Name the team “Data Center”, and click Create.
- Navigate to the Collections page.
- Click Create Collection, name the collection “Data Center Resources”, and click Create.
- Navigate to the Grants page, and click Create Grant.
- Find Swarm in the collections list, and click View Children.
- Find Data Center Resources, and click Select Collection.
- In the left pane, click Roles and in the Role dropdown, select Restricted Control.
- In the left pane, click Subjects and select the Organizations subject type.
- In the Organization dropdown, select docker-datacenter, and in the Teams dropdown, select Data Center.
- Click Create to create the grant.
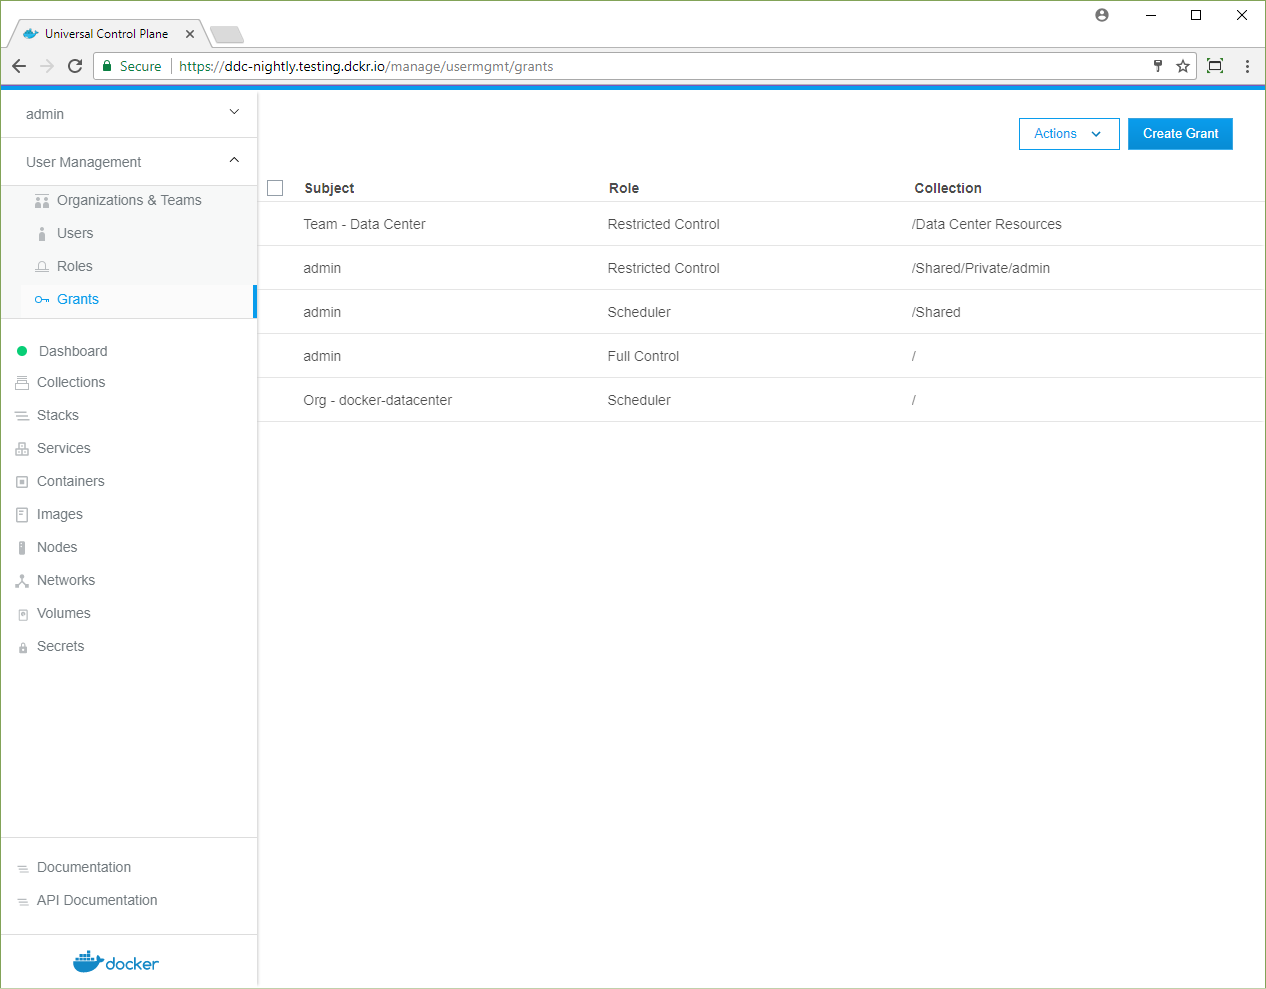
In this example, you gave members of the Data Center team
Restricted Control permissions to create and edit resources in
the Data Center Resources collection.
Where to go next
- UCP permission levels
- Isolate volumes between two different teams
- Isolate swarm nodes between two different teams