Use your own TLS certificates
Estimated reading time: 1 minuteAll UCP services are exposed using HTTPS, to ensure all communications between clients and UCP are encrypted. By default, this is done using self-signed TLS certificates that are not trusted by client tools like web browsers. So when you try to access UCP, your browser warns that it doesn’t trust UCP or that UCP has an invalid certificate.
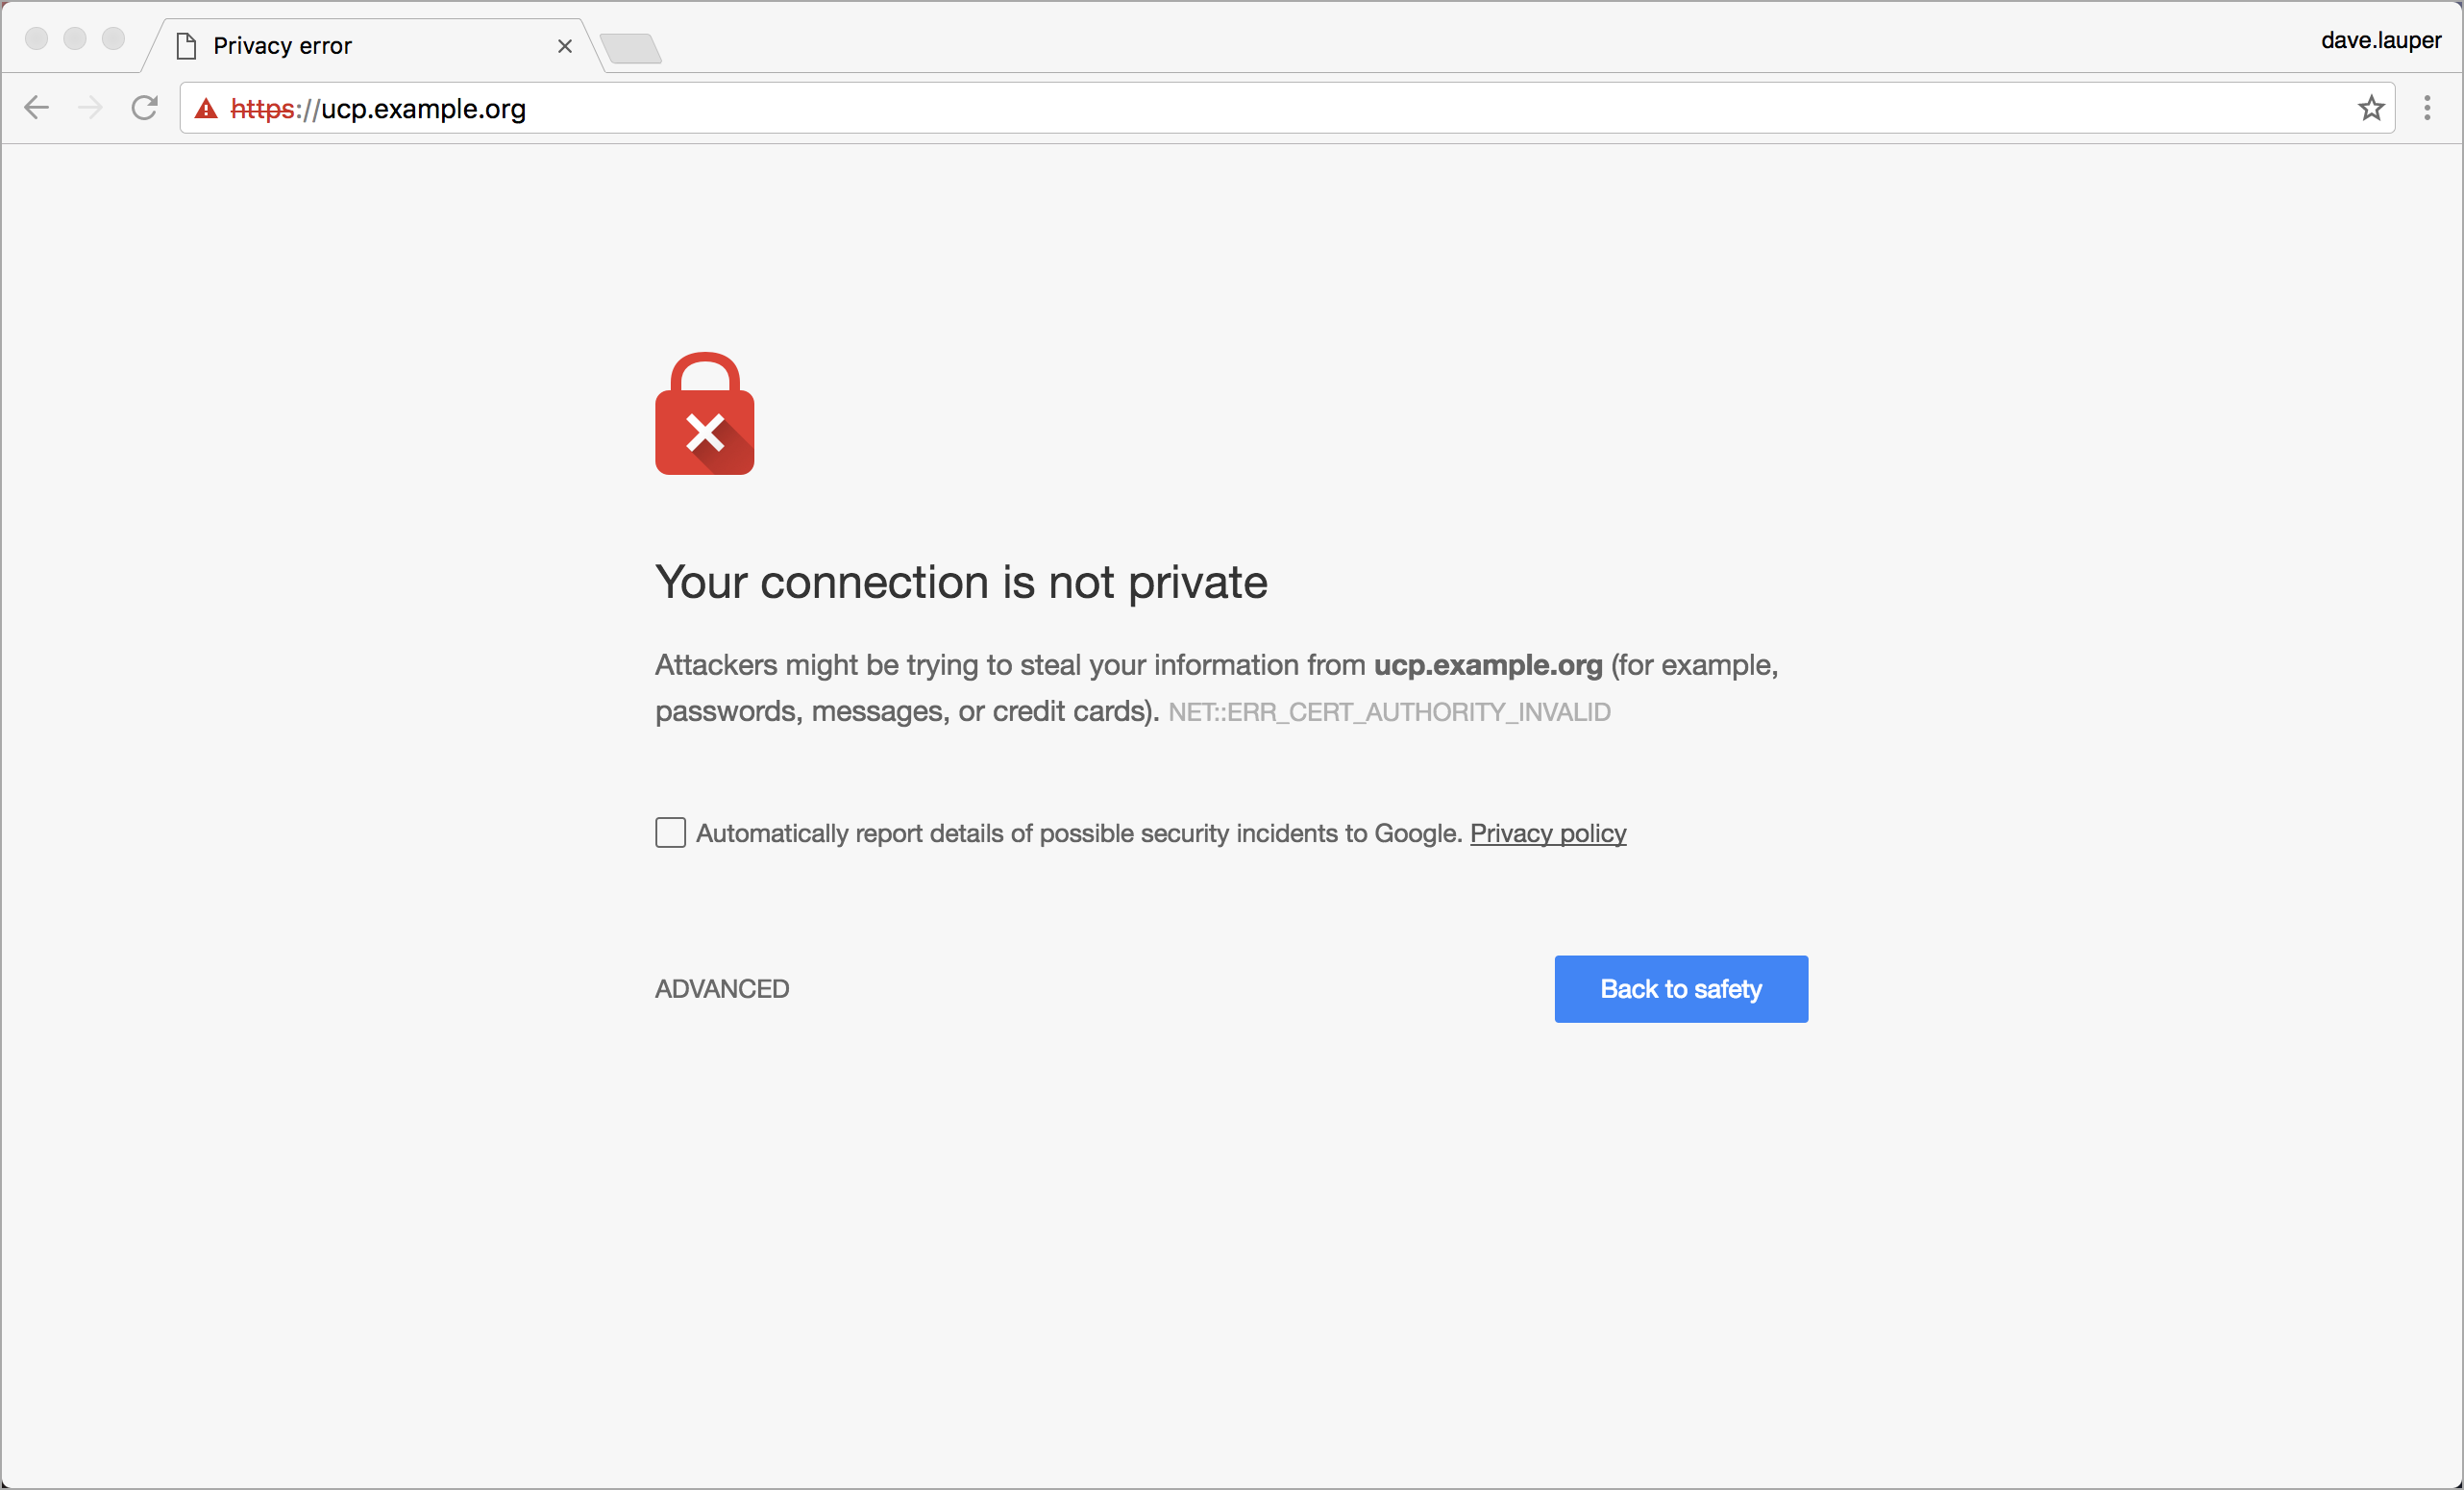
The same happens with other client tools.
$ curl https://ucp.example.org

SSL certificate problem: Invalid certificate chain
You can configure UCP to use your own TLS certificates, so that it is automatically trusted by your browser and client tools.
To ensure minimal impact to your business, you should plan for this change to happen outside business peak hours. Your applications will continue running normally, but existing UCP client certificates will become invalid, so users need to download new ones to access UCP from the CLI.
Configure UCP to use your own TLS certificates and keys
In the UCP web UI, log in with administrator credentials and navigate to the Admin Settings page.
In the left pane, click Certificates.
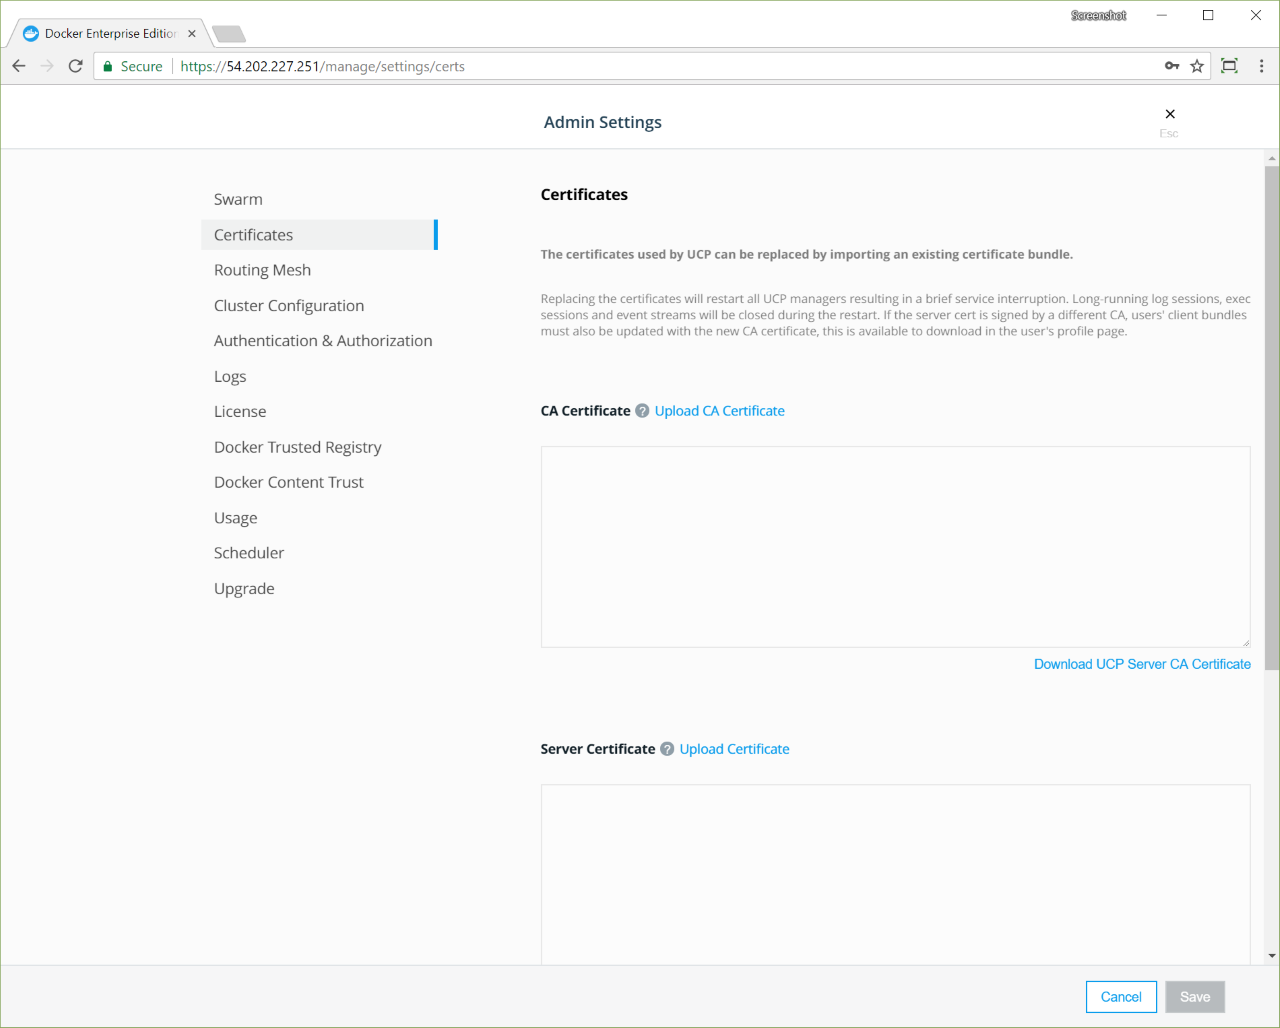
Upload your certificates and keys:
- A
ca.pemfile with the root CA public certificate. - A
cert.pemfile with the TLS certificate for your domain and any intermediate public certificates, in this order. - A
key.pemfile with TLS private key. Make sure it is not encrypted with a password. Encrypted keys should haveENCRYPTEDin the first line.
Finally, click Save for the changes to take effect.
After replacing the TLS certificates, your users can’t authenticate with their old client certificate bundles. Ask your users to go to the UCP web UI and get new client certificate bundles.
If you deployed Docker Trusted Registry, you also need to reconfigure it to trust the new UCP TLS certificates. Learn how to configure DTR.