Get started with Docker Desktop for Mac
Estimated reading time: 16 minutesWelcome to Docker Desktop for Mac! Docker is a full development platform for creating containerized apps, and Docker Desktop for Mac is the best way to get started with Docker on a Mac.
See Install Docker Desktop for Mac for information on system requirements and stable & edge channels.
Check versions
Ensure your versions of docker, docker-compose, and docker-machine are
up-to-date and compatible with Docker.app. Your output may differ if you are
running different versions.
$ docker --version
Docker version 18.09, build c97c6d6

$ docker-compose --version
docker-compose version 1.24.0, build 8dd22a9

$ docker-machine --version
docker-machine version 0.16.0, build 9ba6da9
Explore the application
-
Open a command-line terminal and test that your installation works by running the simple Docker image, hello-world:
$ docker run hello-world Unable to find image 'hello-world:latest' locally latest: Pulling from library/hello-world ca4f61b1923c: Pull complete Digest: sha256:ca0eeb6fb05351dfc8759c20733c91def84cb8007aa89a5bf606bc8b315b9fc7 Status: Downloaded newer image for hello-world:latest Hello from Docker! This message shows that your installation appears to be working correctly. ... -
Start a Dockerized web server. Like the
hello-worldimage above, if the image is not found locally, Docker pulls it from Docker Hub.$ docker run --detach --publish=80:80 --name=webserver nginx -
In a web browser, go to
http://localhost/to view the nginx homepage. Because we specified the default HTTP port, it isn’t necessary to append:80at the end of the URL.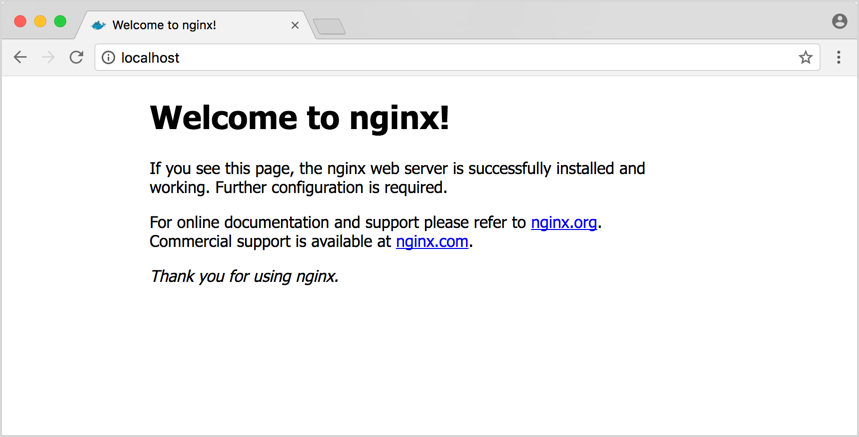
Early beta releases used
dockeras the hostname to build the URL. Now, ports are exposed on the private IP addresses of the VM and forwarded tolocalhostwith no other host name set. -
View the details on the container while your web server is running (with
docker container lsordocker ps):$ docker container ls CONTAINER ID IMAGE COMMAND CREATED STATUS PORTS NAMES 56f433965490 nginx "nginx -g 'daemon off" About a minute ago Up About a minute 0.0.0.0:80->80/tcp, 443/tcp webserver -
Stop and remove containers and images with the following commands. Use the “all” flag (
--allor-a) to view stopped containers.$ docker container ls $ docker container stop webserver $ docker container ls -a $ docker container rm webserver $ docker image ls $ docker image rm nginx
Preferences menu
Choose  → Preferences from the
menu bar and configure the runtime options described below.

General
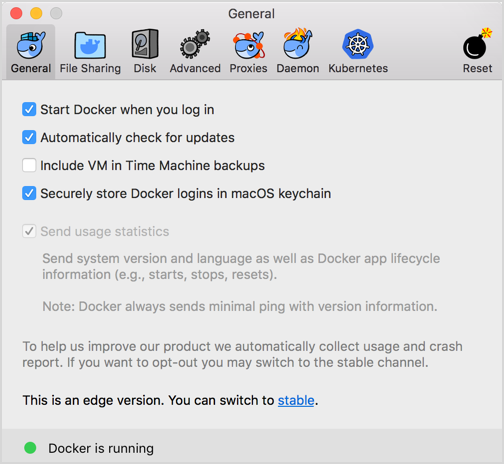
General settings are:
-
Start Docker when you log in: Uncheck this option if you don’t want Docker to start when you open your session.
-
Automatically check for updates notifies you when an update is available. Click OK to accept and install updates (or cancel to keep the current version). If you disable this option, you can still find out about updates manually by choosing
 → Check
for Updates.
 -
Include VM in Time Machine backups backs up the Docker Desktop for Mac virtual machine. (Disabled by default.)
-
Securely store Docker logins in MacOS keychain stores your Docker login credentials. (Enabled by default.)
-
Send usage statistics — Send diagnostics, crash reports, and usage data to Docker. This information helps Docker improve the application and get more context for troubleshooting problems. (Enabled by default.)
File sharing
Choose which local directories to share with your containers. File sharing is
required for volume mounting if the project lives outside of the /Users
directory. In that case, share the drive where the Dockerfile and volume are
located. Otherwise, you get file not found or cannot start service errors at
runtime.
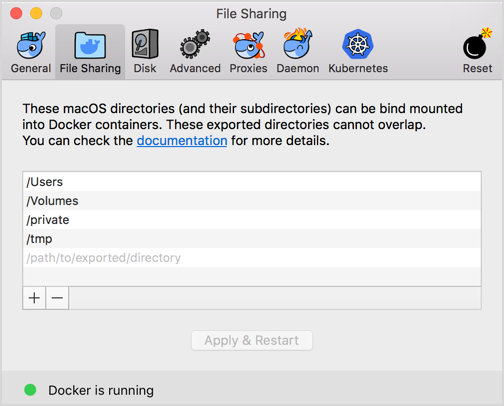
File share settings are:
-
Add a Directory: Click
+and navigate to the directory you want to add. -
Apply & Restart makes the directory available to containers using Docker’s bind mount (
-v) feature.There are some limitations on the directories that can be shared:
- They cannot be a subdirectory of an already shared directory.
- They cannot already exist inside of Docker.
For more information, see:
- Namespaces in the topic on osxfs file system sharing.
- Volume mounting requires file sharing for any project directories outside of
/Users.)
Advanced
On the Advanced tab, you can limit resources available to Docker.
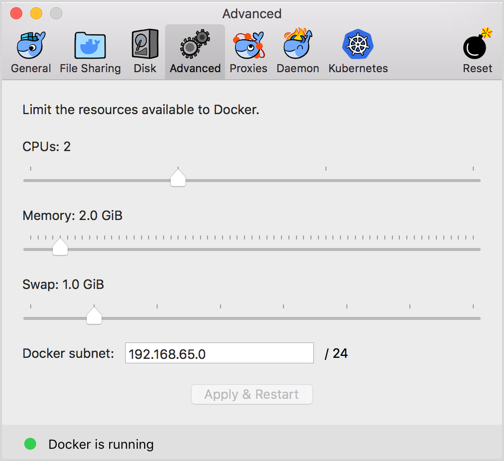
Advanced settings are:
CPUs: By default, Docker Desktop for Mac is set to use half the number of processors available on the host machine. To increase processing power, set this to a higher number; to decrease, lower the number.
Memory: By default, Docker Desktop for Mac is set to use 2 GB runtime memory,
allocated from the total available memory on your Mac. To increase RAM, set this
to a higher number; to decrease it, lower the number.
Swap: Configure swap file size as needed. The default is 1 GB.
Disk
Specify the Disk image location of the Linux volume, where containers and images are stored.
You can also move the disk image location. If you attempt to move the disk image to a location that already has one, you get a prompt asking if you want to use the existing image or replace it.

Proxies
Docker Desktop for Mac detects HTTP/HTTPS Proxy Settings from macOS and automatically
propagates these to Docker and to your containers. For example, if you set your
proxy settings to http://proxy.example.com, Docker uses this proxy when
pulling containers.

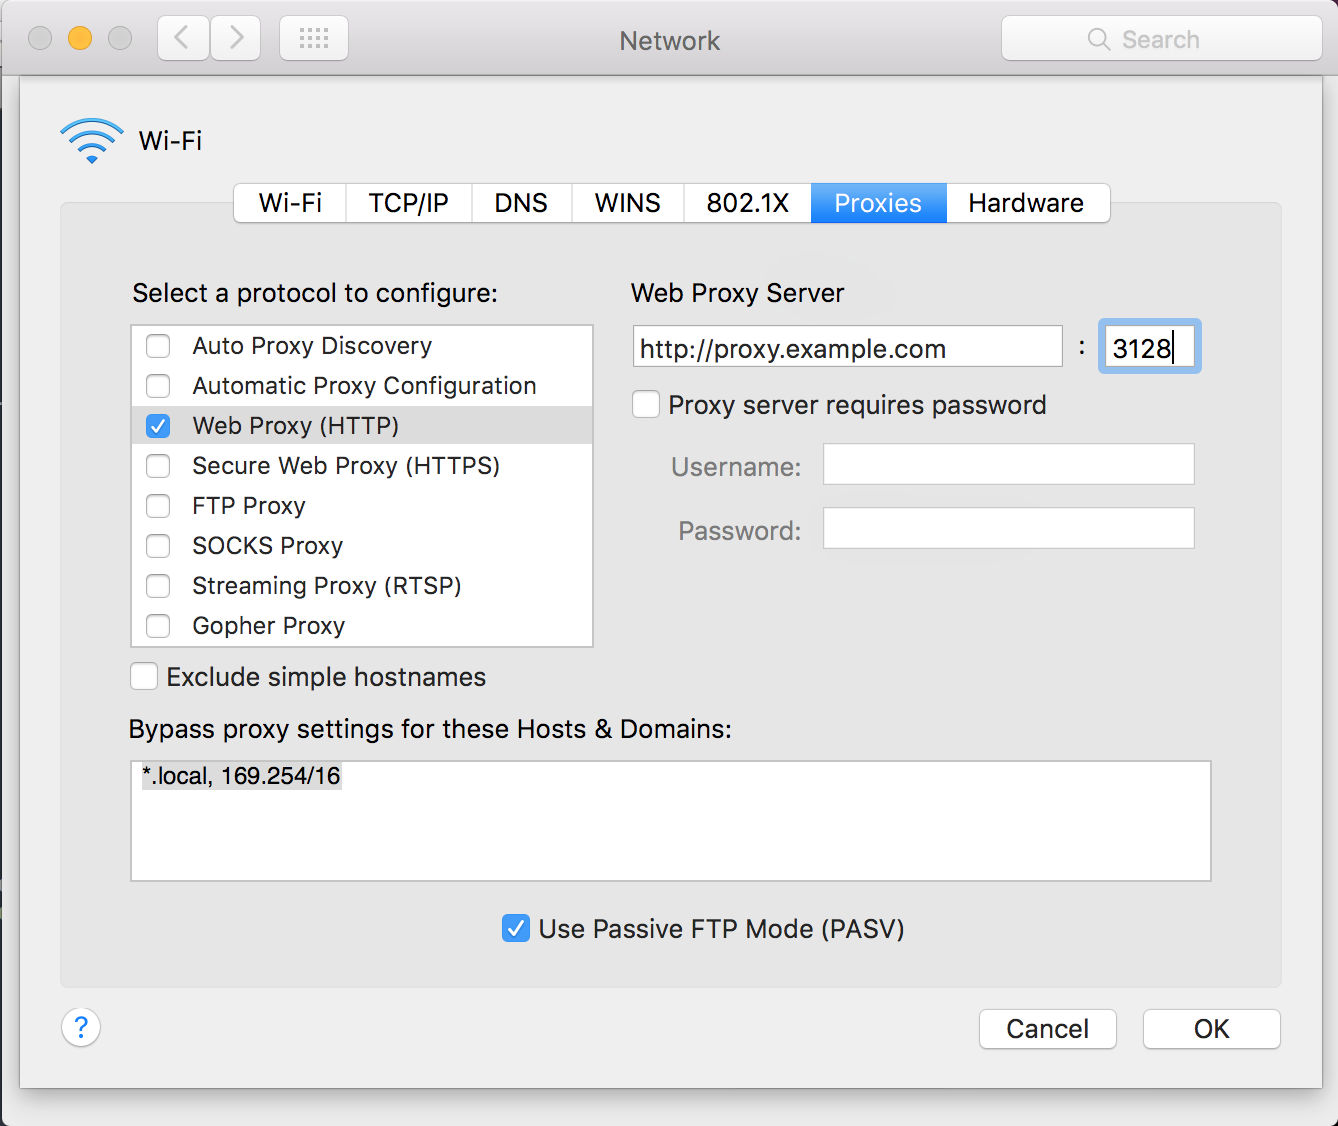
When you start a container, your proxy settings propagate into the containers. For example:
$ docker run -it alpine env
PATH=/usr/local/sbin:/usr/local/bin:/usr/sbin:/usr/bin:/sbin:/bin
HOSTNAME=b7edf988b2b5
TERM=xterm
HOME=/root
HTTP_PROXY=http://proxy.example.com:3128
http_proxy=http://proxy.example.com:3128
no_proxy=*.local, 169.254/16
You can see from the above output that the HTTP_PROXY, http_proxy, and
no_proxy environment variables are set. When your proxy configuration changes,
Docker restarts automatically to pick up the new settings. If you have
containers that you wish to keep running across restarts, you should consider
using restart policies.
Daemon
You can configure options on the Docker daemon that determine how your containers run.
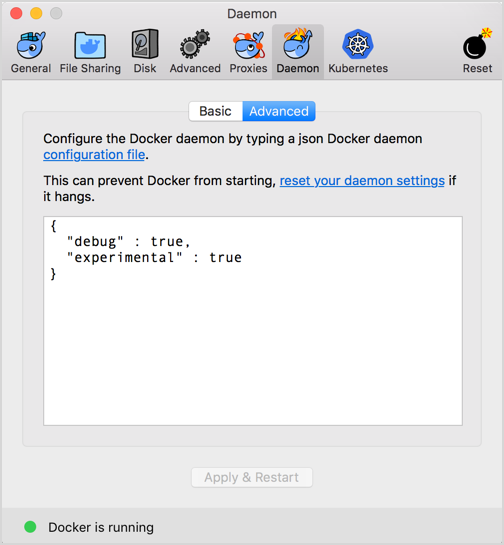
Select Basic to configure the daemon with interactive settings, or select Advanced to edit the JSON directly.
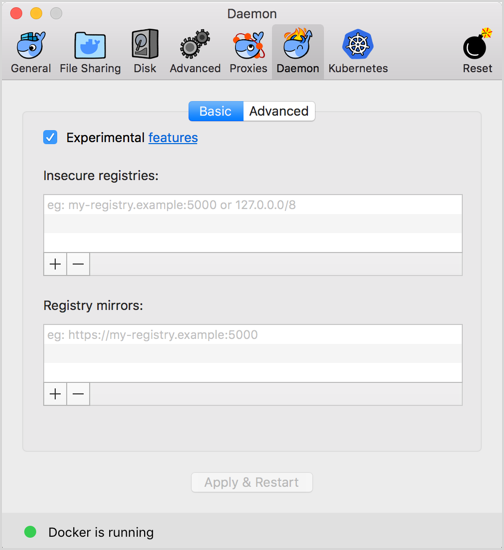
Experimental features
Both Docker Desktop for Mac Stable and Edge releases have experimental features enabled on Docker Engine, as described Docker Experimental Features README. If you uncheck experimental mode, Docker Desktop for Mac uses the current generally available release of Docker Engine.
Don’t enable experimental features in production
Experimental features are not appropriate for production environments or workloads. They are meant to be sandbox experiments for new ideas. Some experimental features may become incorporated into upcoming stable releases, but others may be modified or pulled from subsequent Edge releases, and never released on Stable.
You can see whether you are running experimental mode at the command line. If
Experimental is true, then Docker is running in experimental mode, as shown
here. (If false, Experimental mode is off.)
$ docker version -f {{.Server.Experimental}}
true
Insecure registries
You can set up a custom and insecure registry to store your public or private images (instead of using Docker Hub or Docker Trusted Registry). Add URLs for your insecure registries and registry mirrors on which to host your images.
See also:
Daemon configuration file
Click the Advanced tab to configure the daemon from the JSON file. For a full list of options, see the Docker Engine dockerd commandline reference.
Click Apply & Restart to save your settings and reboot Docker. Or, to cancel changes, click another preference tab, then choose to discard or not apply changes when asked.
Kubernetes
In Docker Desktop for Mac 17.12 Edge (mac45) and higher, and 18.06 Stable (mac70) and higher, a standalone Kubernetes server is included that runs on your Mac, so that you can test deploying your Docker workloads on Kubernetes.
The Kubernetes client command, kubectl, is included and configured to connect
to the local Kubernetes server. If you have kubectl already installed and
pointing to some other environment, such as minikube or a GKE cluster, be sure
to change context so that kubectl is pointing to docker-for-desktop:
$ kubectl config get-contexts
$ kubectl config use-context docker-for-desktop
If you installed kubectl with Homebrew, or by some other method, and
experience conflicts, remove /usr/local/bin/kubectl.
-
To enable Kubernetes support and install a standalone instance of Kubernetes running as a Docker container, select Enable Kubernetes, choose the default orchestrator and click the Apply button.
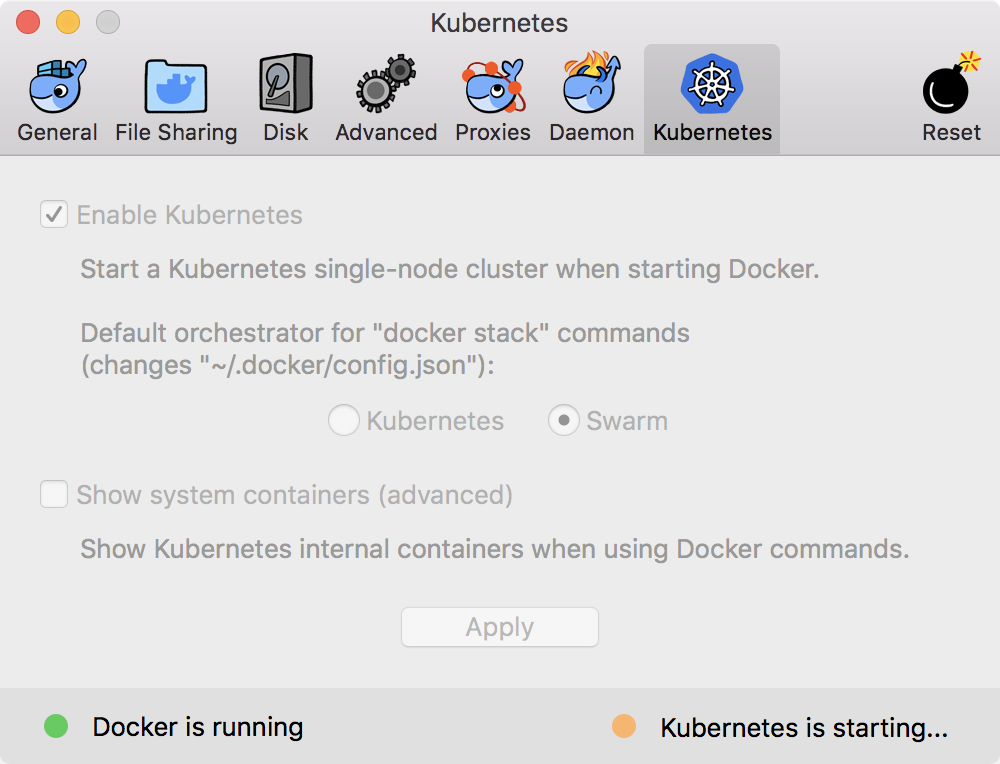
An Internet connection is required. Images required to run the Kubernetes server are downloaded and instantiated as containers, and the
/usr/local/bin/kubectlcommand is installed on your Mac.When Kubernetes is enabled and running, an additional status bar item displays at the bottom right of the Docker Desktop for Mac Preferences dialog.
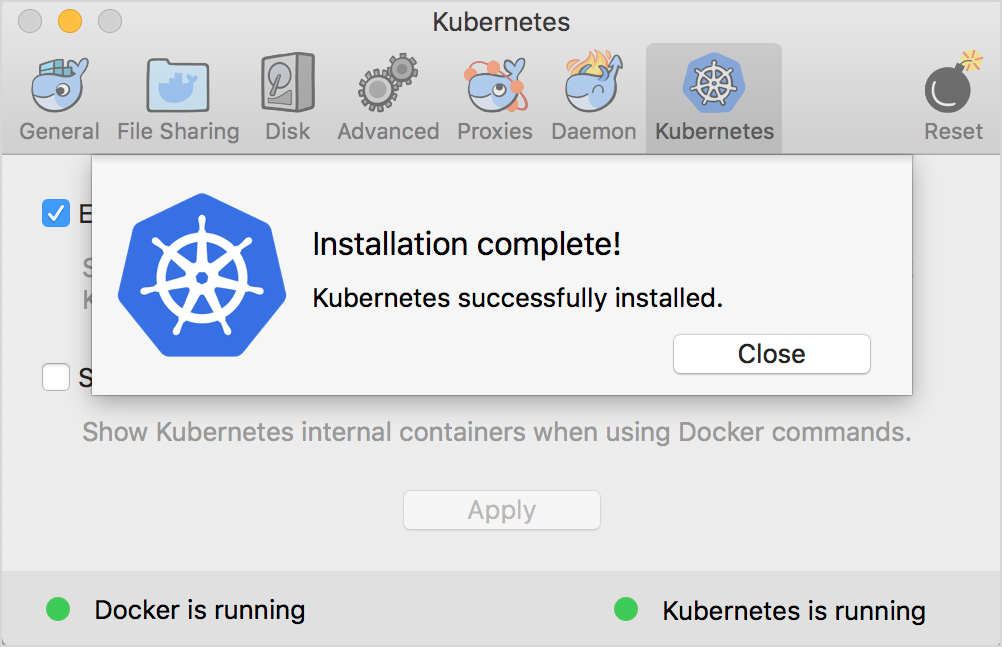
The status of Kubernetes shows in the Docker menu and the context points to
docker-for-desktop.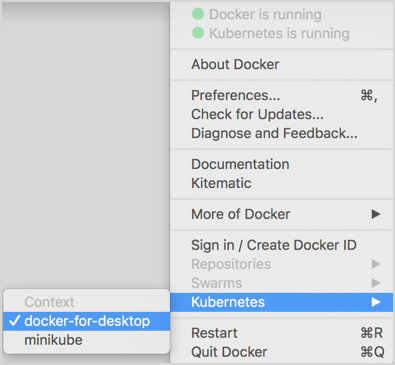
-
By default, Kubernetes containers are hidden from commands like
docker
service ls
, because managing them manually is not supported. To make them visible, select Show system containers (advanced) and click Apply and restart. Most users do not need this option. -
To disable Kubernetes support at any time, deselect Enable Kubernetes. The Kubernetes containers are stopped and removed, and the
/usr/local/bin/kubectlcommand is removed.For more about using the Kubernetes integration with Docker Desktop for Mac, see Deploy on Kubernetes.
Reset
Select  -> Preferences from the
menu bar, then click Reset to reset factory defaults, restart the Docker
daemon, or uninstall.
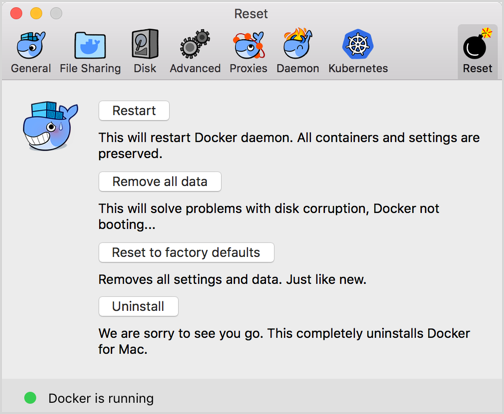
Reset settings are:
-
Restart - Select to restart the Docker daemon.
-
Remove all data - This option removes/resets all Docker data without a reset to factory defaults (which would cause you to lose settings).
-
Reset to factory defaults - Choose this option to reset all options on Docker Desktop for Mac to its initial state, the same as when it was first installed.
- Uninstall - Choose this option to remove Docker Desktop for Mac from your system.
Uninstall Docker Desktop for Mac from the commandline
To uninstall Docker from Mac from a terminal, run:
<DockerforMacPath>
--uninstall
. If your instance is installed in the default location, this command provides a clean uninstall:$ /Applications/Docker.app/Contents/MacOS/Docker --uninstall Docker is running, exiting... Docker uninstalled successfully. You can move the Docker application to the trash.You might want to use the command-line uninstall if, for example, you find that the app is non-functional, and you cannot uninstall it from the menu.
Add TLS certificates
You can add trusted Certificate Authorities (CAs) (used to verify registry server certificates) and client certificates (used to authenticate to registries) to your Docker daemon.
Add custom CA certificates (server side)
All trusted CAs (root or intermediate) are supported. Docker Desktop for Mac creates a certificate bundle of all user-trusted CAs based on the Mac Keychain, and appends it to Moby trusted certificates. So if an enterprise SSL certificate is trusted by the user on the host, it is trusted by Docker Desktop for Mac.
To manually add a custom, self-signed certificate, start by adding the certificate to the macOS keychain, which is picked up by Docker Desktop for Mac. Here is an example.
$ sudo security add-trusted-cert -d -r trustRoot -k /Library/Keychains/System.keychain ca.crt
Or, if you prefer to add the certificate to your own local keychain only (rather than for all users), run this command instead:
$ security add-trusted-cert -d -r trustRoot -k ~/Library/Keychains/login.keychain ca.crt
See also, Directory structures for certificates.
Note: You need to restart Docker Desktop for Mac after making any changes to the keychain or to the
~/.docker/certs.ddirectory in order for the changes to take effect.
For a complete explanation of how to do this, see the blog post Adding Self-signed Registry Certs to Docker & Docker Desktop for Mac.
Add client certificates
You can put your client certificates in
~/.docker/certs.d/<MyRegistry>:<Port>/client.cert and
~/.docker/certs.d/<MyRegistry>:<Port>/client.key.
When the Docker Desktop for Mac application starts up, it copies the ~/.docker/certs.d
folder on your Mac to the /etc/docker/certs.d directory on Moby (the Docker
for Mac xhyve virtual machine).
You need to restart Docker Desktop for Mac after making any changes to the keychain or to the
~/.docker/certs.ddirectory in order for the changes to take effect.The registry cannot be listed as an insecure registry (see Docker Daemon). Docker Desktop for Mac ignores certificates listed under insecure registries, and does not send client certificates. Commands like
docker runthat attempt to pull from the registry produce error messages on the command line, as well as on the registry.
Directory structures for certificates
If you have this directory structure, you do not need to manually add the CA certificate to your Mac OS system login:
/Users/<user>/.docker/certs.d/
└── <MyRegistry>:<Port>
   ├── ca.crt
   ├── client.cert
   └── client.key
The following further illustrates and explains a configuration with custom certificates:
/etc/docker/certs.d/        <-- Certificate directory
└── localhost:5000          <-- Hostname:port
   ├── client.cert          <-- Client certificate
   ├── client.key           <-- Client key
   └── ca.crt               <-- Certificate authority that signed
                                the registry certificate
You can also have this directory structure, as long as the CA certificate is also in your keychain.
/Users/<user>/.docker/certs.d/
└── <MyRegistry>:<Port>
    ├── client.cert
    └── client.key
To learn more about how to install a CA root certificate for the registry and how to set the client TLS certificate for verification, see Verify repository client with certificates in the Docker Engine topics.
Install shell completion
Docker Desktop for Mac comes with scripts to enable completion for the docker,
docker-machine, and docker-compose commands. The completion scripts may be
found inside Docker.app, in the Contents/Resources/etc/ directory and can be
installed both in Bash and Zsh.
Bash
Bash has built-in support for
completion To activate completion for Docker commands, these files need to be
copied or symlinked to your bash_completion.d/ directory. For example, if you
installed bash via Homebrew:
etc=/Applications/Docker.app/Contents/Resources/etc
ln -s $etc/docker.bash-completion $(brew --prefix)/etc/bash_completion.d/docker
ln -s $etc/docker-machine.bash-completion $(brew --prefix)/etc/bash_completion.d/docker-machine
ln -s $etc/docker-compose.bash-completion $(brew --prefix)/etc/bash_completion.d/docker-compose
Add the following to your ~/.bash_profile:
[ -f /usr/local/etc/bash_completion ] && . /usr/local/etc/bash_completion
OR
if [ -f $(brew --prefix)/etc/bash_completion ]; then
. $(brew --prefix)/etc/bash_completion
fi
Zsh
In Zsh, the completion
system takes care of things. To activate completion for Docker commands,
these files need to be copied or symlinked to your Zsh site-functions/
directory. For example, if you installed Zsh via Homebrew:
etc=/Applications/Docker.app/Contents/Resources/etc
ln -s $etc/docker.zsh-completion /usr/local/share/zsh/site-functions/_docker
ln -s $etc/docker-machine.zsh-completion /usr/local/share/zsh/site-functions/_docker-machine
ln -s $etc/docker-compose.zsh-completion /usr/local/share/zsh/site-functions/_docker-compose
Give feedback and get help
To get help from the community, review current user topics, join or start a discussion, log on to our Docker Desktop for Mac forum.
To report bugs or problems, log on to Docker Desktop for Mac issues on GitHub, where you can review community reported issues, and file new ones. See Logs and Troubleshooting for more details.
To give us feedback on the documentation or update it yourself, use the Feedback options at the bottom of each docs page.
Docker Hub
You can access your Docker ID account from within Docker Desktop for Mac.
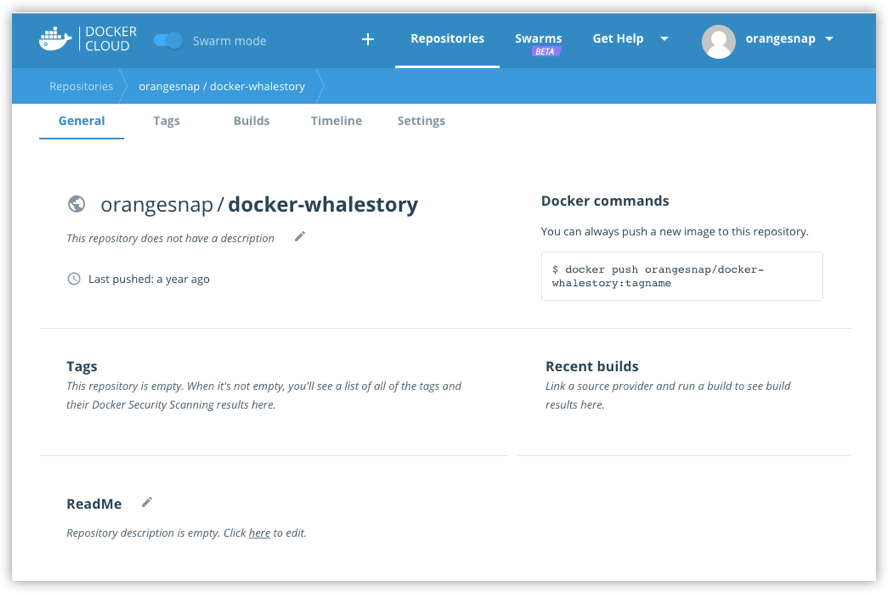
From the Docker Desktop for Mac menu, sign in to Docker Hub with your Docker ID, or create one.

Then use the Docker Desktop for Mac menu to create, view, or navigate directly to your Cloud resources, including organizations, repositories, and swarms.
Check out these Docker Hub topics to learn more:
Where to go next
-
Try out the walkthrough at Get Started.
-
Dig in deeper with Docker Labs example walkthroughs and source code.
-
For a summary of Docker command line interface (CLI) commands, see Docker CLI Reference Guide.
-
Check out the blog post, What’s New in Docker 17.06 Community Edition (CE).